We keep a straight track - we replace the transverse lever - instructions!
Content
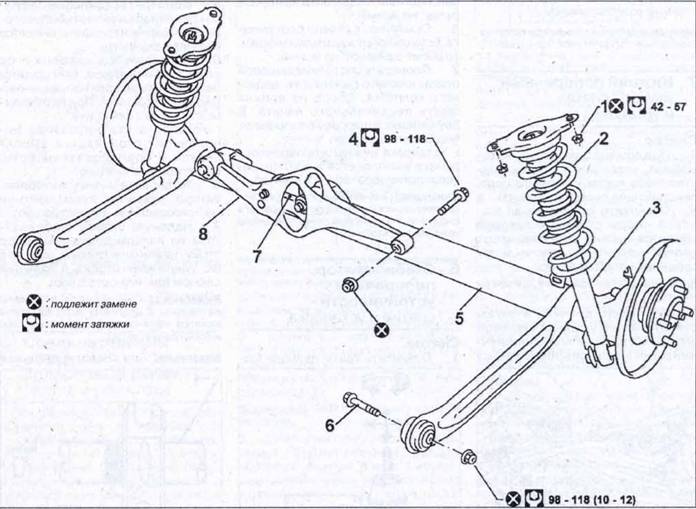
The wishbone is the part of the steering geometry that connects the front wheel to the vehicle's chassis. The wishbone is highly movable with a certain side play provided by its bearings. These bearings, or bushings, consist of a one-piece rubber sleeve rigidly pressed onto a control arm. When the rubber becomes brittle due to external influences or excessive aging, the wishbone loses its stability.
Wishbone Defect
The wishbone is a very massive component made of welded metal . As long as it is not subjected to excessive stress or corrosion, virtually no damage can occur. Its weak point is the pressed bushings..
Although they are made of solid rubber, they can wear out, crack or lose elasticity over time. As a result, the control lever is no longer properly connected to the front wheel, and its mobility deteriorates. Instead, a worn wishbone causes unwanted wheel play. The following symptoms may occur:
- the car no longer keeps its course (collapse).
Every bump in the road causes noise.
— Steering is very "spongy".
- the car has an increasing tendency to skid.
- Tire squeal.
– increased one-sided wear of the front tires
All in all, a worn control lever is more than just a nuisance. This results in costly damage and seriously reduces driving safety. Therefore, this component should be replaced without delay.
What you need?
To successfully replace the transverse arm, you will need the following:
| 1 car lift 1 gearbox jack 1 torque wrench 1 set of wrenches 1 set ring spanners, cranked 1 electric jigsaw (for bushing) 1 new wishbone and 1 new wishbone bushing |
Detection of a faulty transverse arm
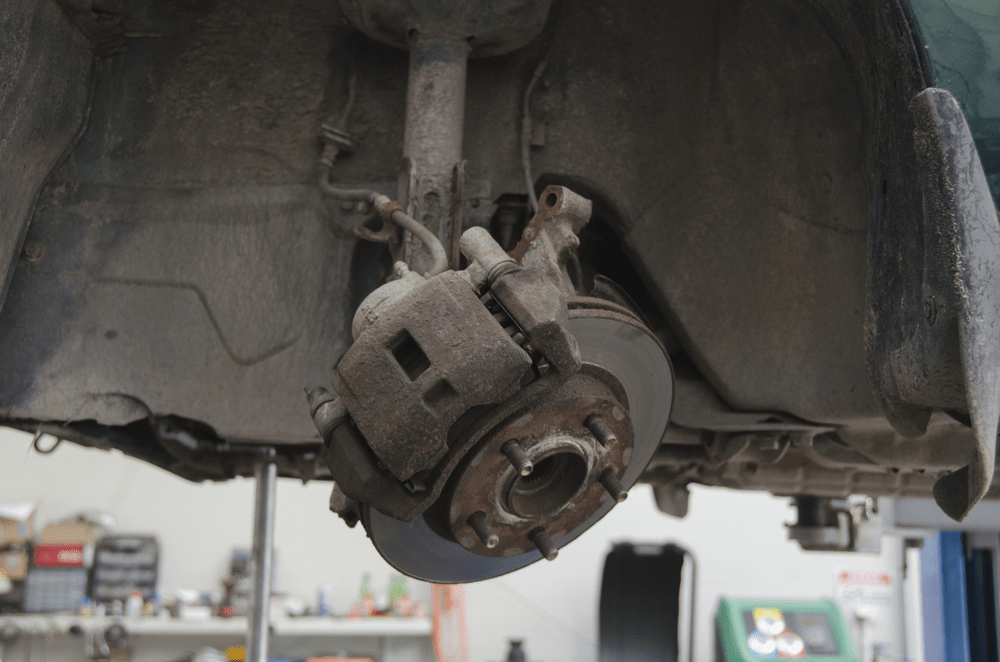
A defective lever or a defective bushing is easy to identify: a thick rubber ring is porous and cracked . If the defect clearly affects the quality of driving, it is possible that the rubber bushing is completely torn. Moving the lever up and down with the lever will clearly show the cracks.
The bushing and control arm are rigidly connected and therefore cannot be replaced individually. For safety reasons, the sleeve is attached to the welded metal part. In the event of a defect, the entire component must be replaced. Since the control levers are very cheap, this is not a problem. In addition, replacing the entire lever is much easier than pressing in and out bushings.
Safety first!
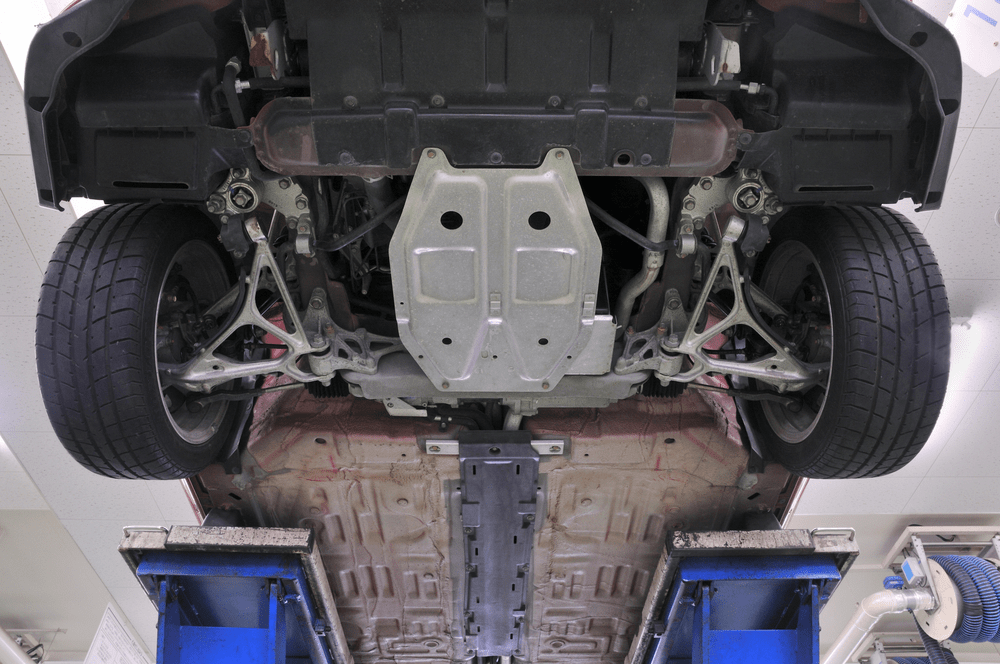
Replacing the transverse arm requires work under the vehicle. The car lift is perfect. If there is none, car repairs are allowed in the raised position subject to additional security measures:
– Never secure the vehicle with only a simple vehicle jack.
– Always place suitable axle supports under the vehicle!
– Apply the handbrake, shift into gear and place safety wedges under the rear wheels.
- Never work alone.
– Do not use temporary solutions such as stones, tires, wooden blocks.
Needlework step by step guide
| This is a general description of how to replace wishbones, not a repair manual. We emphasize that replacing the transverse arm is a task for a certified car mechanic. We accept no responsibility for errors resulting from the imitation of the described steps. |

 CAUTION: Reduced service life of a new transverse link due to incorrect assembly!Never tighten the control arm chassis bolts while the front wheel is still in the air. The arm is generally not firmly locked until the front wheel damper is deflected and under normal pressure.
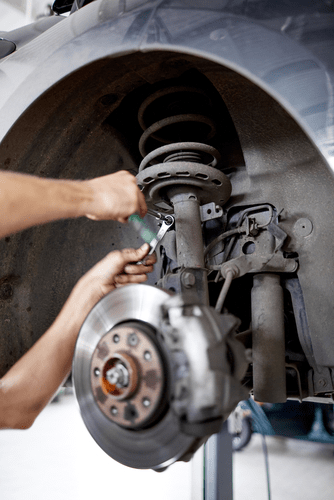
Costs
One new wishbone starts approx. €15 (± £13). Buying a complete set is much cheaper. The front axle comes with
- - lever arm
- - connecting rod
- - spherical bearing
- - steering rods
- - transverse arm bushings
- - support hinge
for both sides costs only 80 - 100 euros (± 71 - 90 pounds) . The effort to replace all of these parts is only slightly more than to replace a single wishbone. After replacing any of these parts, the car should in any case be checked for camber, and therefore it is worth considering replacing the entire axle in one go. Ultimately, these components age at the same time. If a wishbone starts to fail, all the other parts in that area will most likely follow suit soon. Through a complete replacement, a certain new starting point is created, avoiding problems in this area for many years.