Comfortable and beautiful interior of the VAZ 2106 on their own
Content
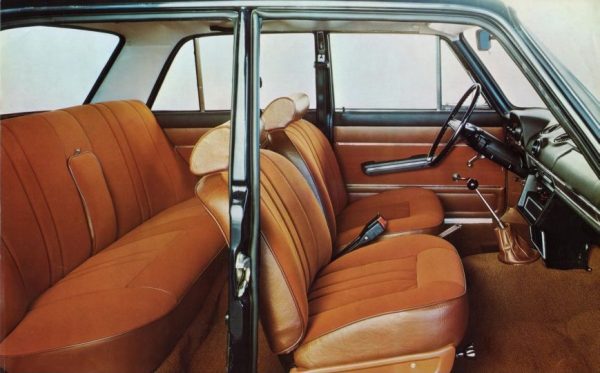
The car VAZ 2106 of the Zhiguli family was produced back in the days of the Soviet Union. The first car of this model rolled off the assembly line of the Volga Automobile Plant in 1976. The new model received a number of improvements and changes in the design and lining of the car body. The interior of the car was not left without the attention of engineers - it became comfortable, ergonomic and reliable. It was the salon that became the subject of our attention. The good old "six" for 40 years of existence has become a retro car, while constant operation in the harsh conditions of our reality had a negative impact on the condition of the car as a whole and on the interior in particular. Paying attention to the maintenance of the car, the owners forget about the interior or simply do not find the time and finances for this. Over time, the interior of the car becomes morally obsolete and, of course, wears out physically.
Car interior - a new life
Today, there is a huge number of workshops on the service market that will help restore the interior of any car.
By giving your car into the hands of professionals, you will get a high-quality result for such types of services as:
- reupholstery of the seat upholstery, it is possible to repair the seat structure;
- tailoring of covers by the individual order;
- hauling or restoration of door cards (panels);
- restoration of paint and varnish coverings of wooden elements of salon;
- restoration and tuning of the instrument panel of the car;
- soundproofing;
- audio system installation;
- and more
Of course, you will be satisfied with the result, but the cost of these services is often high. Therefore, it is inappropriate for owners of old domestic-made cars to shell out an amount from their pocket for interior repairs, which sometimes turns out to be more than the cost of the car itself. Only car restorers can afford such a luxury, but they pursue completely different goals.
But this does not mean that you can forget about the idea of restoring the salon of your true friend. The stores have a fairly wide range of inexpensive and high-quality materials that can be used for self-repair. Having considered the range of automotive, construction and furniture accessories stores, we can choose what is suitable for us to restore the interior.
Salon VAZ 2106
Consider a list of interior elements of a VAZ 2106 car that can be improved, and those that are subject to maximum wear during operation:
- seats;
- interior trim elements (linings on racks and panels);
- sheathing of door panels;
- ceiling;
- back panel trim;
- floor covering;
- dashboard.
For almost 30 years of car production, the upholstery has been made in many different colors: black, gray, beige, brown, blue, red and others.
Colored color received such elements as: seat upholstery - it included a combination of leatherette and velor; sheathing of door panels - made of fiberboard and upholstered with leatherette; leatherette gear lever cover, as well as a textile carpet.
The perforated ceiling stretched on knitting needles was made in white or light gray.
These interior elements give the car comfort, sophistication and individuality.
Seat upholstery
Over time, the seats trimmed with velor become unusable, lose their original appearance, the lining is torn. Restoring the seat on your own will be very difficult, you must have the skills of a tailor, have special sewing equipment. To do this, having only one desire, is unlikely to succeed. Therefore, in this case, there are two options: contact a seat upholstery studio, install foreign-made seats in the car (more on this below), or change the upholstery yourself.
The choice of materials and colors offered by the studio is very large, by combining them, you can realize any of your ideas. And you can also change the foam rubber, change the shape of the seat and even install heating.
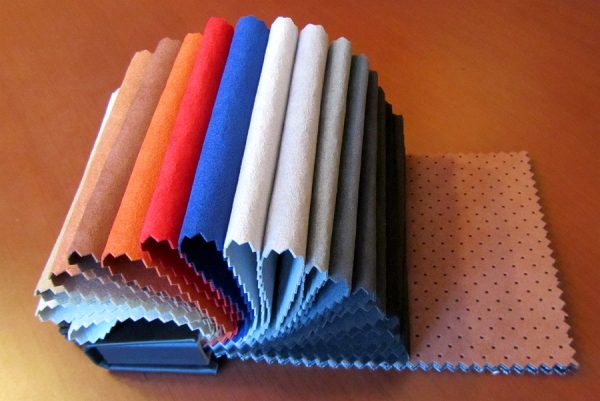
The cost of work in the studio will vary greatly depending on what materials you wish to use. It can be fabric, alcantara, velor, leatherette or genuine leather (the prices of which also vary depending on the quality and manufacturer).
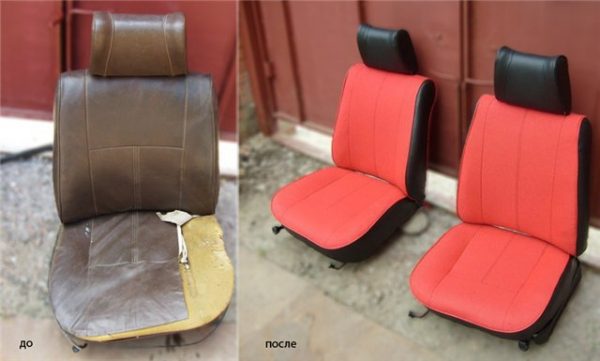
For high-quality seat upholstery, you will have to pay a decent amount, on average from 8 thousand rubles for a set of fabric-covered seats, other materials will cost more. Experienced drivers know that seat upholstery can be done by yourself.
Brief instructions for self-upholstery of the seats:
- The seats are removed from the car and installed on a table or other surface convenient for work.
- Remove the factory seat covers. It is advisable to do this carefully so as not to tear it. In order to remove the upholstery from the seat, you must first remove the head restraint from the seat back:
- silicone grease type WD 40 is lubricated with the headrest posts so that the lubricant flows through the posts into the headrest mount;
- the headrest is lowered all the way down;
- with a sharp movement with an upward force, the head restraint is pulled out of the mount.
- The removed casing is torn apart at the seams.
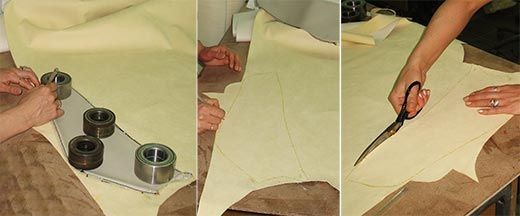
- The parts are laid on the new material and their exact contour is outlined. Separately, it is necessary to circle the contour of the seam.
 The new part is made along the contour of the old skin, torn into elements
 - On leather and alcantara, if these materials are used, it is necessary to glue the fabric-based foam on the back so that the foam is between the leather (alcantara) and the fabric. Gluing foam rubber with leather (alcantara) is only necessary with spray glue.
- Details are cut out along the contour.
- The prepared parts are sewn together exactly along the contour of the seam. Loops for tension knitting needles are immediately sewn in. The lapels are bred to the sides, stitched with a line.
- The finished trim is turned out and pulled onto the seat in the reverse order of removal. After installation, the leather (alcantara) upholstery must be warmed up with a hairdryer so that it stretches and sits tightly on the seat. In the manufacture of fabric upholstery, dimensions are taken into account in advance so that the upholstery fits snugly on the seat.
Door trim
The basis of a covering of doors consists of fiberboard. This material eventually absorbs moisture and deforms. The skin begins to move away from the inner panel of the door, bend and pull the clips out of the seats. You can purchase a new skin and install it on new clips, then the skin will last for a long time.
For those who want to make a sheathing in the same style with other interior elements, it is necessary to make a new sheathing base. The same fiberboard or plywood can serve as the base material. It is even better to use a less hygroscopic material, such as plastic or plexiglass, they will last longer and will not deform over time.
How to make door trim:
- The trim is removed from the door.
- With the help of a knife, the factory leatherette is separated from the base of the skin and removed.
- The fiberboard base is placed on a new sheet of material, pressed tightly and the contour of the factory base is outlined, taking into account the holes for the clips, bolts and window lifter handles.
- Using a jigsaw, a new base is cut out. All holes are drilled.
- The prepared material is cut out along the contour of the base, taking into account an allowance of 3–4 cm for turning.
- The material is stretched onto the base, the wrapped edges are glued, additionally it can be fixed with staples.
- New clips are inserted.
Similarly, the manufacture of trim for the rear doors.
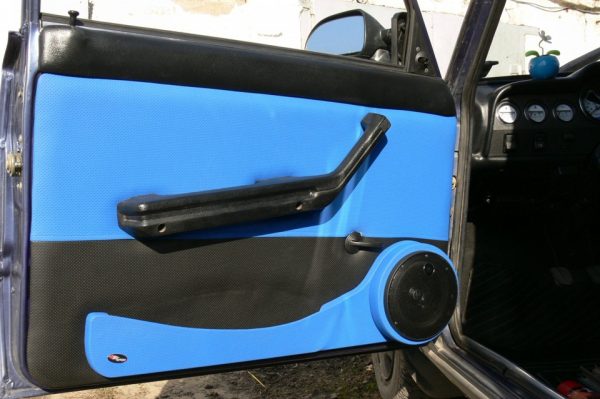
The fabricated base can be covered with any suitable material. It can be a car carpet, leatherette, alcantara. To create soft skin, a sheet of foam rubber, 5–7 mm thick, is first glued onto the base.
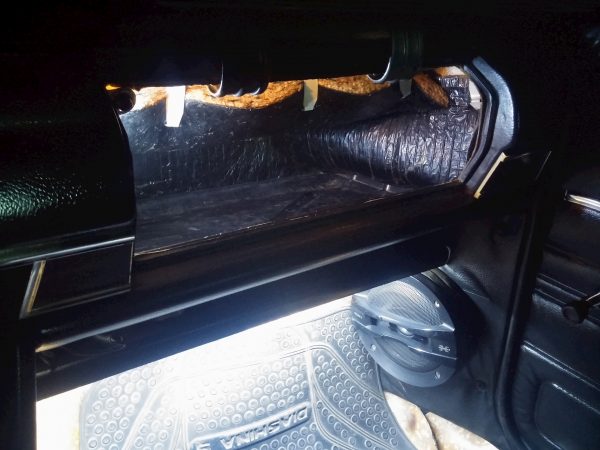
The door trim can be used to install the loudspeakers of the acoustic system. For these purposes, it is better to use a special acoustic podium. To install speakers in a door, it is recommended that you first soundproof it.
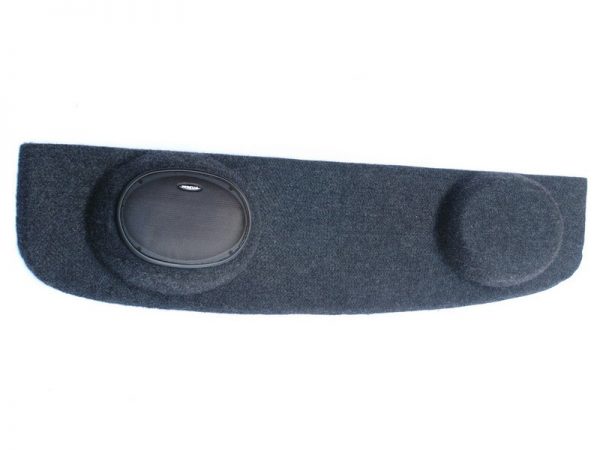
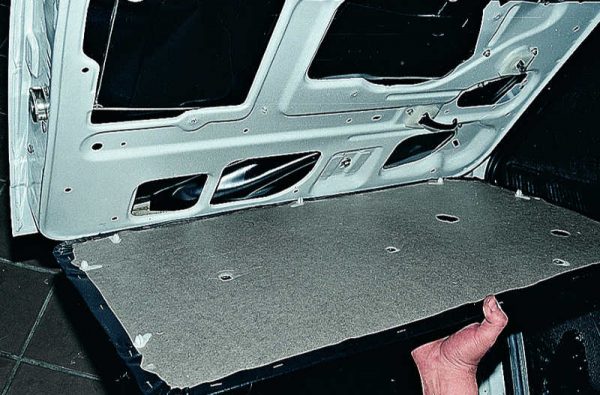
Rear trim
The rear shelf in the car is a very convenient place to install acoustic speakers. Most often, this is what the owners of the VAZ 2106 do. To achieve a better sounding of the acoustic system, a new shelf-podium is installed instead of the regular shelf. It is made mainly from chipboard or plywood (10–15 mm) and podiums of the diameter corresponding to the speakers are installed on it. The finished shelf is covered with the same material as the door trim.
Manufacture:
- The factory panel is removed from the car.
- Measurements are taken and a cardboard template is made. It is also possible to make a template according to the factory panel.
- If the shelf is acoustic, then the location of the speakers is marked on the template.
- According to the shape of the template, a panel of chipboard (16 mm) or plywood (12–15 mm) is cut with an electric jigsaw.
- Edges are processed. Given the thickness of the shelf, the bevel of the side with which the panel is located to the glass is calculated. Holes are prepared for fastening the panel to the body with bolts or self-tapping screws.
- According to the shape of the template, taking into account the inversion, the material is cut out.
- The material is stretched onto the panel, the inversion is fixed with glue or staples. If Carpet is used, it is glued to the entire area to be covered.
- The panel is installed in a regular place and fixed with self-tapping screws.
Salon floor lining
The floor covering is a textile carpet. It is most susceptible to wear and contamination from the feet of passengers and carried goods. It can be made from any suitable material: Carpet, carpet, linoleum.
To replace the floor covering:
- Seats, plastic door sills and pillars, framing of the heating system, seat belt buckles are removed.
- Removed the factory floor trim.
- The sheathing, cut in the shape of the factory, is spread on the floor and carefully leveled.
- In the reverse order of removal, the removed interior parts are installed.
Learn more about tuning the VAZ 2106 interior: https://bumper.guru/klassicheskie-modeli-vaz/tyuning/tyuning-salona-vaz-2106.html
Soundproofing
High-quality sound insulation is a source of increased comfort. This statement is appropriate for any cars, and even more so for domestic ones. The process of soundproofing is not complicated, but very painstaking. It can be done on your own.
In order to avoid problems when working on the installation of sound insulation, please adhere to three basic rules:
- Carefully remember or write down the procedure for disassembling the cabin. Sketch or mark on the wiring where the wires and connectors connect. Store removed parts and fasteners in groups so that nothing is lost.
- Clean well from dirt and degrease the surface before applying soundproofing elements. Carefully measure the part before cutting the material and applying it to the surface of the body.
- Immediately consider the thickness of the applied materials so as not to lose the necessary clearances for installing the interior trim elements during assembly.
If you have little free time, the work of applying sound insulation can be divided into stages. For example, disassemble the door, apply soundproofing and assemble it back. On the next free day, you can make the next door, etc.
If you do soundproofing on your own, without outside help, you can easily cope in 5 days. We are talking about the complete soundproofing of a domestically produced hatchback car, taking into account the soundproofing of the luggage compartment, complete disassembly of the passenger compartment and removal of the instrument panel.
Tools needed for soundproofing work:
- a set of tools for dismantling the car interior;
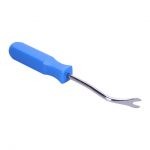
- trim clip removal tool;
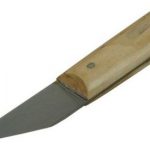
- knife;
- scissors;
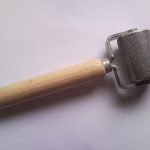
- roller for rolling vibration isolation;
- building hair dryer for heating the bituminous layer of vibration isolation;
- gloves for hand protection.
Photo gallery: a special tool for soundproofing VAZ
-
- A building hair dryer is used to heat up vibration isolation before application, to make the material elastic

-
- Clip remover for gentle removal of clips
-
- A thick steel knife is needed for cutting materials
-
- The roller is designed for rolling the applied vibration isolation
Materials needed for soundproofing
Noise isolation of the car is carried out using materials of two types: vibration-absorbing and sound-absorbing. The choice of material on the market is huge - different thicknesses, absorption characteristics, different manufacturers. The cost is also very different, for any budget, what material to choose is up to you. Naturally, expensive materials are more technologically advanced and have an advantage over cheap ones, and the result from their use will be better.
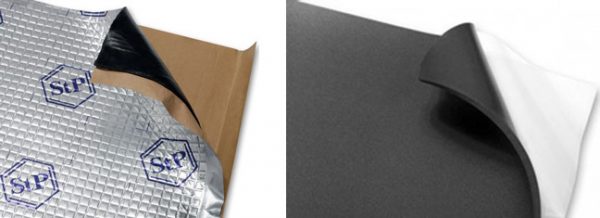
Table: area of processed interior elements VAZ 2106
| Element | Area, m2 |
| Salon floor | 1,6 |
| Engine compartment | 0,5 |
| Back panel | 0,35 |
| Doors (4 pcs.) | 3,25 |
| Потолок | 1,2 |
| Total | 6,9 |
The total area of treated surfaces is 6,9 m2. It is recommended to take the material with a margin. In addition, it is necessary to take 10-15% more sound-absorbing material, because it overlaps the vibration isolation.
Before starting work on the installation of sound insulation, I recommend eliminating all sources of noise, especially those inherent in domestic cars. Such sources may be: unscrewed parts that rattle; wires dangling under the dashboard, worn out door locks that do not hold the door well in the closed state; loose door hinges; obsolete sealing gum, etc.
The procedure for applying soundproofing materials:
- The surface is cleaned of dirt.
- The surface is degreased.
- With scissors or a knife, a part is cut out of the vibration-absorbing material of the desired shape.
- The workpiece is heated with a building hair dryer to give it elasticity.
- The protective paper is removed from the sticky layer.
- The workpiece is applied to the surface with a sticky layer.
- Carefully rolled with a roller to remove the air gap between the surface and the material.
- The surface of the vibration-absorbing material is degreased.
- Sound-absorbing material is applied.
- Press firmly with hands.
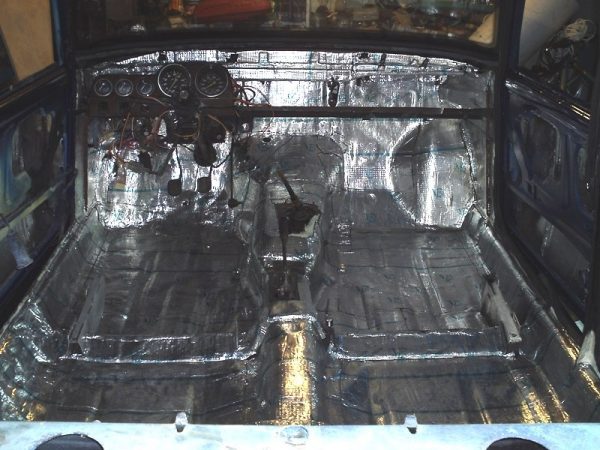
Soundproofing the cabin floor
The most noisy areas on the floor of the cabin are the transmission area, the cardan tunnel, the sill area and the wheel arch area. These areas are subjected to enhanced processing of vibration-absorbing materials. The second layer is applied to the entire surface of the bottom sound-absorbing material. Do not forget that the technical holes and seat mounting brackets must not be pasted over.
Soundproofing the engine compartment
By the same principle, we cover the front of the cabin - the engine compartment. The material is applied up to the windshield. The large number of installed units and wiring harnesses makes it difficult to operate here. However, this element is very important to achieve the overall effect of sound insulation. If neglected, the sound of a running motor against the background of a general reduction in noise will cause discomfort.
Recommendations for applying materials to the engine compartment and interior floor:
- When removing the factory soundproofing, it is desirable to clean the surface well from its remnants. Clean and degrease the surface well.
- The material begins to be applied first to the engine compartment, starting from the top, from the windshield gum, then smoothly passes to the cabin floor.
- Large flat surfaces that are subject to vibration are glued. This can be checked by tapping on the surface, it will rattle.
- Open holes are sealed in the engine compartment to prevent cold air in winter.
- The maximum area is glued on the engine compartment.
- The wheel arches and transmission tunnel are treated with an additional second layer or a thicker material is used.
- It is not necessary to treat the brackets and stiffeners with vibration isolation.
- Soundproofing must cover the entire surface, avoiding gaps.
Pay attention to the factory soundproofing. Don't be in a hurry to throw it away. In some areas, for example, under the feet of passengers and the driver, there will be enough space to leave it together with the new sound insulation. It will not hurt, on the contrary, it will be a great addition in the fight against noise from the engine and wheels. It can be placed over new materials.
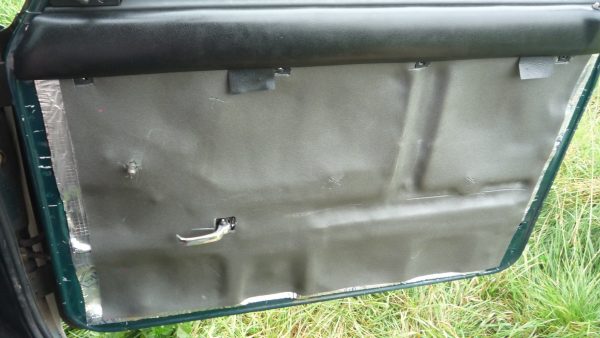
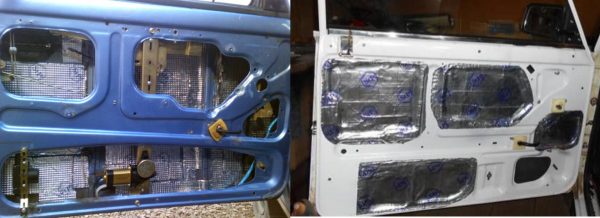
Soundproofing doors
Doors are processed in two stages. First, the inner part, that is, the element that is painted on the outside of the car (panel), and then the door panel with technical openings. The openings are sealed too. The inner part can be treated only with vibration isolation, no more than 2 mm thick, this will be enough. But we carefully glue the panel, closing all the holes, this will also help keep the heat in the cabin in winter.
Work order:
- The door handle is removed, it is screwed with three bolts covered with plugs.
- The window regulator handle, a decorative cap is removed from the door opening handle.
- The clips are unfastened and the door trim is removed. 4 self-tapping screws are unscrewed and the upper lining of the skin is removed.After unfastening the clips, the trim can be easily removed from the door.
- The surface of the door is prepared for gluing: dirt is removed, the surface is degreased.
- A blank of the desired shape is cut out of the vibration isolation sheet to be applied to the door panel. There is no need to cover 100% of the panel surface, it is enough to paste over the largest plane that does not have stiffeners. Be sure to leave open drainage holes to remove moisture from the door!
- The applied vibration isolation is rolled in with a roller.
- Technical holes on the door panel are sealed with vibration isolation.Vibration isolation applied to the panel and door panel
- Sound insulation is applied to the entire surface of the door panel. Holes are cut on the material for attaching clips and self-tapping screws.
- The door trim is installed. The door is assembled in the reverse order of disassembly.
More about the VAZ 2105 power window device: https://bumper.guru/klassicheskie-modeli-vaz/stekla/steklopodemnik-vaz-2106.html
The result of a well-done work will be noticeable immediately. The noise level in the car will decrease by up to 30%, in fact, this is quite a lot.
You will not be able to achieve a result comparable to modern foreign cars, no matter how hard you try. In them, initially, the noise level emitted by the operation of components and assemblies is several times lower.
Video: the process of applying soundproofing

Front instrument panel
The instrument panel is most often subjected to alterations, because it is not only a decorative element, but also the “working area” of the driver. It contains the vehicle controls, instrument panel, control panel and elements of the heating system, glove box. The instrument panel is constantly in the driver's field of vision. What motorists do not come up with in the process of improving the instrument panel: they fit it with leather or Alcantara; covered with flock or rubber; install multimedia devices; additional sensors; make the backlight of the panel, controls, glove box, in general, for which only imagination is enough.
Read about the repair of the instrument panel VAZ 2106: https://bumper.guru/klassicheskie-modeli-vaz/elektrooborudovanie/panel-priborov/panel-priborov-vaz-2106.html
In order to apply a new coating to the panel, it must be removed from the vehicle. This procedure is very time consuming, so it is recommended to do the work in a complex when you remove the panel to install soundproofing materials.
By the way, any owner of the VAZ 2106 knows that the heating system here is imperfect and, in severe frosts, there may be problems with fogging the windows, and sometimes it’s just cold in the cabin. To improve the operation of the heater, the instrument panel often also has to be removed. Therefore, it is necessary to clearly understand in advance what type of work you are going to do before starting to disassemble the cabin, so as not to do the work twice.
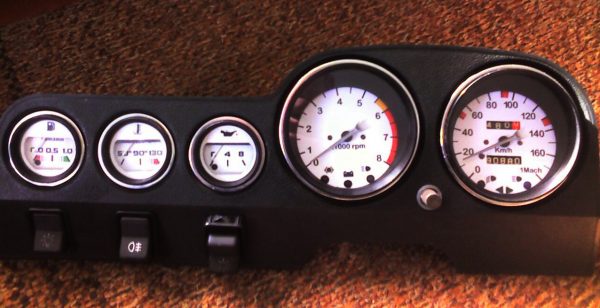
Dashboard
There are 5 round instruments on the dashboard, very typical for the VAZ 2106. To improve the instrument panel, it is proposed to cover it with material or apply a coating just like the panel. To do this, the shield must be removed and all devices removed from it.
In the devices themselves, you can change the weak factory backlight to LED, choosing the color of the LED to your liking. You can also change the dial. You can choose ready-made or make it yourself.
The white dial of the device in combination with a good LED backlight will be well read in any light.
Glove box
The lighting of the glove box can be improved with an LED strip that is attached to the top of the inside of the glove box. The tape is powered from the factory limit switch.
- The 12 V LED strip is selected according to the color.
- The required length is measured and cut off according to a special mark applied on the tape.The tape shows the places of the cut of the tape, on which there are contacts for supplying power
- Two wires up to 20 cm long are soldered to the tape contacts.
- The tape is glued inside the glove box to the top of it.
- Tape power wires are connected to the glove box end switch. The polarity must be observed, there are “+” and “-” marks on the tape.Lighting from the LED strip much better than a standard light bulb illuminates the glove box

Seats
This is perhaps the most important element in the interior of the car. While driving on long trips, the driver should not experience discomfort from an uncomfortable seat. This can lead to increased fatigue, as a result, the trip will turn into torment.
The seat of the VAZ 2106 car in the factory version does not differ in increased comfort compared to modern cars. It is too soft, there is no lateral support. Over time, the foam rubber becomes obsolete and begins to fail, the springs weaken, the lining is torn.
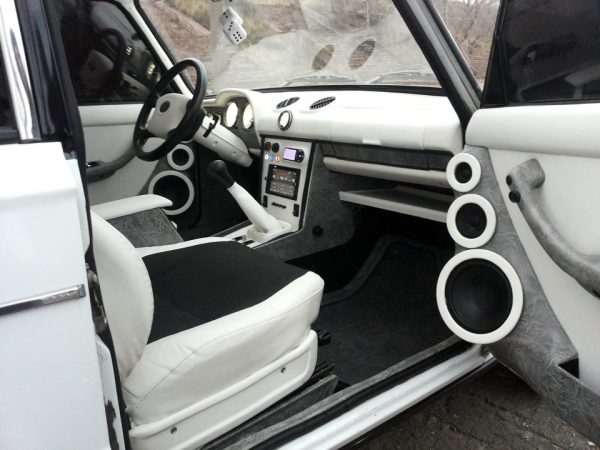
We talked above about pulling the seat upholstery, but there is a second option that Zhiguli owners very often choose today - this is the installation of seats from foreign-made cars in the car. The advantages of these seats are obvious: a comfortable fit with lateral back support, a high seat back, a comfortable headrest, a wide range of adjustments. It all depends on which seat model you choose. It is worth noting that often only the front seats are subject to replacement, because it is very difficult to choose a rear sofa.
As for the choice of suitable seats for the VAZ 2106, then any suitable in size for this car will do here, because the mountings will still have to be redone during installation. To finalize the mounts suitable for installing new seats, you may need a welding machine, a metal corner, a grinder, a drill. All this is necessary in order to form new supports on the floor of the cabin, coinciding with the seat slides, as well as for the manufacture of brackets. What kind of fastenings you will make depends on the seats and your ingenuity.
List of car models whose seats are popular for installation in the VAZ 2106:
- Volkswagen Passat B3;
- Ford Scorpio;
- Renault 19;
- Ford Focus;
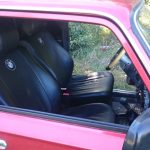
- BMW E34;
- Opel (80s of release);
- Mazda 626.
Photo gallery: results of installing seats from foreign cars
-
- The result of installing leather seats from the BMW E34
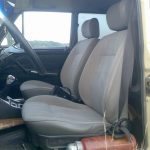
-
- The result of installing seats from Opel Vectra B
-
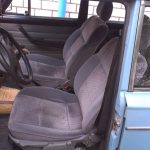
- The result of installing seats from the VW Passat B3
It is up to you to decide which seats to install in the car instead of the regular ones, which will suit your liking and afford.
If we talk about the disadvantages associated with the installation of foreign seats, we can distinguish the following: perhaps a decrease in the free space between the seat and the door; you may have to abandon the movement of the seat on the sled; perhaps a slight displacement of the seat relative to the steering column.
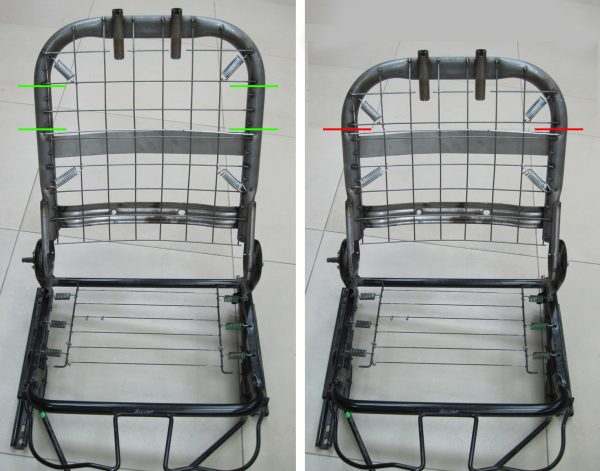
There are more serious difficulties associated with the installation of non-native seats. The back of the seat may be very high and the height of the seat will not fit. In this case, you can shorten the back of the seat itself. This is a laborious process:
- The seat back is disassembled to the frame.
- With the help of a grinder, a part of the frame is cut to the desired length.The green lines mark the places where the frame was cut. Welding points are marked in red
- The cut out section is removed and a shortened version of the back is welded.
- In accordance with the new size of the back, the foam rubber is cut in its lower part and installed in place.
- The casing is shortened or a new one is made.
It is preferable to immediately select seats that are suitable for all dimensions.
In general, you gain more than you lose: a comfortable fit is the most important aspect for the driver!
Interior lighting
Additional lighting in the cabin of the VAZ 2106 will not be superfluous, it has long been known that the factory light is far from ideal. It is proposed to use a ceiling lamp from the cars of the Samara family (2108–21099). You can install an LED lamp in this ceiling lamp, the light from it is quite strong and white.
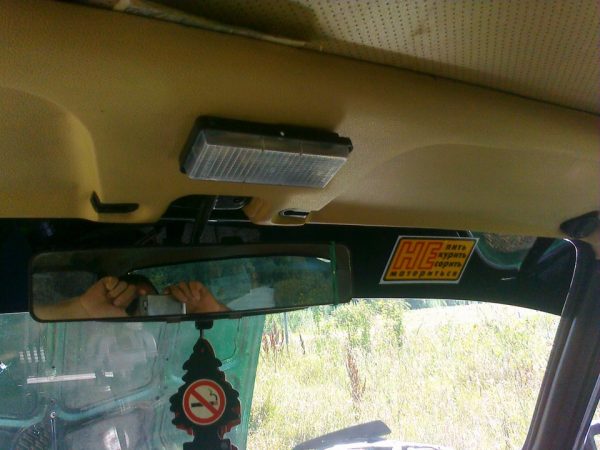
You can install it on the roof lining (if your car has one) between the sun visors:
- The ceiling lining is removed.
- From the side interior lamp, wires are pulled under the trim to connect the lamp to the on-board network.
- A hole is made in the overlay for the wire.
- The plafond is disassembled and its back side is attached to the lining with self-tapping screws.
- The cover is put in place.
- The wiring is soldered to the contacts of the ceiling.
- The plafond is assembled in the reverse order of disassembly.
Video: how to install the ceiling in the "classic"

In conclusion, I would like to note that the classics of the domestic automobile industry are very conducive to interior modifications. The simplicity of the interior and the great experience of motorists in tuning these models allows you to apply all the new technologies and techniques, and domestic engineers have made sure that you can do the whole range of work yourself. Experiment, good luck.

