Body VAZ 2106: scheme of basic and additional elements, body repair, painting
Content
Back in 1976, the first copies of "sixes" drove along the roads of the USSR. And to this day, many of them have remained on the move. The quality of the hardware of the domestic car is so good that the car has been in operation for 42 years. The body of the VAZ 2106 and its elements deserve detailed consideration.
Body description VAZ 2106
The stamping method is called almost the main reason for the slow aging of metal body elements. But many body panels "six" are made in this way. The elements are connected to each other by welding technology.
The skeleton of a VAZ 2106 is a combination of components:
- sub-frame;
- mud flaps;
- floor elements;
- front and back;
- amplifiers;
- thresholds.
In fact, the body of the VAZ 2106 is a four-door sedan-type design with removable elements: doors, hood, luggage cover, fuel filler flap.
The "six" has chrome bumpers, for beauty they are equipped with plastic sidewalls, and for protective purposes - they are equipped with rubber bumpers. The glass of the car is regularly polished - the windshield is 3-layer, the rest are hardened, and the rear one is heated (not always).
Bottom with molded carpet, protected by a moisture-proof backing. Noise-insulating gaskets were found under it. The boot floor is lined with special plastic.
Doors consist of two panels connected to each other by welding technology. Locks are supplied with blockers, they are of rotary type. The lock function is also provided on the hood, which has a cable drive - the opening handle is displayed in the passenger compartment, under the driver's dashboard. The trunk lid has the same structure as the hood. Mastic-bituminous desiccant is the only corrosion protection (apart from the inner door upholstery) applied to the door panels. However, this composition during the Soviet era was so high quality that it was enough in full.
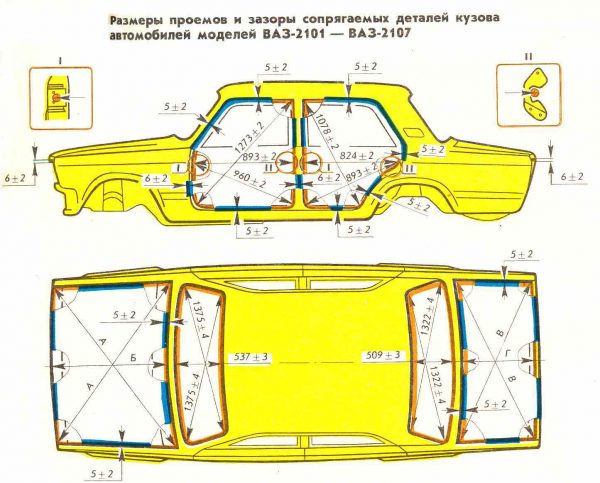
Body dimensions
There is a concept of geometric and body dimensions. The first ones imply control points and distances, the alignment of door and window openings, the distance between the axles, etc. As for the body dimensions, these are the usual parameters:
- the length of the "six" body is 411 cm;
- width - 161 cm;
- in height - 144 cm.
Body standard dimensions also include the distance between the front and rear axle points. This value is called the wheelbase, and for the VAZ 2106 it is 242 cm.
The weight
"Six" weighs exactly 1 ton 45 kilograms. The bulk is made up of the following parts:
- body;
- engine;
- rear axle;
- Transmission;
- shafts and other components.
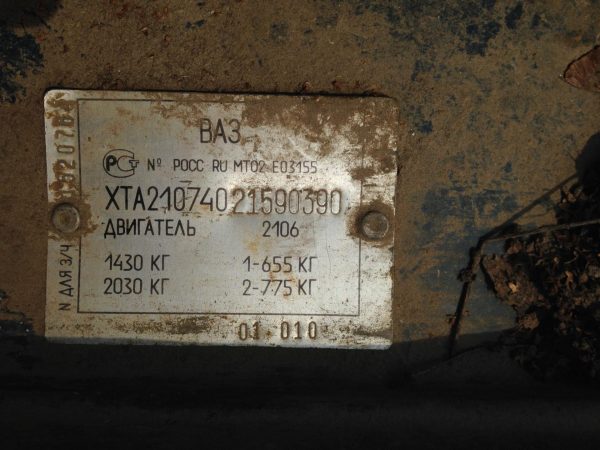
Where is the body number
On the "six", the main passport and technical data, including the body and engine numbers, are marked on the identification plates. They can be found in several places:
- on the tide of the engine block to the left of the fuel pump;
- on the air intake box on the right;
- on the left rear wheel arch connector in the front left corner of the luggage compartment;
- inside the glove compartment.
Read about the device of the VAZ 2106 fuel pump: https://bumper.guru/klassicheskie-modeli-vaz/toplivnaya-sistema/priznaki-neispravnosti-benzonasosa-vaz-2106.html
Additional body elements
In addition to the main elements of the body, it is also customary to talk about additional components.
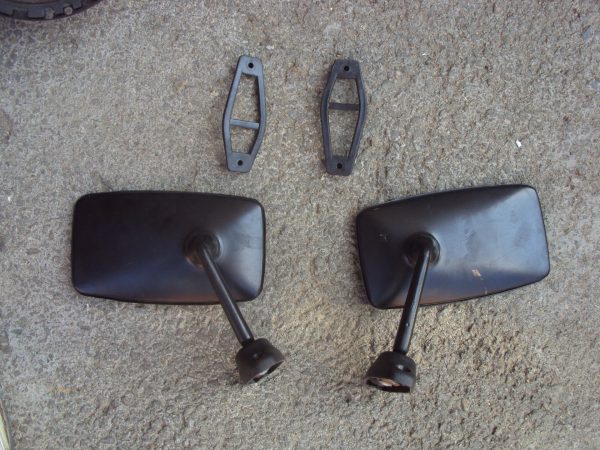
The side mirrors on the VAZ 2106 are designed to provide better visibility, thereby increasing the safe qualities of the car. However, in addition to their main function, mirrors also decorate the car. The design of the mirrors brings completeness, a chip to the exterior, creating a unique style.
The "six" side mirrors are unpretentious, not very large, like on foreign cars, but they make it possible to carry out tuning. They have an anti-glare surface, have a heating system that protects against moisture and snow.
Consider them in more detail.
- The right mirror is very limited in its adjustment possibilities, so the driver sees only the side of the car while driving.
- The left mirror is also not very modernized.
In addition to them, there is also a rear-view mirror. It is installed in the cabin, contains a reflective surface with an anti-glare effect that protects the driver from dazzling. As a rule, the R-1a model is placed on the "six".
Side mirrors are mounted on the doors. A rubber gasket is required to protect the body from damage. The element is fixed on 8 mm screws through the drilled holes.
Overlays also refer to additional body elements. They add beauty to the car. They are considered tuning parts, installed on internal thresholds, and in addition to decorative functions, they protect the paintwork.
The surface of the overlays can be mirrored, corrugated, with an anti-slip effect, etc. They can be embossed with the AvtoVAZ or Lada logo.
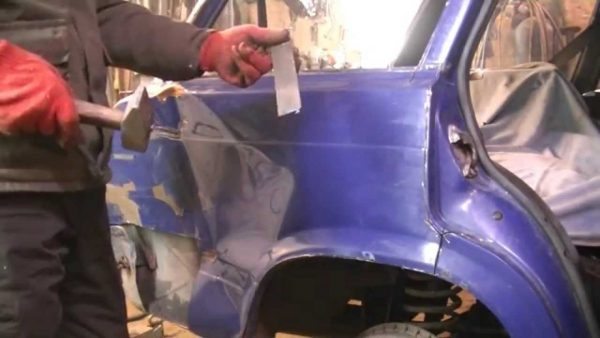
Body repair
Owners who have gained a hand carry out body repairs of their "six" on their own. As a rule, the process can be carried out with minor damage. Undoubtedly, here you need a lot of work experience and the availability of high-quality tools. However, it is better to entrust the restoration of geometry to specialists.
The goal of any body repair (straightening) is to restore the belt of tension. Even at the factory, steel body panels are stamped under pressure. As a result, one form or another is formed on the details, the violation of which is unacceptable. The task of restoration is reduced to giving the element a regular shape by hitting a special hammer or in other ways (more on this below).
Basically, the straightening of the body panels of the "six" is carried out in two stages: knocking out with a wooden mallet and straightening with hammers with soft (rubber) surfaces.
You can buy a good body straightening tool today at highly specialized points of sale. They are also made by hand, but this is not recommended, since without specific knowledge and skills, quality cannot be expected.
So, these are the tools that the owner of the “six”, who decided to carry out body repairs on his own, should arm himself with.
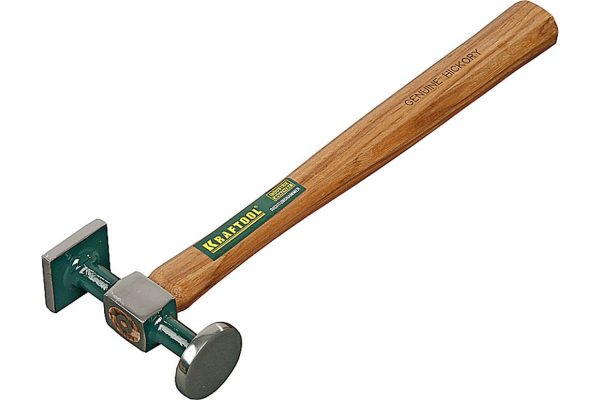
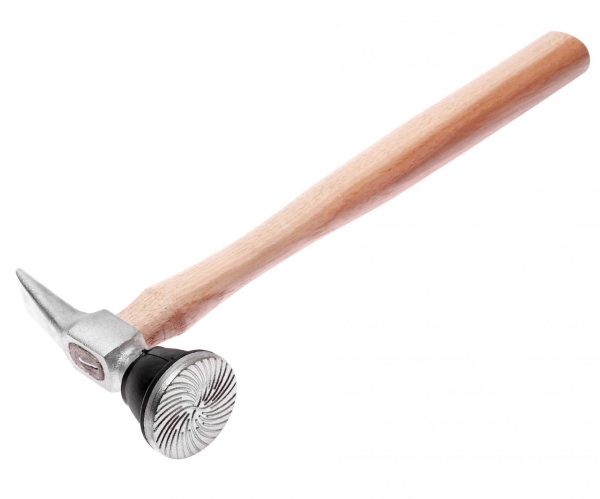
- Mallets and hammers. These are the main accessories of the leveler, which will help to perform high-quality alignment of dents. Such hammers differ from ordinary locksmiths in that they have a rounded head, and it is perfectly polished. In addition, special hammers are made using materials such as rubber, non-ferrous metals, plastics, etc.
 A Kyivan of the KRAFTOOL manufacturer
 - All kinds of dies, supports and anvils. They are designed to support damaged areas of the body. As a rule, these devices are required to repeat the shape of a dent - therefore, there are many of them in the arsenal of a leveler.
- Hooks and levers used for hoods. They cling to the inside of the body part. You can make them with your own hands using durable metal rods. There should be several hooks - they should differ in size, bend angle, thickness.Hooks and fixtures for body work vary
- Spoons and percussion blades. They are designed to quickly and effectively pull out body dents. In most cases, they are used in combination with supports, however, they also have a specialized purpose - to help separate the outer surface of the body panel from the inner one. In addition, the spoon will help correct any curvature of the body part.
- Sanding file or machine. An indispensable tool for carrying out grinding work that occurs after straightening. Often craftsmen use an abrasive wheel instead, fixed on a grinder.
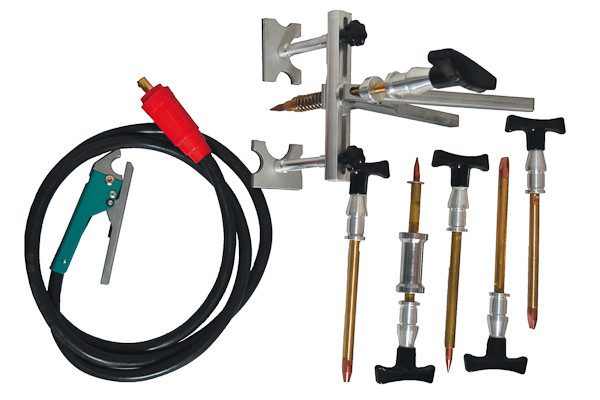
- A spotter is a specialized tool whose task is to carry out spot welding on metal body panels. Modern spotters are a whole system with the support of a pneumatic or hydraulic hammer.A spotter with attachments makes it possible to carry out spot welding on metal body panels
- A trowel is a hammer used to level all sorts of bumps.
- Knife - A knurled hammer used to repair extruded surfaces.A notched straightening hammer is used to restore elongated body surfaces
Installation of plastic wings
The installation of a plastic wing will decorate the VAZ 2106 car, as well as lighten the weight of the body. The operation can be carried out in several ways. Popular, as a rule, is a method involving the installation of linings on the wings.
Today, sets of wing arches on the VAZ are made of very durable fiberglass. The technology of their installation is extremely simple: the metal surface of the body panel is carefully wiped, then the inner edge of the product is carefully smeared with sealant. The arch is glued to the body, some time passes (depending on the composition of the sealant, the packaging says how long to wait) and the surface is cleaned of excess sealant.
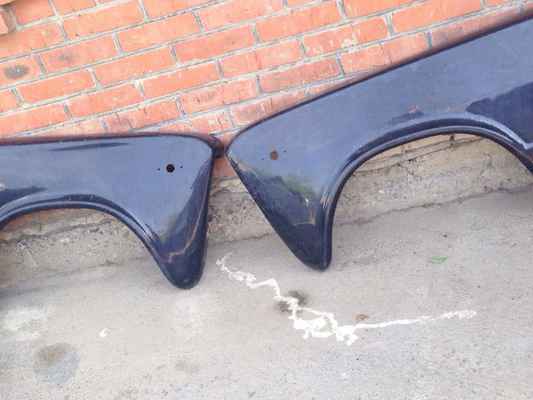
You can buy such wings in any specialized store, including via the Internet. Advice - do not save on the quality of the product, since the service life will depend on this.
After installing such arches, defects may be found along the edges or configuration. Often, VAZ 2106 owners buy such linings with an installation service so that there are no problems. However, it will be possible to correct these inaccuracies if you can putty the panel with high quality. In addition, the perfect fit of the plastic part can be achieved in this way.
- Close the non-working part of the body with one-sided tape, and then putty the bumps with automotive putty with a hardener.
- Attach an additional wing, wait until the composition has cooled down, then screw it on from below with metal screws.
Thus, the putty will close all the cracks formed between the lining and the wing - the excess will come out from under the lining on the wing.
If we are talking about a complete replacement of the wing, then you will have to dismantle the regular wing.
Order of execution on the rear wing.
- First, remove the headlight and bumper. Then release the trunk, remove the rubber cover molding and the gas tank (when replacing the right wing). Be sure to disconnect the wiring.
- Cut off the bow with the rear wheel arch with a grinder exactly along the bend, maintaining a distance of 13 mm from the edge of the wing. And also cut off the connections with the floor, in the spare wheel area, and the joint with the crossbar of the rear window and the body sidewall, be sure to exactly along the bend.
- It is also necessary to cut off the square connecting the wing to the rear panel, be sure to make an indent of 15 mm.
- Use a drill to knock out the welding points on the wing.
- Remove the wing, remove the residues remaining on the body, straighten the defects, sand the places for installing a new part.Removing the rear wing of the VAZ 2106 requires the use of a grinder and a powerful drill
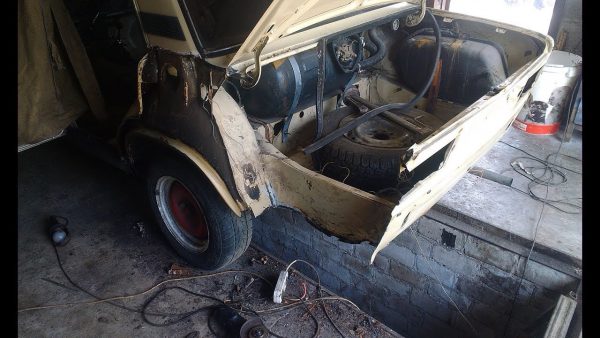
If a metal wing is installed, then it will need to be welded using an autogenous gas. The plastic part is mounted on bolts - you have to be creative to make it look beautiful. Work on the front wing is much easier to carry out, the process is similar to that described.
Welding work
This is a separate topic that deserves detailed consideration. Many beginners make mistakes that are very difficult to correct later. First of all, it is desirable to decide on the device. In most cases, you will have to work with the thin metal of the VAZ 2106 body, so gas welding is required, but a MIG machine will also be needed.
The main work on connecting metal panels is reduced to spot welding. The apparatus for such work is a transformer with pincers. The connection of parts occurs due to the contact of two electrodes subjected to high temperatures. Spot welding when working with the body of the VAZ 2106 is used in the process of replacing the wings, door linings, hood and luggage cover.
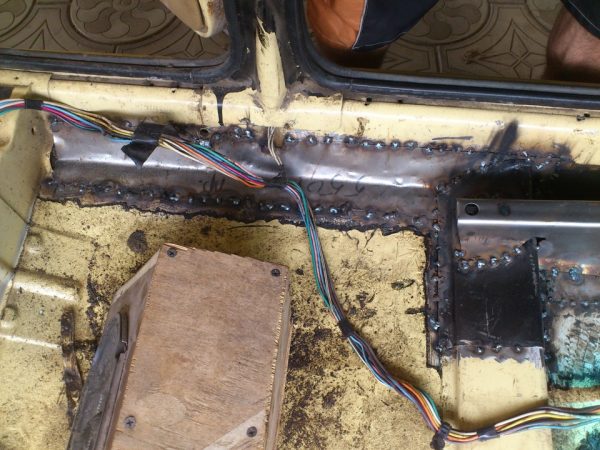
Thresholds are often repaired or replaced as they are closer to the road and regularly exposed to moisture and dirt. Apparently, for this reason, the body metal is of poor quality here, and the anticorrosive protection is also not carried out well enough.
Before you start working with thresholds, you need to stock up on the necessary tools.
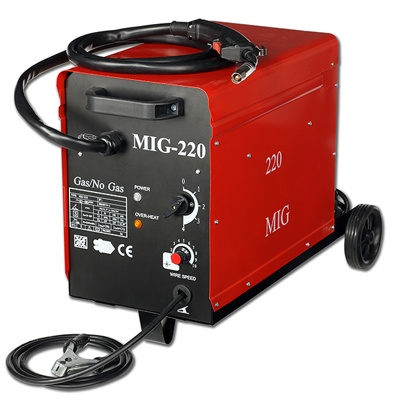
- Welding machine semi-automatic, designed to work in a carbon dioxide environment.Welding machine MIG-220 for work in the environment of carbon dioxide
- Drill.
- Metal brush.
- Bulgarian.
- Primer and paint.
It is imperative to prepare new thresholds if the replacement of elements is implied, and this happens in 90% of cases. Only minor corrosion points and dents can be repaired - in other cases it is more expedient to carry out a replacement.
Threshold repair comes down to straightening dents, cleaning rust with a special metal brush and puttying.
Now about the replacement in detail.
- Carefully check the door hinges, as they can lead to an element diagnosis error. The gaps between the doors and thresholds are inspected to eliminate the possibility of confusion about the fit of the doors. Sagging doors need hinge replacement, not threshold repair.
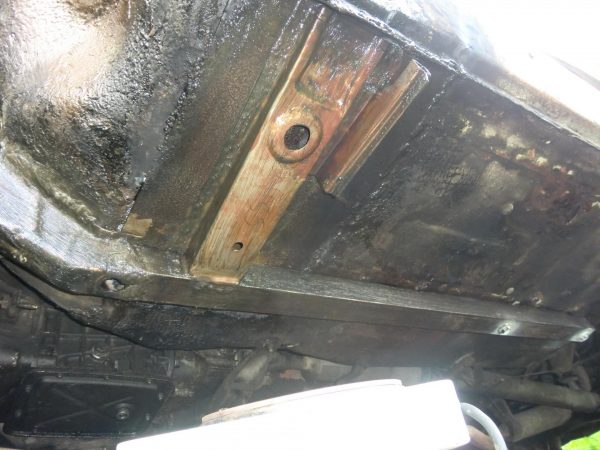
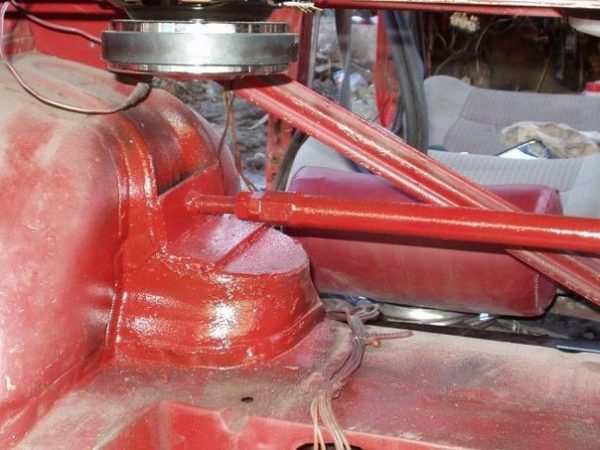
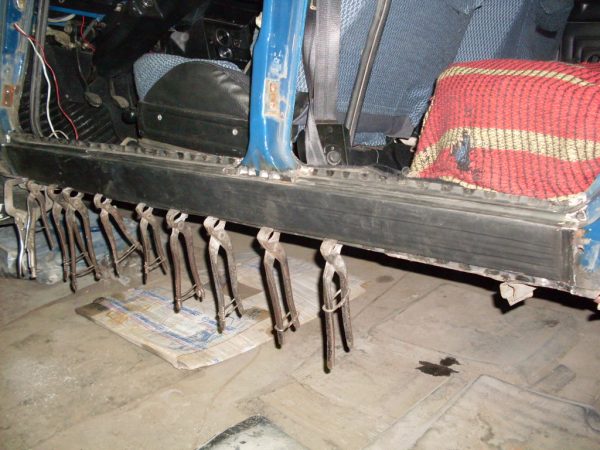
- After the doors are inspected, you can cut out the rotted threshold area. At the same time, remove the wings, if their repair or replacement is implied. It is also recommended to put special extensions in the salon on the old and "decrepit" body.Strengthening the body of the VAZ 2106 using stretch marks
- Cut off a piece of threshold corroded by rust with a grinder. If it is inconvenient to work with an angle grinder, it is recommended to take a chisel or a hacksaw for metal.
- After removing the outer part of the threshold, you should start cutting the amplifier - this is a metal tape with holes. On some modifications of the VAZ 2106, this part may not be available, the easier and faster the procedure will go.Threshold amplifier VAZ 2106 with holes
- Remove all remnants of rot, thoroughly clean the surface.
Now you need to move on to setting a new threshold.
- Try on the part - in some cases, you may have to cut a new threshold.
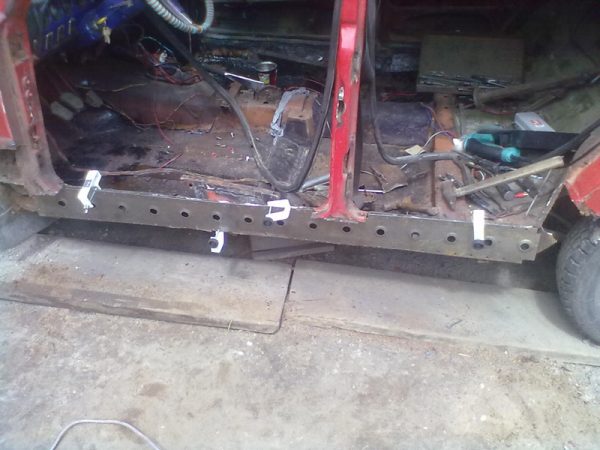
- Weld first a new amplifier, with pre-drilled holes every 5–7 cm. The element must be connected to the car pillars. Experienced welders advise grabbing the bottom and top of the part first, starting from the center rack.
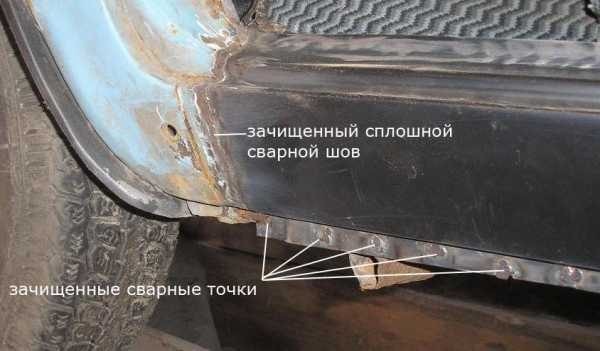
- Clean up traces of slag so that the surface becomes almost a mirror.Cleaning the threshold and welded points from slag
- Now you should put the outer part of the threshold for fitting, if necessary, bend or cut out all that is superfluous.
- Wipe off the shipping primer and paint from the part, then use self-tapping screws to fix the outer part of the threshold.Installation of the outer part of the threshold - pliers act as clamps
- Hang the doors in place and check if the gap is normal - it should be even, nowhere and nothing should protrude or stick out.
- Carry out welding in the direction from the B-pillar to both sides. Boil top and bottom. The better the fixing work is done, the stiffer the body will be in this place.
- The final stage is priming and painting.
As a rule, welding work is best done with an assistant. But if it is not there, you can use clamps or clamps that will securely fix the part before work.
The next area of the car, which also requires welding, is the bottom. As a rule, if work is underway with thresholds, then the floor is also affected, since rust leaves its traces here too. However, we must remember that after welding, the structure of the metal will change, and the next corrosion will occur earlier than usual. For this reason, you should try to use more whole sheets and apply a lot of anticorrosive composition.
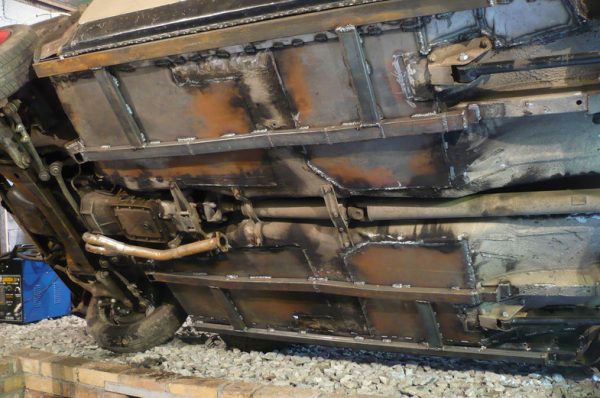
The bottom of any car serves as a platform for assembling various body panels. This means that it must be as strong as possible. Damaged parts of the floor are the main cause of corrosion, corroding the entire body. Therefore, after welding, it is imperative to carry out anticorrosive treatment of the bottom. There are several types of this procedure.
- Passive processing, which implies a simple isolation of the metal from contact with the external environment. A rubber-based mastic is used, but it is unlikely that it will be possible to treat hard-to-reach places with this composition.
- Active processing, which involves the creation of a special layer that prevents the onset of the oxidative process. Various liquid formulations of the Movil type are used. They are applied with a spray gun so that the composition penetrates into all areas of the bottom.
Today, tools are used that not only stop the corrosion process, but also reverse it. For example, these are MAC, Nova, Omega-1, etc.
Hood VAZ 2106
Many owners of the "six" dream of improving the appearance of their car using tuning technology. The hood is that part of the body on which the beauty and style of the exterior directly depend. Therefore, it is this part of the body that undergoes modernization more often than others.
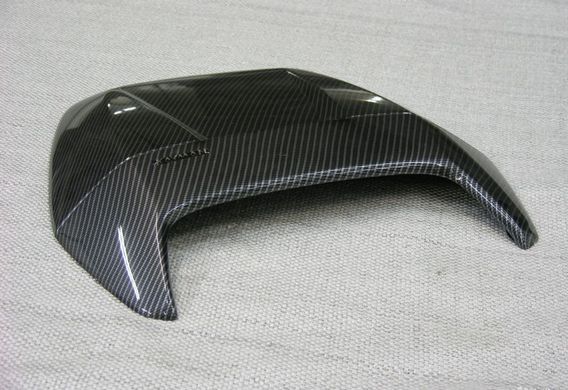
Air intake on the hood
Installing an air intake will enable better cooling of the powerful VAZ 2106 engine. Normally, only a couple of holes are provided for air intake, which are clearly not enough.
Read about the device and repair of the VAZ 2106 engine: https://bumper.guru/klassicheskie-modeli-vaz/dvigatel/remont-dvigatelya-vaz-2106.html
Here's what you'll need:
- 2 caps for the hood (they are sold in car dealerships at a price of 150 rubles apiece);An air intake cap is inexpensive
- good glue;
- Bulgarian;
- welding machine.
Step by step algorithm of actions.
- Clean the surface of the caps from paint.
- Cut the lower base of the air intakes with a grinder.
- Attach the caps to the regular holes on the hood of the VAZ 2106. For the most part, they do not completely cover the air ducts, so you have to weld the rest with pieces of metal. As a patch, you can take a sheet from a damaged car door.
- Weld pieces of metal by welding, puttying, priming and painting.Caps on the hood require careful processing and puttying
Hood lock
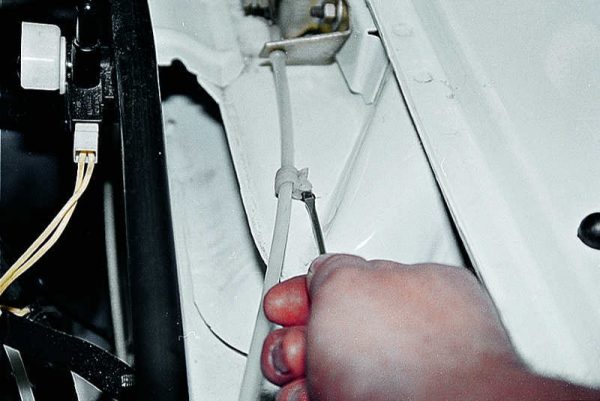
When working on the hood, it will be useful to check the lock. After long-term operation, it often jams, providing the owners with unnecessary trouble. It changes in this order.
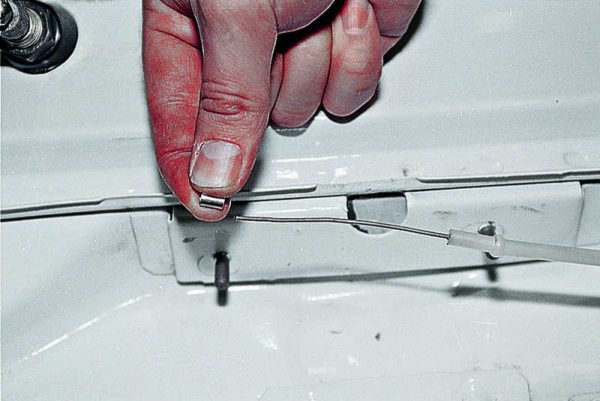
- Remove the 2 plastic fasteners of the lock control rod by prying them with a thin screwdriver.The plastic fasteners of the lock control rod must be removed by prying with a thin screwdriver
- Move the retainer tube with pliers.The retainer tube is moved with pliers
- Disconnect the rod from the lock.
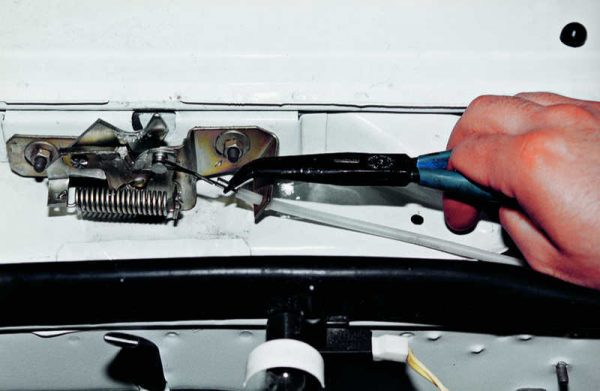
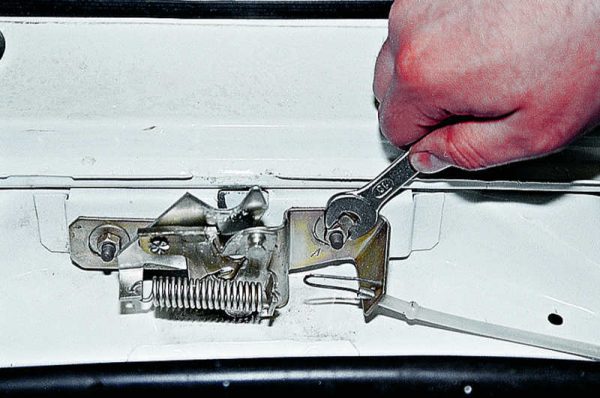
- Mark the position of the lock on the bracket with a marker, then unscrew the nuts with a 10 wrench.The position of the lock on the bracket must be marked with a marker before removal.
- Take out the lock.
The replacement of the cable deserves special attention.
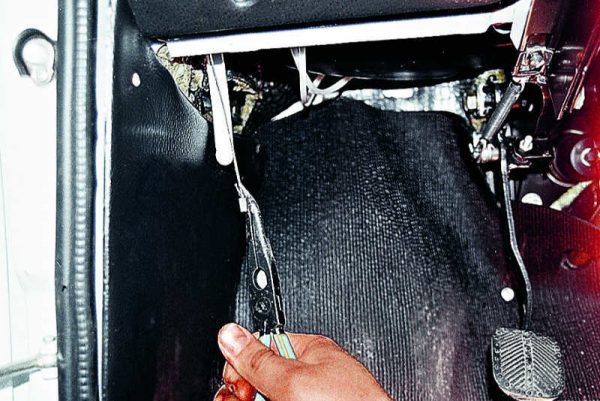
- After removing the lock, you must remove the cable lock.The hood latch cable must be released from the latch
- Then pull the cable out of the cabin with pliers.Pulling the cable is carried out from the passenger compartment
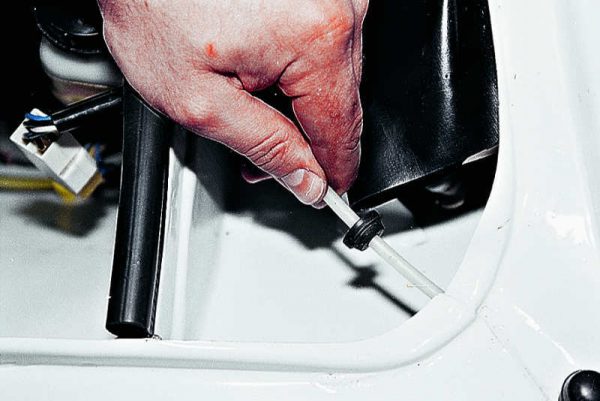
- As for the cable sheath, it is pulled through the engine compartment.The cable sheath is removed from the engine compartment
More about VAZ 2106 body repair: https://bumper.guru/klassicheskie-modeli-vaz/poleznoe/remont-vaz-2106.html
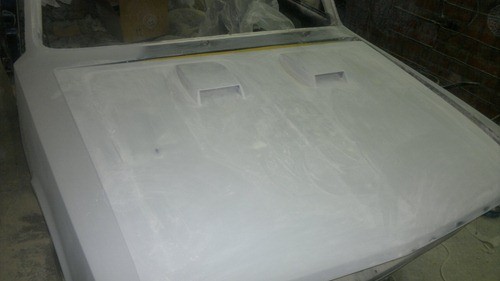
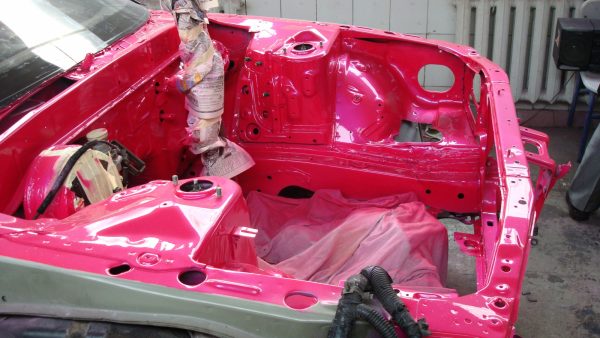
How to paint a VAZ 2106
As a rule, the owners of the "six" come to mind to paint the body in two cases: the paintwork has worn out or after an accident. First of all, attention is paid to the choice of paint - today you can purchase various options, but most often the car is painted with an acrylic composition or metallic.
Before painting, it is recommended to carefully prepare the car. Here are the types of work included in the preparation.
- Cleaning from dirt and dust.
- Dismantling of elements that may interfere with the process.
- Straightening of defects: chips, scratches, dents.
- Primer with acrylic composition.
- Soil treatment with abrasive paper.
Only after these steps can the spray painting process begin. Apply 3 coats of paint. The first and third layers will be the thinnest, the second the thickest. At the final stage of painting, varnish is applied.
As for the technology of applying metallic paint, the main coating here is a layer of varnish. Aluminum powder is added to it, which gives the effect of polished metal. Lacquer should cover the body in 2-3 layers, using the same sprayer.
Video: how to paint a VAZ 2106

The body of any car needs regular inspection. Remember that it is a platform for the engine and other important machine components.

