Design features and repair of the VAZ 2101 engine
Content
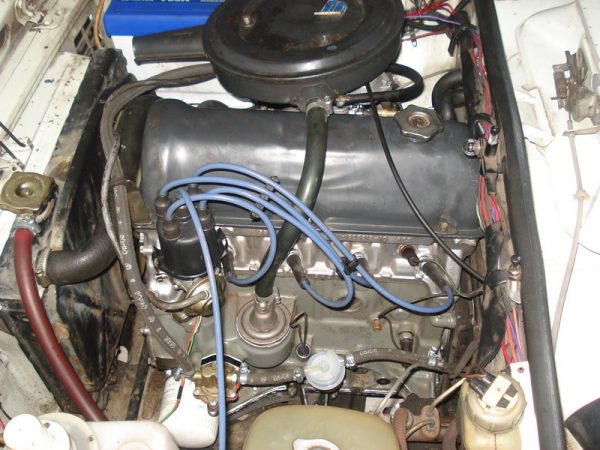
VAZ 2101 engines are distinguished not only by their simple, understandable design, but also by their durability. Surprisingly, Soviet developers managed to design engines that can give odds to foreign "millionaires" of the world's most famous automakers. Thanks to the reliability and maintainability of these power plants, "penny" and today roam our roads, and quite briskly.
What engines were equipped with the first VAZs
"Kopecks" were equipped with two types of power units: 2101 and 21011. The design of the first was borrowed from the Italian Fiat-124. But it was not a copy, but a real improved version, although the camshaft was upgraded. Unlike Fiat, in which it was located at the bottom of the cylinder head, in the VAZ 2101 the shaft received an upper location. The working volume of this engine was 1,2 liters. He was able to develop a power equal to 64 hp. s., which at that time was enough.
The VAZ 2101 engine differed from its predecessor in volume, which increased to 1,3 liters, and, accordingly, in the size of the cylinders. This did not lead to a particular improvement in power characteristics, however, it was this unit that became the prototype for subsequent modifications, namely 2103 and 2105.
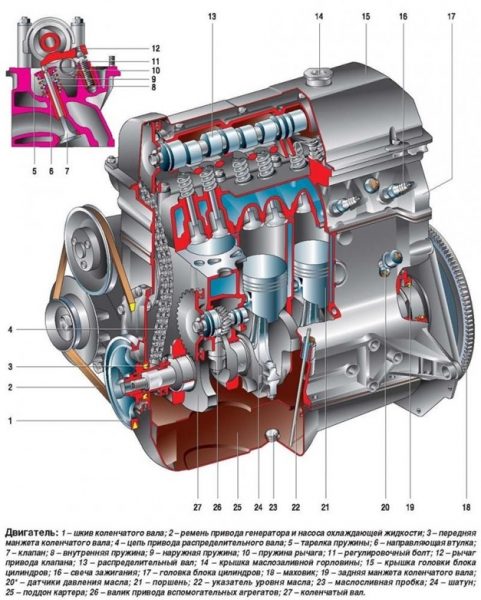
Table: main characteristics of the VAZ 2101 and VAZ 21011 engines
| Positions | Indicators | |
| WHA 2101 | WHA 21011 | |
| Type of fuel | Petrol A-76, AI-92 | Petrol AI-93 |
| injection device | Carburetor | |
| Cylinder block material | Cast iron | |
| Cylinder head material | Aluminium alloy | |
| Weight, kg | 114 | |
| Cylinder arrangement | Inline | |
| Number of cylinders, pcs | 4 | |
| The diameter of the piston, mm | 76 | 79 |
| Piston movement amplitude, mm | 66 | |
| Cylinder diameter, mm | 76 | 79 |
| Working volume, cm3 | 1198 | 1294 |
| Maximum power, hp With. | 64 | 69 |
| Torque, Nm | 87,3 | 94 |
| Compression ratio | 8,5 | 8,8 |
| Mixed fuel consumption, l | 9,2 | 9,5 |
| Declared engine resource, thousand km. | 200000 | 125000 |
| Practical resource, thousand km. | 500000 | 200000 |
| Camshaft | ||
| location | top | |
| gas distribution phase width, 0 | 232 | |
| exhaust valve advance angle, 0 | 42 | |
| intake valve delay 0 | 40 | |
| gland diameter, mm | 56 and 40 | |
| gland width, mm | 7 | |
| Crankshaft | ||
| Neck diameter, mm | 50,795 | |
| Number of bearings, pcs | 5 | |
| Flywheel | ||
| outer diameter, mm | 277,5 | |
| landing diameter, mm | 256,795 | |
| number of crown teeth, pcs | 129 | |
| weight, g | 620 | |
| Recommended engine oil | 5W30, 15W40 | 5W30, 5W40, 10W40, 15W40 |
| Engine oil volume, l | 3,75 | |
| Recommended coolant | Tosol | |
| Amount of coolant, l | 9,75 | |
| Timing drive | Chain, double row | |
| The order of the cylinders | 1–3–4–2 | |
Which motor can be installed on a "penny" instead of a regular one
One of the main types of car tuning is the improvement of the car engine. VAZ 2101 motors are an unplowed field in this sense. Some craftsmen install turbines on them in order to increase power and traction characteristics, others change the crankshaft and bore the cylinders, and still others simply change the engine to a more powerful one. But here it is important not to overdo it, because the car body is designed for certain loads, exceeding which can seriously harm the entire car.
Among the popular options for replacement, it is worth considering only power units that are close in design and performance. On a "penny" without any problems, you can install a gasoline engine with a volume of 1,6 or 2,0 liters from the same Fiat-Argent or Polonaise.
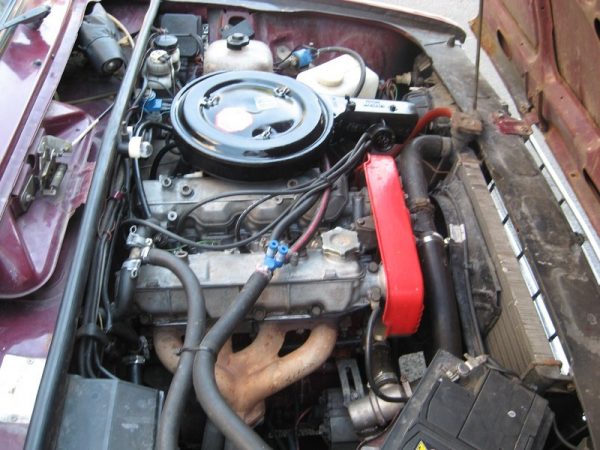
You can try the same engine from Renault Logan or Mitsubishi Galant if you put them together with a gearbox. But the best option is a power unit from subsequent modifications of VAZs. These can be VAZ 2106, 2107, 2112 and even 2170. Engines from these machines will fit both in size and in attachment to the gearbox.
More about the VAZ 2101 gearbox: https://bumper.guru/klassicheskie-modeli-vaz/kpp/korobka-peredach-vaz-2101.html
VAZ 2101 engine malfunctions and their symptoms
No matter how reliable the “penny” power unit is, it can also sometimes be capricious. The main signs of its malfunction are:
- inability to start;
- unstable idling, tripling;
- reduction of traction and power characteristics;
- overheat;
- extraneous noises (knocking, clatter);
- the appearance of a white (gray) exhaust.
Naturally, any of the listed symptoms cannot clearly indicate a specific malfunction, so let's look at them in more detail in the context of possible breakdowns.
Engine won't start at all
If, when the ignition is turned on and the key is turned to the position at which the starter is turned on, the latter works, and the power unit does not show any signs of life at all, this may be evidence of a failure:
- ignition coils;
- distributor;
- interrupter;
- ignition circuits;
- fuel pump;
- carburetor.
If such a sign is found, do not immediately change any of the ignition system components, or disassemble the carburetor. First, make sure that the voltage from the battery is supplied to the coil, distributor, distributor, spark plugs. After that, you can already start diagnosing the fuel pump and carburetor.
Unstable idle
In this case, the malfunction can also be caused by problems in two systems: power and ignition. Typical breakdowns accompanied by this symptom include:
- failure of the carburetor solenoid valve;
- clogging of the fuel filter at the inlet to the carburetor;
- clogging of the fuel or air jets;
- violation of the regulation of the quality and quantity of the fuel-air mixture;
- failure of one or more spark plugs;
- burning of the contacts of the ignition distributor, distributor cover, slider;
- breakage of the current-carrying core (insulation breakdown) of one or more high-voltage wires.
Here, as in the previous case, it is better to start searching for a problem by checking the ignition system.
Reduced engine power
The power unit may lose its power characteristics due to:
- malfunction of the fuel pump;
- clogging of the fuel filter or fuel line;
- violation of the regulation of the quality of the fuel-air mixture;
- increasing the gap between the contacts of the breaker;
- incorrect adjustment of the valve timing or ignition timing;
- wear of the elements of the piston group.
If a decrease in the power and traction characteristics of the power unit is detected, first of all check whether the marks of the gas distribution mechanism drive match, and also whether the ignition timing is set correctly. Next, you should make sure that the gap between the contacts of the distributor is correctly adjusted. After that, you can already start checking the fuel pump, filter and carburetor. If a drop in engine power is accompanied by thick white smoke from the exhaust pipe, the appearance of an oil emulsion in the air filter housing, this is a clear sign of wear or damage to the parts of the piston group.
Overheating
Violation of the normal temperature regime can be detected by observing the behavior of the arrow on the temperature gauge located on the instrument panel of the car. When overheated, it moves to the red sector of the scale. In more complex cases, the coolant simply boils. Under no circumstances should you continue driving with such a malfunction. This will inevitably lead to, at a minimum, burning the cylinder head gasket.
Engine overheating can be caused by:
- thermostat malfunction (blocking the movement of fluid through the cooling radiator);
- breakdown of the water pump (pump);
- low level of coolant in the system (depressurization, coolant leakage);
- inefficient operation of the radiator (clogging of tubes, external lamellas);
- broken radiator fan drive belt.
Having found that the car's engine has begun to overheat, the first step is to check the coolant level in the expansion tank. Next, you need to determine whether the thermostat opens to a large circle. To do this, just touch the radiator pipes. With a warm engine, they should both be hot. If the top is hot and the bottom is cold, the thermostat is defective and needs to be replaced.
It is almost impossible to determine the malfunction of the pump without dismantling it, so this option is best left for last. But the performance of the fan is easy to determine. At the "penny" it has a permanent drive. Its impeller is driven by a V-belt from the crankshaft pulley. By the way, this belt also ensures the operation of the water pump, so if it breaks, two nodes of the cooling system will fail at once.
Extraneous noises in the engine
The car engine itself is a rather complex mechanism that makes many different sounds during operation. It is impossible for an uninitiated person to determine by ear the malfunction of the power unit, but a specialist, even without additional equipment, can tell you what kind of sound is superfluous and what kind of breakdown it indicates. For VAZ 2101, the following extraneous sounds can be distinguished:
- knock of valves;
- knocking main or connecting rod bearings;
- clatter of piston pins;
- loud rustling of the timing chain.
Valve knocking can occur due to increased clearance in the valve mechanism, worn valve springs, worn camshaft cams. A similar problem is solved by adjusting the valves, replacing the springs, restoring or replacing the camshaft.
The crankshaft main and connecting rod bearings can also make knocking sounds. Such a malfunction may indicate low oil pressure in the system, increased clearance between the liners and connecting rod journals, and severe wear of the bearings themselves.
Piston pins usually knock for one reason - an incorrectly set ignition angle. Their knocking indicates that the air-fuel mixture ignites too early, which causes the detonation process in the combustion chambers. It is enough to "delay" the ignition a little by turning the distributor clockwise, and the problem will disappear.
The timing chain cannot but rustle while driving, but a too loud sound is a sign of either stretching or a breakdown of the damper. Such a breakdown is eliminated by replacing the damper or tensioner shoe.
Learn more about the VAZ 2101 ignition system: https://bumper.guru/klassicheskie-modeli-vaz/elektrooborudovanie/zazhiganie/kak-vystavit-zazhiganie-na-vaz-2101.html
Thick white exhaust
A serviceable engine in dry weather practically does not smoke. In frost or rain, the exhaust becomes noticeably denser due to condensate. This is absolutely normal. But if thick white (in some cases bluish) smoke comes out of the exhaust pipe, regardless of weather conditions, most likely there is wear on the piston rings, and maybe the pistons themselves with the cylinder walls. In this case, the oil enters the cylinders and burns out, and the one that does not burn out is expelled through the carburetor into the air filter housing. It is the burnt grease that forms the same white smoke. In addition, when parts of the piston group are worn, exhaust gases can enter the lubrication system, creating excess pressure there. As a result, oil can even leak out through the dipstick hole. There is only one way out - engine overhaul.
But that's not all. White exhaust is also a sign of cylinder head gasket damage, in which coolant circulating in the cooling jacket enters the combustion chambers. This malfunction is almost always accompanied by exhaust gases entering the expansion tank. So, when you see white smoke, do not be too lazy to look into the tank. The smell of exhaust and air bubbles will point you in the right direction in search of a breakdown.
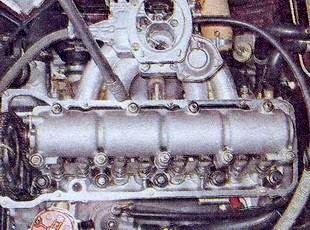
Repair of the VAZ 2101 engine
Repair of the “penny” power unit, associated with the replacement of elements of the piston group, as well as parts of the crankshaft, is carried out after it is removed from the car. As for the gearbox, it can not be dismantled. Consider the easiest way to dismantle the motor without a gearbox.
Removing the VAZ 2101 engine
To dismantle the VAZ 2101 engine, you will need:
- garage with a viewing hole and a hoist (lifting device);
- a set of wrenches and screwdrivers;
- a container for collecting coolant with a volume of at least 5 liters;
- marker or piece of chalk;
- two old blankets (covers) to protect the front fenders of the car when removing the engine from the engine compartment.
The order of work is as follows:
- We drive the car to the inspection hole.
- We disconnect the hood from the car body by unscrewing the nuts of its fastening to the canopies. In order not to suffer later with setting the gaps of the hood, before removing it, we circle the canopies along the contour with a marker. These marks will help you install the hood in the position it was before.
- We cover the front fenders of the car with a blanket.
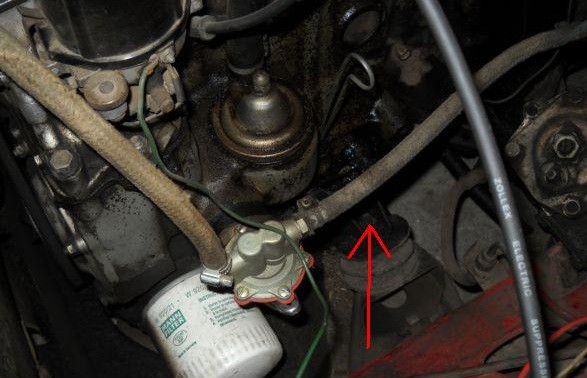
- We drain the coolant from the cylinder block by unscrewing the drain plug and substituting a pre-prepared dry container under it.
 Before removing the engine, be sure to drain the coolant
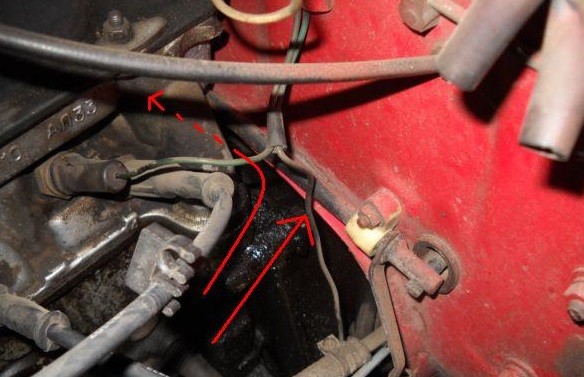
 - We loosen the clamps on the pipes going to the radiator on both sides. We remove the nozzles, remove them to the side.To remove the pipes, you need to loosen the clamps of their fastening.
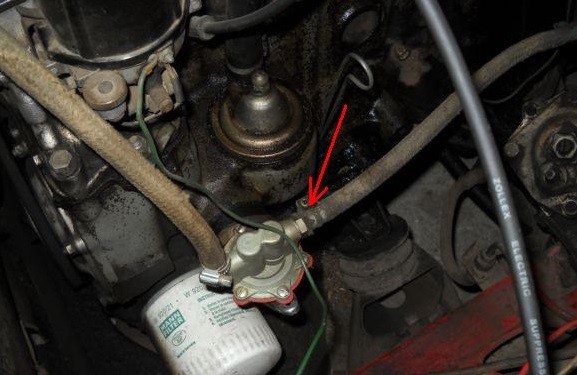
- We disconnect the wires from the spark plugs, distributor, oil pressure sensor, remove them.
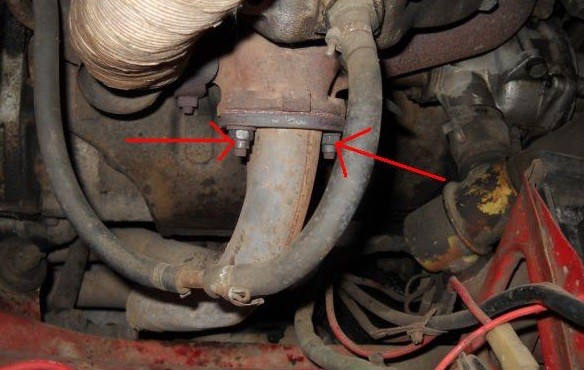
- Loosen the clamps on the fuel lines. We remove the hoses going from the highway to the fuel pump, filter and carburetor.Fuel lines are secured with clamps
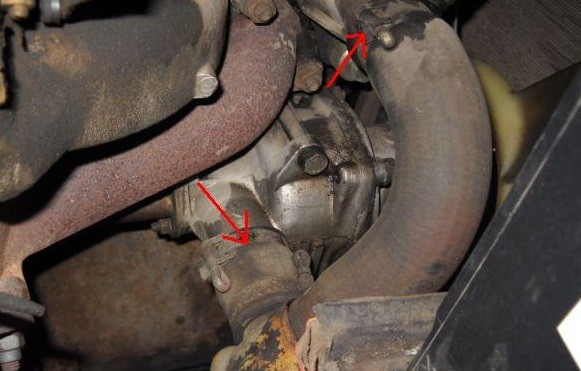
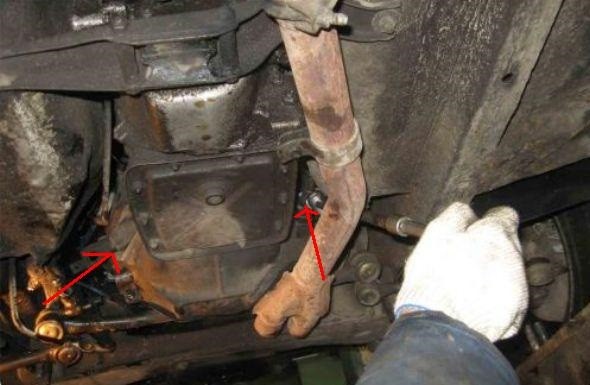
- We disconnect the intake pipe from the exhaust manifold by unscrewing the two nuts on the studs.To disconnect the intake pipe, unscrew the two nuts
- Disconnect the terminals from the battery and remove it.
- Loosen the three nuts securing the starter. We remove the starter, remove it.The starter is attached with three nuts.
- We unscrew the two upper bolts securing the gearbox to the engine.The upper part of the gearbox is fixed with two bolts
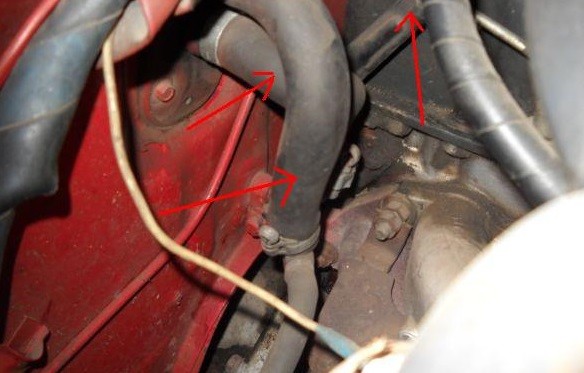
- Loosen the clamps of the heater radiator pipes. Disconnect pipes.The stove pipes are also fastened with clamps.
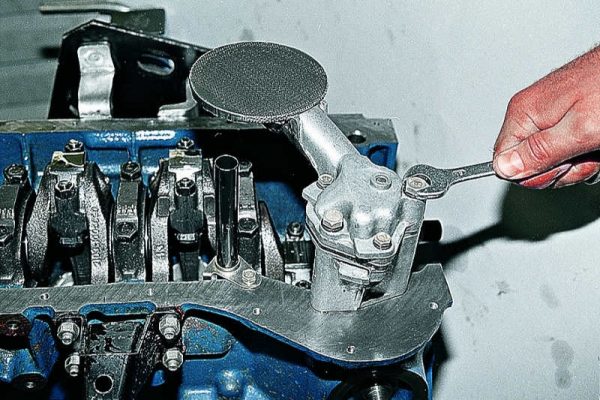
- We dismantle the throttle and air damper drives on the carburetor.
- We go down into the inspection hole and dismantle the clutch slave cylinder. To do this, remove the coupling spring and unscrew the two bolts of its fastening. Set the cylinder aside.
- Remove the two lower gearbox mounting bolts.The gearbox is also attached to the bottom with two bolts.
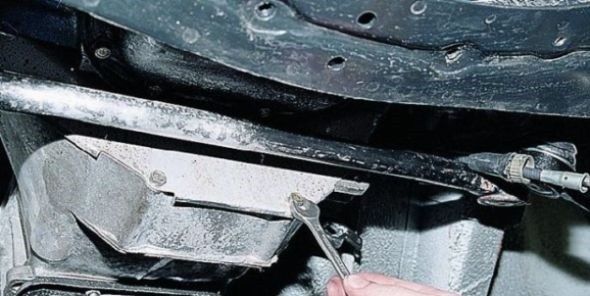
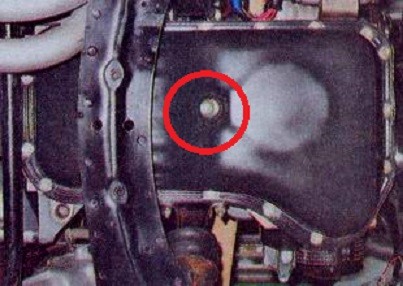
- We unscrew the four screws securing the protective cover.The cover is held on by four bolts.
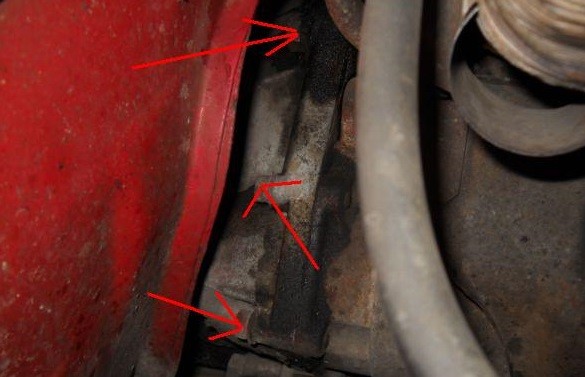
- We unscrew the nuts securing the engine to both of its supports.The engine is mounted on two supports
- We throw belts (chains) of the hoist on the power unit. We check the reliability of the capture.
- We turn on the first gear and carefully begin to raise the motor with a hoist, trying to shake it a little, removing it from the guides.The easiest way to lift the engine is with an electric hoist.
- Carefully raise the engine and lower it to the floor. For greater convenience, it can be installed on a table, workbench or other stand.
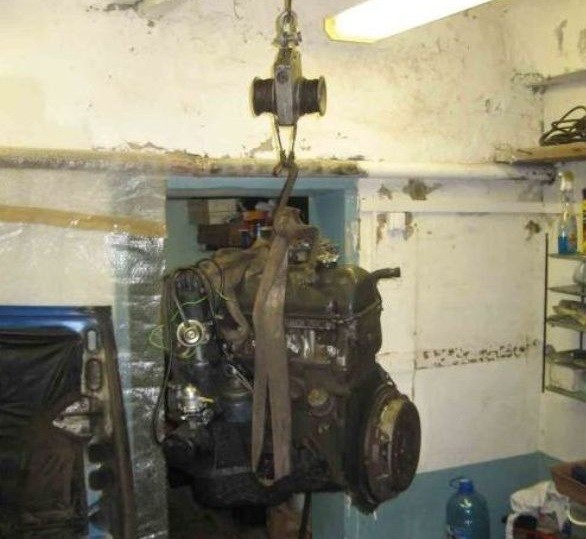
Video: how to remove the VAZ 2101 engine

Replacing the earbuds
To replace the liners, you will need a set of wrenches and screwdrivers, as well as a torque wrench.
To replace rings, you must:
- Clean the engine from dirt, oil drips.
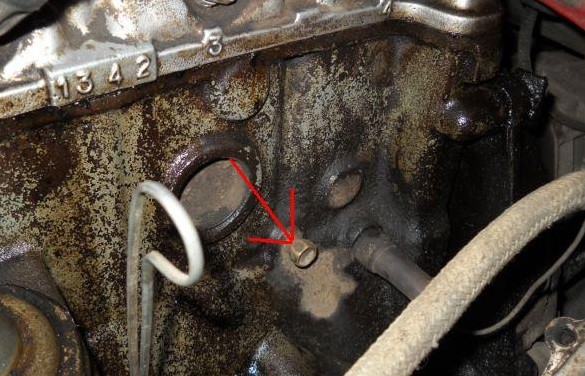
- Drain the oil from the oil pan by unscrewing the drain plug with a 12 hex wrench.To drain the oil from the sump, you need to unscrew the plug with a 12 hex wrench.
- Disconnect the pan by unscrewing all twelve bolts around its perimeter with a 10 wrench.
- Remove the carburetor and ignition distributor from the engine.
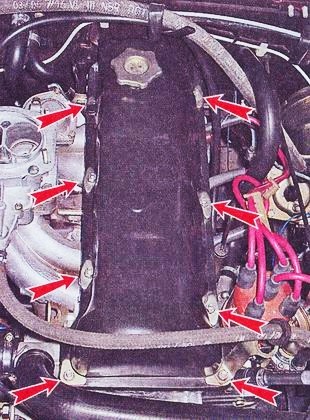
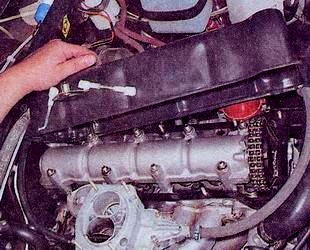
- Using a 10mm socket wrench, unscrew all eight nuts securing the cylinder head cover.The cover is attached with eight bolts.
- Remove cover from pins.
- Remove cover gasket.A gasket is installed between the head and the cover
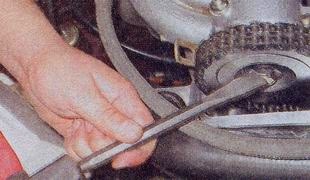
- Using a large slotted screwdriver or chisel, bend the lock washer of the camshaft sprocket bolt.The star is fixed with a bolt with a folding washer
- Unscrew the bolt with a 17 wrench and remove it with washers.The fastening bolt is unscrewed with a key of 17
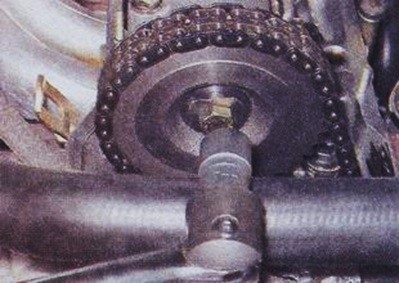
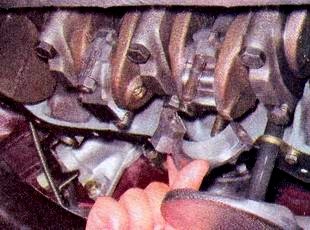
- Remove the timing chain tensioner by unscrewing the two nuts with a 10 wrench.The tensioner is held on by two nuts.
- Disconnect the star along with the chain.
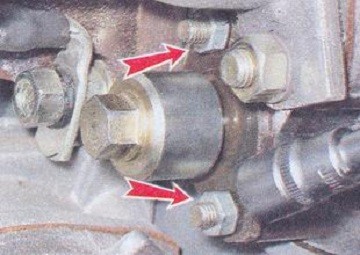
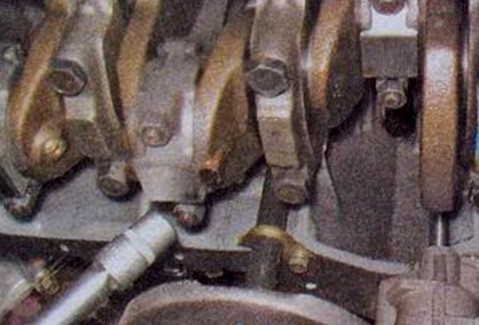
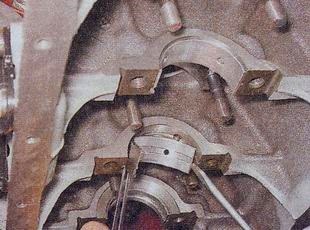
- Using a 13 socket wrench, unscrew the nuts securing the camshaft bearing housing (9 pcs).The bearing housing is secured with nine bolts.
- Remove the housing from the studs together with the camshaft.
- Using a 14 wrench, unscrew the connecting rod cap nuts.Each cover is held on by two nuts.
- Remove the covers with inserts.The bushings are located under the connecting rod caps.
- Disconnect all connecting rods from the crankshaft, remove all liners.
- Using a 17 wrench, unscrew the bolts of the main bearing caps.
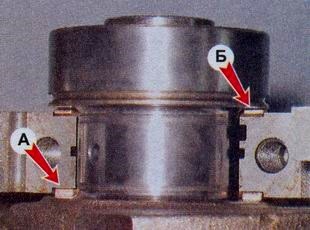
- Remove the bearing caps and take out the thrust rings (the front one is made of an alloy of steel and aluminum, and the rear one is made of sintered metal).A - steel-aluminum, B - cermet
- Remove the main bearing shells from the covers and cylinder block.The main bearing shells are located in the cylinder block
- Remove the crankshaft from the crankcase, wash it in kerosene, wipe it with a dry, clean cloth.
- Install new bearings and thrust washers.A - main, B - connecting rod
- Lubricate the main and connecting rod journals of the crankshaft with engine oil, install the crankshaft into the cylinder block.
- Install the main bearing caps, tighten their bolts with a torque wrench, observing the tightening torque at 68,4–84,3 Nm.
- Install the connecting rods with liners on the crankshaft. Screw in and tighten nuts to 43,4 - 53,4 Nm.
- Reassemble the engine in reverse order.

More about the VAZ 2101 carburetor: https://bumper.guru/klassicheskie-modeli-vaz/toplivnaya-sistema/karbyurator-vaz-2101.html
Replacing the piston rings
To replace the rings, you will need the same tools, a vise with a workbench, as well as a special mandrel to compress the pistons during installation.
To replace rings, you must:
- Perform the work provided for in paragraphs 1-18 of the previous instructions.
- Push the pistons and connecting rods one by one out of the cylinder block.
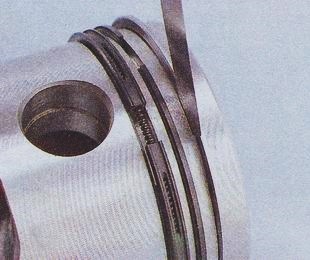
- Clamping the connecting rod in a vise, remove one oil scraper and two compression rings from the piston. Repeat this procedure for all four pistons.Each piston has two compression rings and one oil scraper ring.
- Clean the pistons from soot.
- Install new rings, correctly orienting their locks.
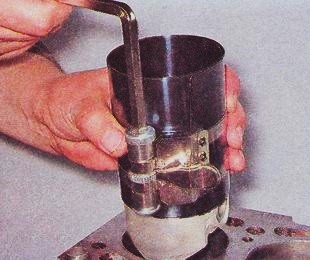
- Using a mandrel, install the pistons in the cylinders.It is much more convenient to install a piston with rings using a special mandrel
- We assemble the engine in the reverse order.
Removal and repair of the oil pump
Repair of the oil pump is possible without removing the engine. But if the power unit is already dismantled, then why not disassemble the pump and check it. This will require:
- Unscrew the two bolts securing the device with a 13 wrench.The oil pump is attached with two bolts.
- Remove the pump from the engine along with the gasket.
- Disconnect the oil intake pipe by unscrewing the three bolts with a 10 wrench.The pipe is fixed with three bolts
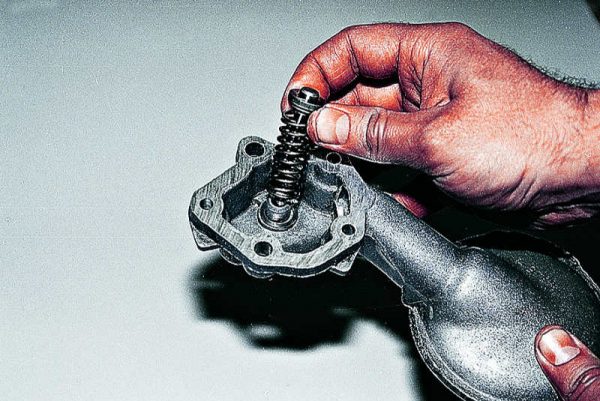
- Remove pressure reducing valve with spring.The pressure reducing valve is used to drain the oil when the pressure in the system increases.
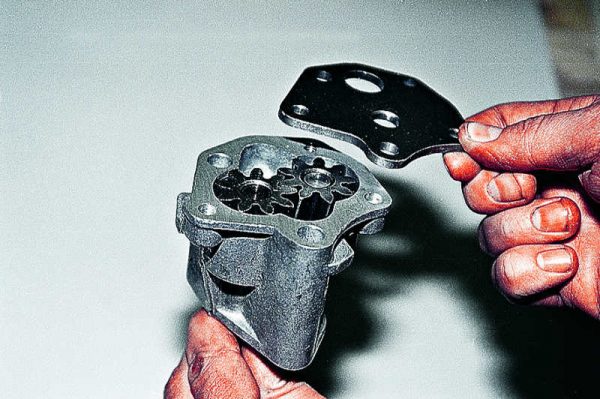
- Detach cover.There should be no dents or scratches on the inside of the cover.
- Pull out the drive gear.
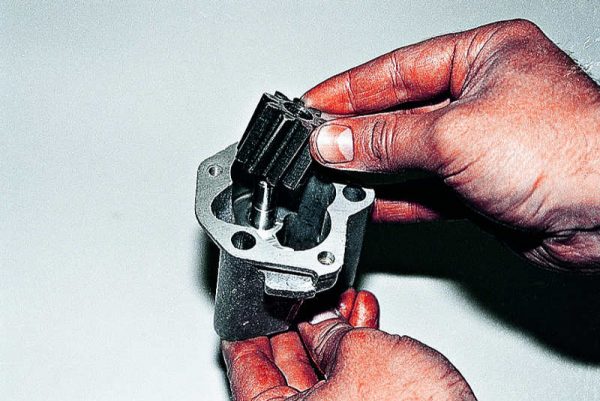
- Remove driven gear.The oil in the system circulates due to the rotation of the driven gear
- View device details. If the pump housing, cover, or gears show visible signs of wear or damage, they must be replaced. In case of significant damage, the pump assembly must be replaced.
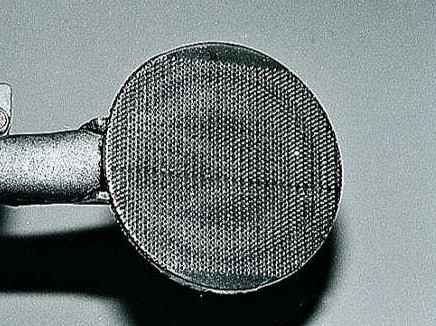
- Clean the oil pick-up screen.If the screen is clogged, the pressure in the lubrication system will be insufficient.
- Assemble the pump in reverse order.

Video: assembly of the VAZ 2101 engine

Yes, self-repair of an engine, even if it is as simple as a VAZ 2101, is a very time-consuming task and requires certain knowledge. If you think that you can not cope with such a task, it is better to contact a car service.

