Changeover to CNC adjustable hand levers
This mechanic guide is brought to you at Louis-Moto.fr.
The brake and clutch levers must be perfectly tailored to the driver's hands. Thanks to the conversion to adjustable levers, this is possible and is especially suitable for drivers with small or large hands.
Switch to CNC adjustable hand levers
Precision milled high quality CNC anodized hand levers give all modern motorcycles a sophisticated look and make them stand out from the rest of the range. Of course there are other references in this area too, for example CNC. They give the car a certain elegance that is always present in the driver's field of vision. In addition, these levers allow multi-level adjustment of the distance from the steering wheel and thus individually adapt to the size of the driver's hands. These models are especially appreciated by drivers with small hands and often having difficulty with butt levers. In addition, a very short version is available for sport pilots. Their shape helps to properly meter the manual force transmitted to the braking system, and if the rider carefully places his motorcycle in the gravel pit, the lever is often retained.
The note : If your motorcycle has a hydraulic clutch, the clutch lever is installed as a hydraulic brake lever.
On most motorcycles, switching to CNC hand levers is very easy (even if you are an amateur handyman) as long as you have a set of wrenches with the right heads and the right screwdrivers. You will also need grease to lubricate the moving parts.
Warning: Perfect functioning of the hand levers is essential for road safety. For example, a jammed brake lever can have tragic consequences for road traffic. Therefore, it is imperative that you work with care and understand how the various components work. Otherwise, it is imperative to entrust the assembly to a specialized garage. Before using the motorcycle under normal conditions, it is necessary to pass the test in the workshop and on the road on a deserted road.
Switching to CNC adjustable hand levers - let's go
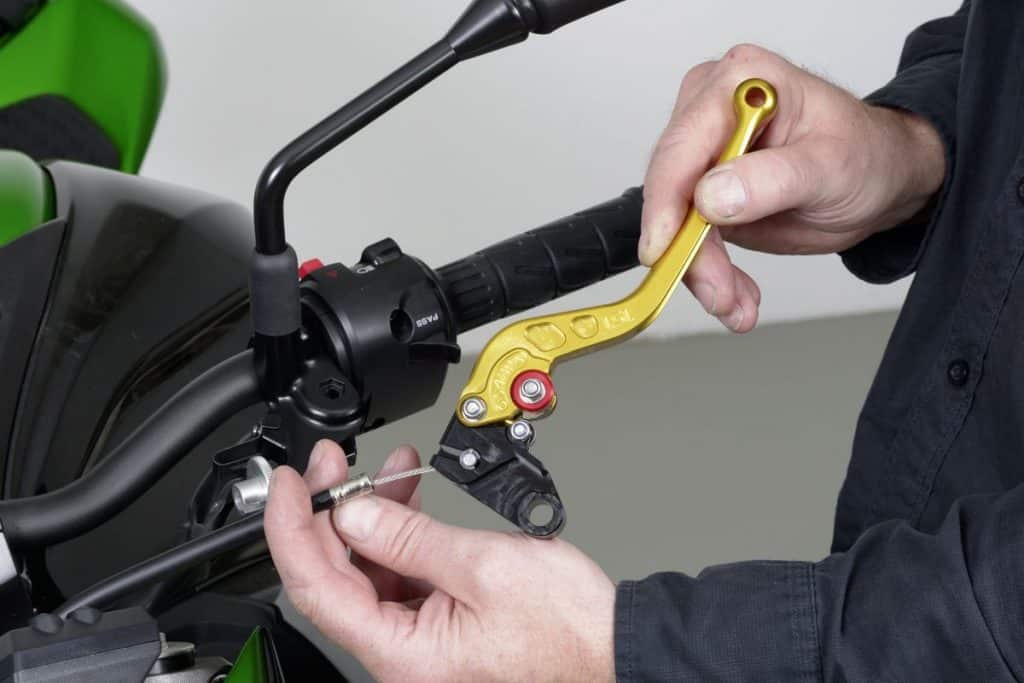
01 - Disconnect and unhook the clutch cable

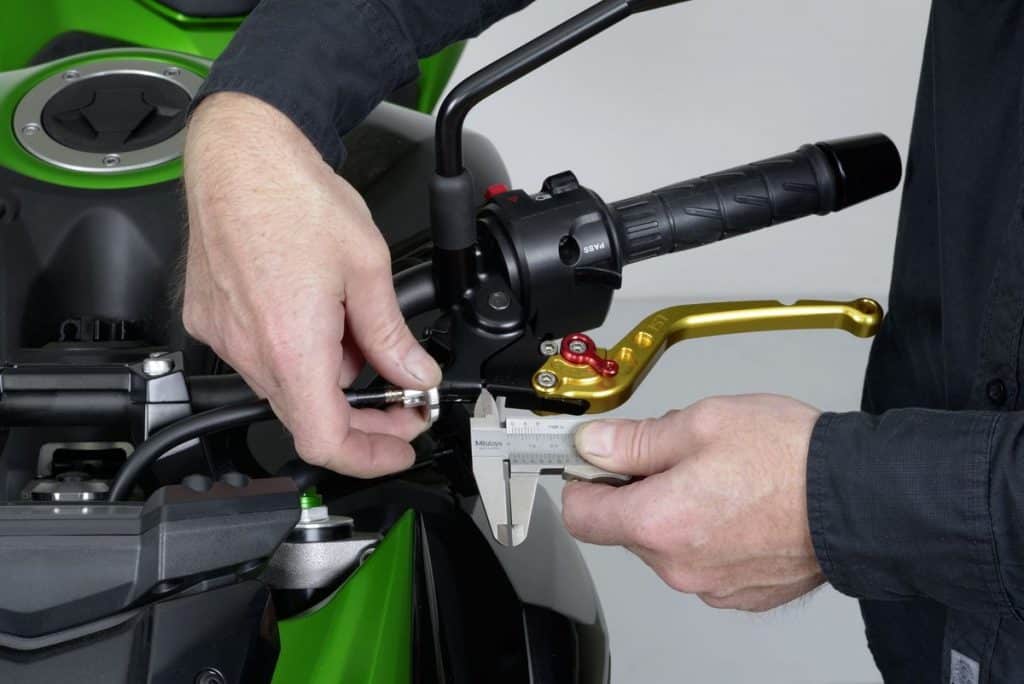
Before disassembling the clutch lever, the clutch cable must be disconnected and uncoupled. The clutch lever must have some play so that the clutch does not slip when disengaged. Often the driver gets used to the optimum clutch clearance for him. Therefore, after conversion, he will be happy to find the same clearance. To do this, it is advisable to measure the clearance with a vernier caliper before turning the cable adjuster back until you can disconnect the cable. To unhook the cable, it is necessary to align the slots in the adjuster handle, adjuster and armature.
02 - Unhook the clutch cable
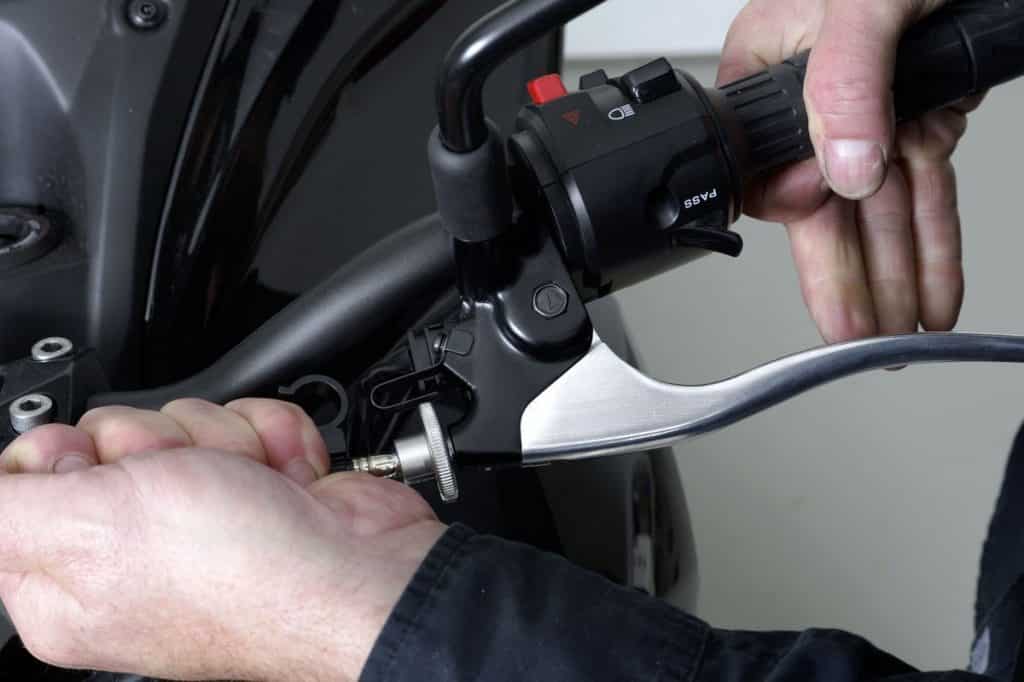
A little effort is often required (pull on the lever, grip the Bowden cable firmly with your other hand, pull the outer casing out of the adjuster while slowly releasing the lever, and disconnect the cable from the adjuster). It is sometimes easier to unhook it by first unscrewing the lever bolt.
If not, you should also loosen the long bowden cable or motor regulator slightly. To loosen the lever bearing screw, we had to first remove the clutch switch from our bike, as it is very close to the locknut. Then you can remove the old arm and its bearings. There may still be a thin spacer ring between the frame and the arm; this is used to compensate for the game, be careful not to lose it.
03 - Check the long grip
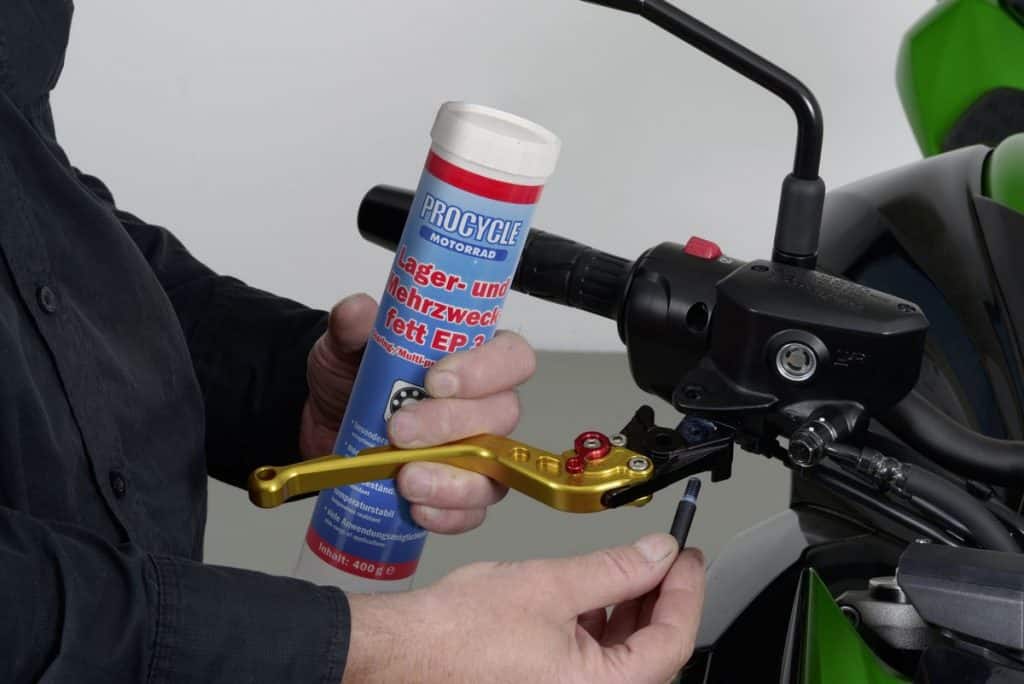
Before installing a new arm, check if you need to take back the original bearing shell, as in our case. Clean it and lubricate it well before inserting it into the new arm.
04 - Cleaning the clutch cable
Also apply some grease to the top and bottom points of contact of the new arm with the frame so that it “glides” well and wear out as little as possible. Also clean and lubricate the end of the clutch cable before inserting it into the new lever. Then you can insert a new arm (with a spacer ring if necessary) into the frame and tighten the bolt; Do this step effortlessly because the lever should not lock under any circumstances. If there is a nut, it must always be self-locking.
If the clutch switch was removed, reposition it. Be careful not to damage or block the movable follower (mostly plastic). Pull the bowden cable lightly out of the black sheath (if necessary, press the silver sheathed end of the cable against the adjusting wheel) and hook the cable onto the adjuster.
05 – Clutch play adjustment
Then adjust the clutch free play according to the measurement you made earlier. The gap between the edge of the arm and the frame is usually about 3mm. Then adjust the distance between the lever and the handlebar so that it can be used optimally in the riding position. Check again that everything works before using the motorcycle again: Is the clutch working properly? Does the clutch switch work? Is the clutch shifting easily (make sure it doesn't jam, lock up, or make panning noise)?
06 - Brake lever rework
In the case of hydraulic brakes, adjustment of the cable on the lever is prohibited; therefore, the replacement of this lever is faster. It is especially important to carefully monitor the correct operation of the brakes!
Start by loosening the bolt. It is possible that it is held in the armature not only by a lock nut, but also by an additional thread. When removing the arm from the anchor, check if there is a thin spacer ring; this is used to prevent slamming ... don't lose it! If you need to reuse the original arm bearing bush, you must clean it well. Lightly lubricate the bearing shell and bolt, as well as the location of the new arm (this is the protrusion that drives the piston in the brake frame) and the points of contact with the frame at the top and bottom of the arm.
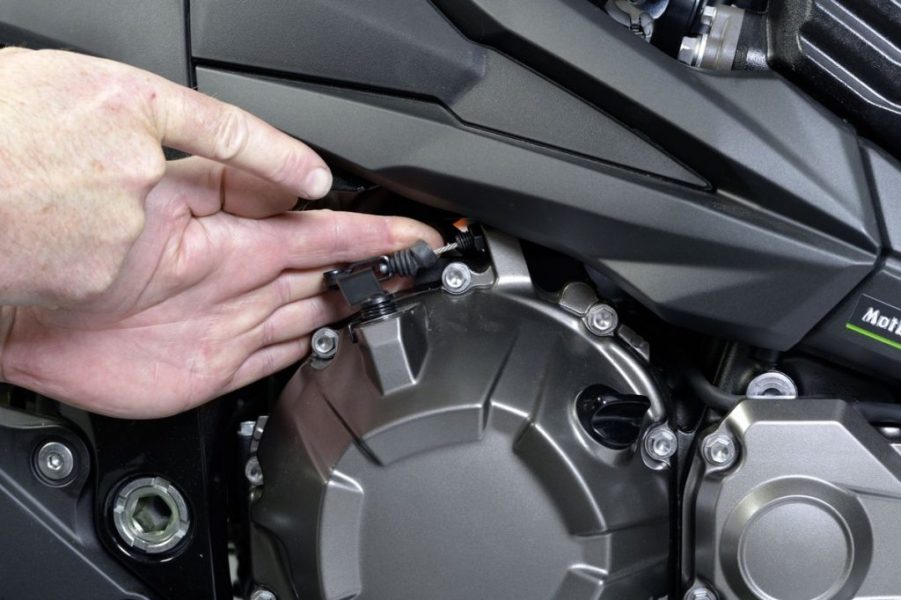
07 - Watch the brake light switch push pin.
Some models have an adjustment screw on the lug. This should be adjusted to a small clearance so that the lever does not push the piston constantly (eg on BMW models). Also pay attention to the brake switch plunger when installing the new arm in the armature. If it is blocked, it could be damaged; there is also the danger of the brake lever self-locking! Therefore, you must perform this step with great care!
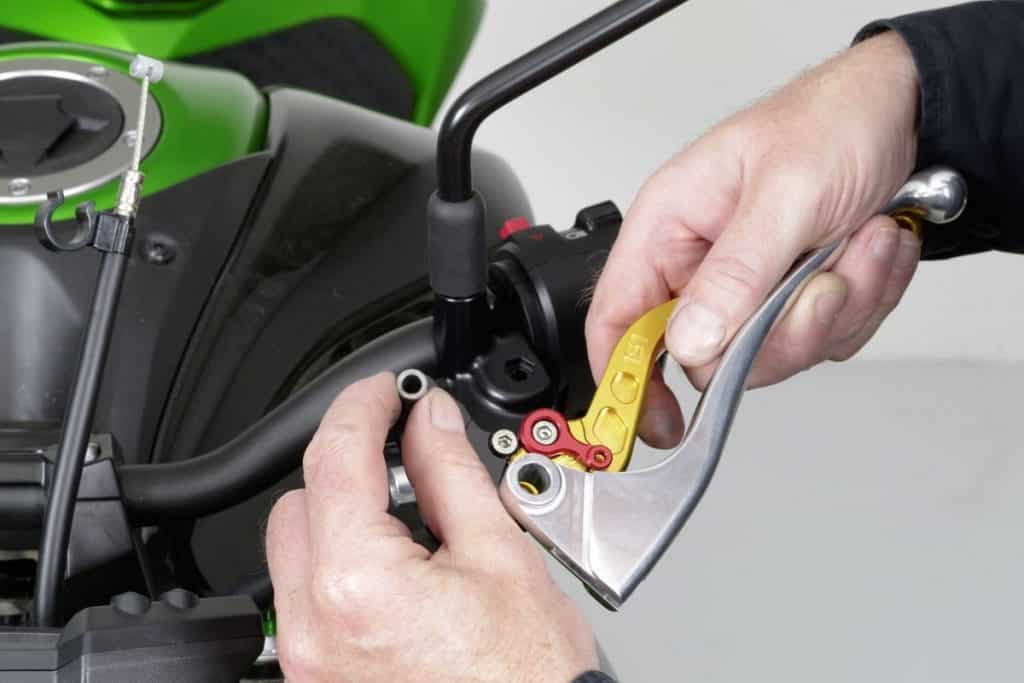
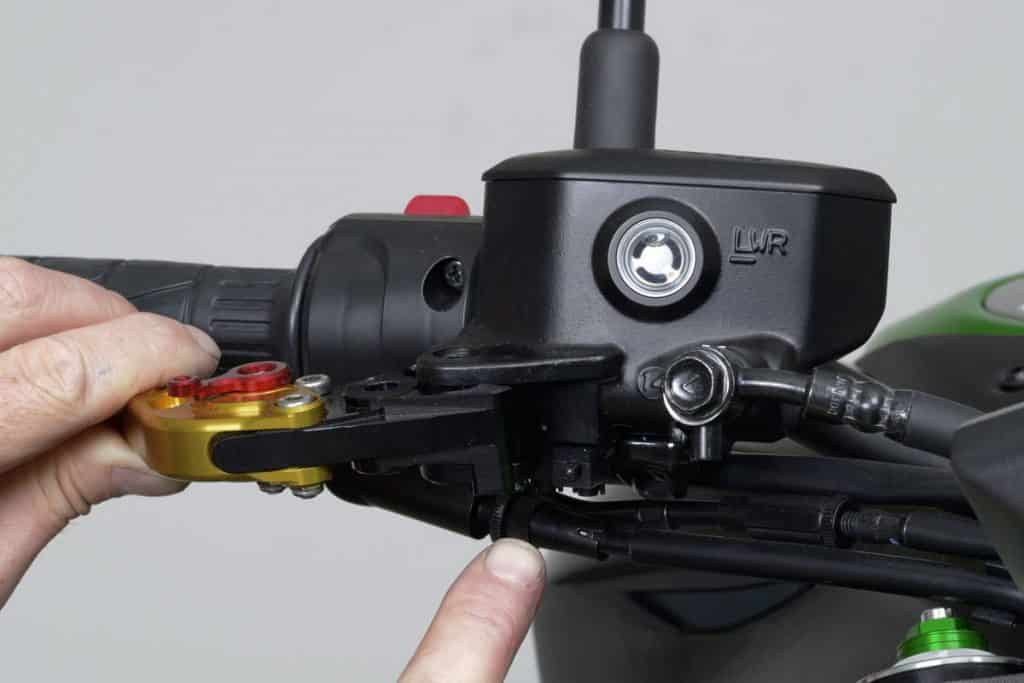
08 - Lever adjustment

After screwing in the new lever (be careful not to force it or lock it), adjust its position in relation to the handlebars with the adjuster so that the rider can optimally control the brake while sitting on the motorcycle. Before getting back on the road, double-check that the brake is working properly with the new lever: can it be easily applied without wobbling? Is there a slight play in relation to the piston (so that the piston is not subjected to constant stress)? Is the stop switch working properly? If all those checkpoints are in order, let's go, enjoy your ride!