Sandblaster: how to assemble the installation at home
Content
 Sandblasting has become a part of everyday life, it is used in many cases, but what is it like?
This is, first of all, the interaction of air with small particles of sand, which, under high pressure, form an air-sand jet for processing various products.
A jet in the direction flies out of the gun. The apparatus has been actively used for centuries in various parts of the industry.
Such equipment will be needed for grinding, removing paint, applying a primer, car tuning.
If the processing area is very small, then many cope with sandpaper, but large areas will take too much time and effort. With a homemade sandblasting installation, a minimum of time is required.
The device can be purchased at any store where building materials are presented, or you can try to create it on your own.
Be prepared that a good device will not be cheap if you still do not dare to make it yourself. After all, having certain skills, you do not have to spend a lot of time and effort, especially if you regularly make something.
What are sandblasters made of?
There are several ways to make a sandblasting installation, but, despite the choice, you will need a certain list of materials.
- compressor;
- pipes and hoses;
- gun to be used for painting;
- plumbing fittings;
- nozzle, faucet and plastic bottle.
A good owner keeps at least half of the listed list in his garage or pantry.
But the compressor will have to be bought, but when compared with the cost of the entire apparatus, then this is an insignificant waste.
Types of sandblasters
Choosing the necessary equipment, it is worth, first of all, to determine what it will be used for. By answering this question for yourself, you will decide on the type of sandblasting installation.
If it is designed to process glass objects for the purpose of decoration, then the parameters of the sandblasting chamber depend on the surface area of processing.
If the next task is to paint or prime, then an open-type apparatus should be used that can clean the surface for the above needs. But to work with this type of equipment, a separate room is required.
Another criterion that influences the choice of a variety of sandblasters is the frequency of their use.
If you decide to open your own business and put the work on stream, then for frequent use you need a powerful product, this is the only way to provide qualified services.
The more time the device is used, the more powerful it should be.
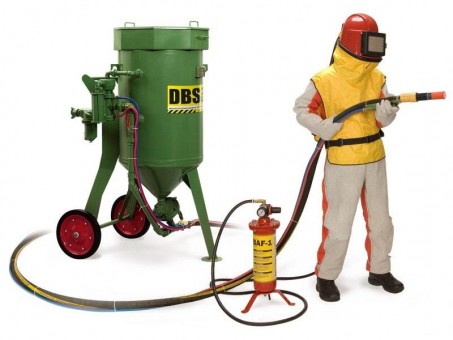
Such a device, created by one's own hands, can only be of two types:
1. Pressure, which assumes the formation of air in the installation and the dispenser. Air and sand particles fly out of the nozzle in a jet.
The jet speed is high, which allows you to clean a large piece of the territory in a fairly short period of time.
2. Engineering involves the flow of air and sand through two different sleeves and mixing them in the tip.
It is easiest to do it on your own, but with this design, the list of items that can be processed is much smaller. This can be explained by a weak air flow with an abrasive.
Making a simple installation at home
The sandblasting machine is the simplest, represented by two components such as a nozzle and a handle with a fitting. Air enters one, and sand enters the second.
If you want the tip for ejection of a stream of air and sand to not wear out and serve for a long time, then it is worth choosing the appropriate material.

The most reliable option is tungsten or boron carbide. It is durable and will last for several tens of hours with continuous operation.
Cast iron or ceramic materials will wear out much faster, although they will cost more, then why pay more?
Having decided on the tip, we proceed to the formation of the body of the gun, which is sharpened for them. A plastic bottle, which must be fixed on top, will serve as a container for the abrasive.
The design is ready, but without a compressor it will not work, so the final step is to connect it. He will also be responsible for the air supply.
The principle of operation of the device is that the incoming air is immediately in the bottle, and then in the tee. Mixed with abrasive, the mixture is sent to the top of the tee.
If you want to control the amount of abrasive in the air, you should attach an appropriate faucet. It will be possible to assemble the device in just an hour, provided that all the components and improvised materials are available.
Universal Sandblasting Chamber
The camera is used in cases of processing small parts. It is made in the form of a metal box, which you can make yourself or purchase.
In any case, in the future it will have to be sheathed with a steel sheet. To make it more convenient to work with it, place the device on a stand.
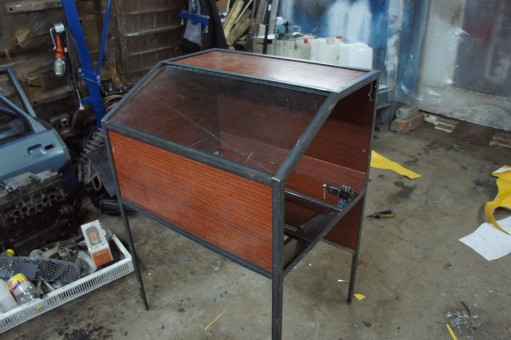
Make a window in this chamber that will allow you to observe the process. It is recommended to place it on top.
Working with the camera involves the implementation of certain actions with its components inside, so the device is divided into two parts, where rubber gloves are inserted.
Such gloves, like glass, are a consumable item that needs to be replaced over the years. But in order not to do this too often, try to select high-quality materials. Think about this point in advance so that it does not cause unnecessary trouble.
At the bottom of the chamber there is a wire grate and a welded chute, necessary for placing already used sand into it. A hole is made in the cylinder of the box for air to enter.
To illuminate the camera, it is enough to use ordinary fluorescent lamps. A homemade chamber can be equipped with ventilation, but sometimes they do without it.

The component that you are going to process must be placed through a pre-prepared door. If the part is long, then the structure can be covered with a tarpaulin, so it is easier to drive them through the created device.
The tarp will serve as protection and will not allow sand to fly out of the chamber.
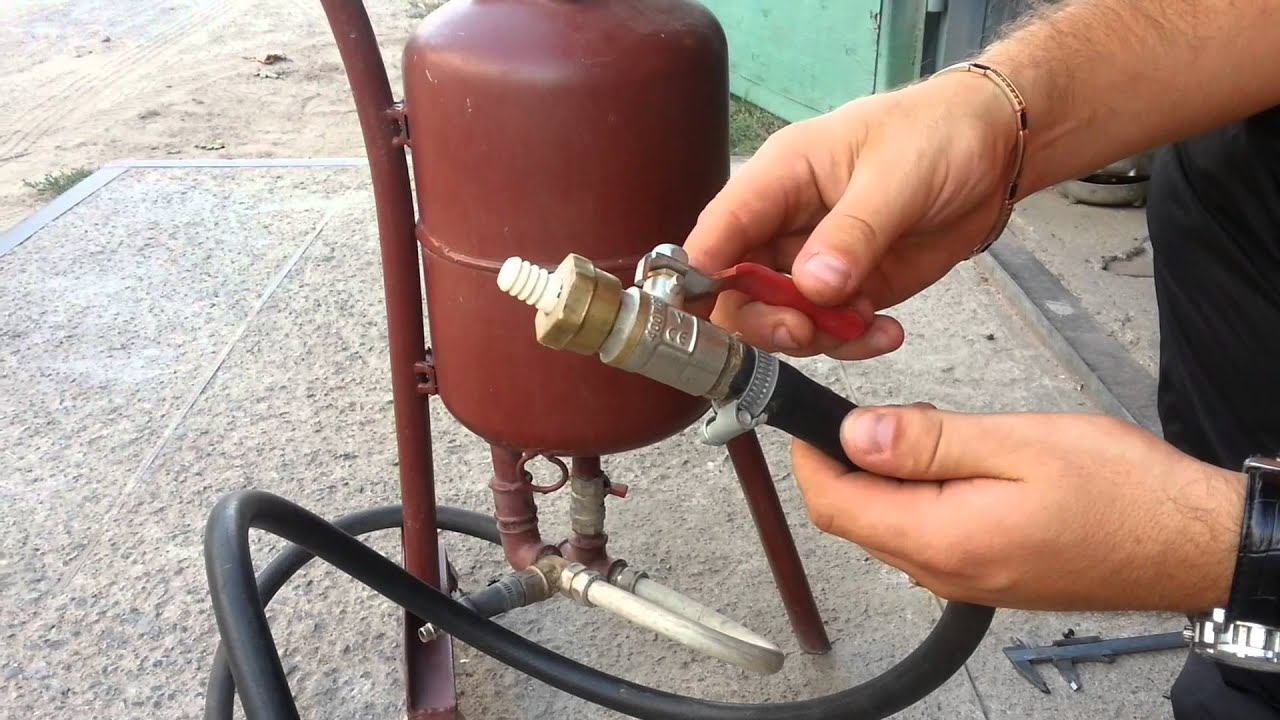
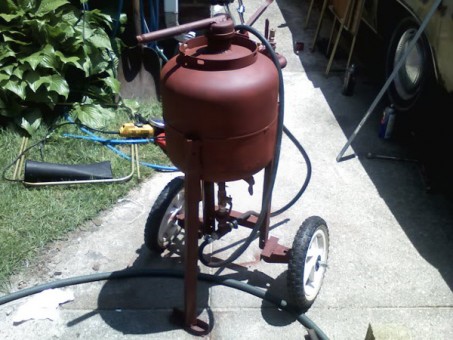
How to make a device from a fire extinguisher?
Specialists manage to make sandblasting installations from a fire extinguisher. Of the entire design of the fire extinguisher, only a shell is needed, in which a metal tube with a thread is installed.
To fix it, it is worth making holes on both sides. Air will enter through this pipe, and a 18 * 8mm groove hole is made for sand.
All components of the fire extinguisher are soldered back after attaching the tube. An abrasive enters there, nozzles are fixed to the lower end, and a compressor is fixed to the upper end.

Sand enters the bottom of the tube, the incoming pressure pushes the sand out, it instantly flies out of the tip installed on the device.
If a fire extinguisher was not at hand, then any container, the same as a gas cylinder, can do. Just first get rid of possible gas residues by expelling it with the same compressor.
Abrasive as a consumable
Sand for the functioning of this apparatus is not at all suitable, because it is heterogeneous, the size and shape of the inclusions are completely different.
A problem may arise and affect the very quality of work and its result.
Large particles will cause deep scratches. For such cases, there is a special consumable that can be found in a store selling building materials - abrasive mixtures.
They can be presented in different shapes, sizes and hardness. Especially for our procedure, the most affordable abrasive is suitable.

There are also those who are ready to spend their time sieving ordinary river sand through a sieve, which in this case is also suitable for work.
glass engraving
Moreover, with this device you can touch the beauty and engrave glass, who knows, maybe over time the hobby will grow into a serious business.
We glue the surface of the glass and draw the desired pattern on the film.
Then we process the image with a homemade tool and remove the film to evaluate the result of the work. Each master independently determines the depth of engraving, preliminary test application.

The pattern will look beautiful in any occasion, it can be decorated with LED pendant. A home-made device can easily cope with such a task and at the same time it is in no way inferior to an expensive counterpart from a store.
All glass surfaces can be sandblasted.
We take a metal plate, cutting holes in it, the surface is processed after the sheet adheres tightly to the surface. The procedure will take several minutes and the consumption of sand is minimal.

This working method is ideal when using a smooth, chip-free hole. The device is also suitable for other needs, for use, both at a professional and amateur level.
With him there is an opportunity to carry out a large list of works, which is difficult to imagine. A good owner should certainly stock up on sandblasting.
Tips for working with a homemade device
Many owners of home-made devices are more confident in them than in imported equipment, because they are made with their own hands, who else to trust, if not themselves. But still it is worth listening to a number of recommendations for use.
1. If your device is not so powerful, with a volume of 6 liters, then the diameter of the nozzle should be 3 mm. Too narrow is also not suitable, but if the power is large, then you should pay attention to a larger diameter.
2. Parts that are expected to be consumed over time should not be tightened too much to make it easier to replace them. These are the components that are most often in contact with the abrasive.
3. Do not install a sandblaster or use it at home. After all, no matter how strong the chamber you make, the sand will still go beyond it. The chamber is designed to retain the main dust, after the procedure, it will be extremely difficult to put things in order.
4. Even if you are working in the garage, you need to protect your airways and eyes so that the smallest particles of sand do not settle on the mucous membranes and lungs.
Goggles and a respirator will help, because this is the only way to avoid serious diseases.
There are many options for creating sandblasting on the Internet, here are some of them that turned out to be the simplest, most effective and less expensive.
With these diagrams, you will quickly realize the principle of operation of sandblasters.
If you need to regularly use this device, then you should take the process of creating the device seriously, having calculated every detail.
If you correctly follow the calculations and securely fix everything, then the device will last for many years.