
Valve adjustment VAZ 2107
Content
The valve is an element of the engine that is part of the gas distribution mechanism (timing) and controls the supply of the working mixture to the cylinder, as well as the removal of exhaust gases. A lot depends on the correct operation of the timing system: engine power, efficiency, environmental friendliness and other parameters. This article will focus on adjusting the valves of the VAZ 2107 engine.
The purpose of the valves in the engine
During its operation, the engine consumes air and fuel, and emits exhaust gases. The valves serve to allow the air-fuel mixture to enter the cylinder (through the intake valve) and to remove exhaust gases (through the exhaust valve). The alternation of intake and exhaust cycles is called the engine duty cycle. It consists of four bars.
- Inlet. The intake valve is open. The piston moves down and, due to the vacuum created in the cylinder, carries along the air-fuel mixture, which enters through the open intake valve.
- Compression. Both valves are closed. The piston moves up (toward the spark plug) and compresses the air-fuel mixture.
- Working move. Both valves are closed. The spark plug produces a spark that ignites the air-fuel mixture. During the combustion of the air-fuel mixture, a lot of gas is formed, which pushes the piston down.
- Release. Exhaust valve open. The piston moves up and pushes the exhaust gases out of the cylinder through the open exhaust valve.
 The working cycle of the engine consists of four strokes, during which the working mixture enters, compresses and burns, then the exhaust gases are removed
More about the device of the VAZ 2107 engine: https://bumper.guru/klassicheskie-modeli-vaz/dvigatel/remont-dvigatelya-vaz-2107.html
Video: the principle of operation of the engine and the purpose of the valves

The meaning of valve adjustment
The opening of the valve is controlled by the camshaft cam. When the engine is running, the valve heats up and elongates, which can cause it to close incompletely. To compensate for this elongation, there is a gap between the valve and the camshaft cam. The meaning of adjusting the valves comes down to setting the required value of this gap.
Signs of improper valve adjustment
Signs of improperly adjusted valves are:
- Extraneous metal knock from under the valve cover.
- Decreased engine power.
- The smell of clean gasoline in the exhaust.
Valve adjustment on VAZ 2107 vehicles is mandatory after the repair of the gas distribution mechanism, as well as after a run of 10-15 thousand kilometers.
Learn more about the timing device: https://bumper.guru/klassicheskie-modeli-vaz/grm/grm-2107/metki-grm-vaz-2107-inzhektor.html
Video: the principle of operation of the gas distribution mechanism

Valve adjustment on the VAZ 2107
Adjusting valves on the VAZ 2107 is not difficult. However, you will need some spare parts and materials, as well as detailed instructions.
Necessary tools and materials
Before you start adjusting the valves, you must acquire the following tools and materials:
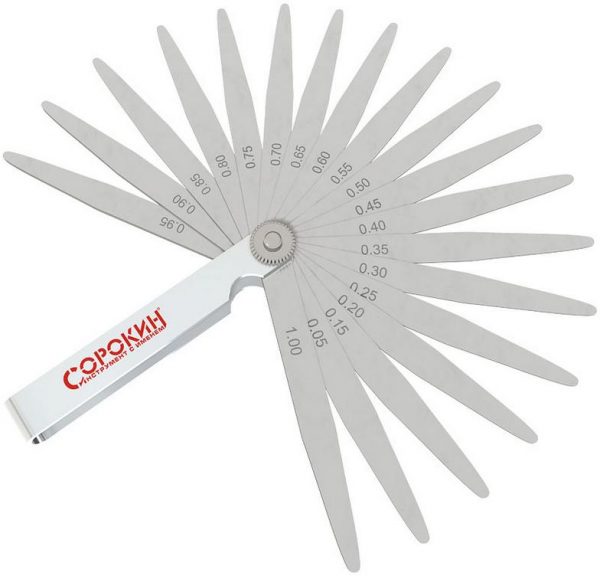
- A set of probes for adjusting gaps (or a micrometer and a rail). This is the main tool at work. It must be of good quality, you should not buy probes from a dubious manufacturer.
- Set of open-end wrenches, medium size (10–19 mm).
- Valve cover gasket. It is better to choose a gasket from a good manufacturer: Corteco or Elring.
- Clean rags or paper towels.A feeler gauge set is the main tool for adjusting valve clearances.
Valve adjustment instructions
The valves are adjusted on the engine with a temperature of not more than 20 oC. On a hot engine, it is impossible to make high-quality adjustment of the valves - this is due to the expansion of the metal when heated. To determine the temperature of the engine, put your palm on the valve cover - it should not feel warm, coolness should come from the metal of the valve cover. The work is done in the following order.
- Remove the air filter together with the housing, then unscrew the 8 nuts securing the valve cover to the engine block.Valve cover fastening nuts are located along its perimeter
- Having removed the valve cover, we see the camshaft star and rocker arms. Before adjusting the valves, it is necessary to set the fourth engine cylinder to top dead center (TDC). To do this, turn the crankshaft clockwise until the mark on the camshaft star matches the special ebb under the valve cover, and the mark on the crankshaft pulley matches the special mark on the engine block.To adjust the valves, the engine must be installed in a position in which the special adjustment marks coincide with each other.
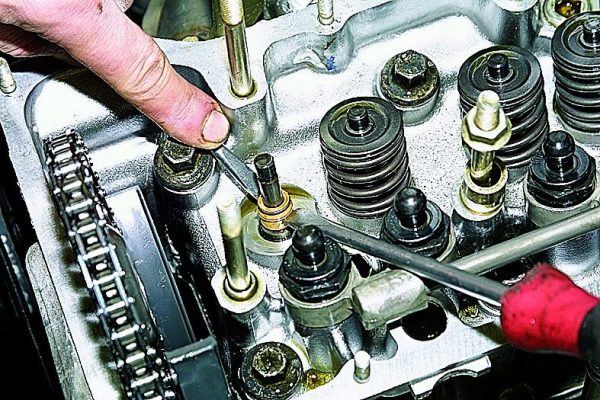
- After setting the fourth cylinder to TDC, we pick up the probe and check the gap between the camshaft cam and the valve rocker on cams No. 6 and 8. The cam numbers are counted in order from the star. The thermal clearance of valves on the VAZ 2107 should be 0,15 mm.The gap on the sixth and eighth cams should be 0,15 mm
- If the gap differs from the standard, then it must be adjusted. To do this, loosen the lower lock nut, and set the required clearance with the upper nut. After that, check the correct adjustment with a feeler gauge. The probe should enter tightly, but without jamming.Gap adjustment is made by the upper nut with loose locking fasteners
- Rotate the crankshaft 180 degrees and adjust valves No. 4 and 7.
- Turn the crankshaft half a turn again and adjust the clearance on valves No. 1 and 3.
- And once again turn the crankshaft 180 degrees and adjust the thermal clearance on valves No. 5 and 2.
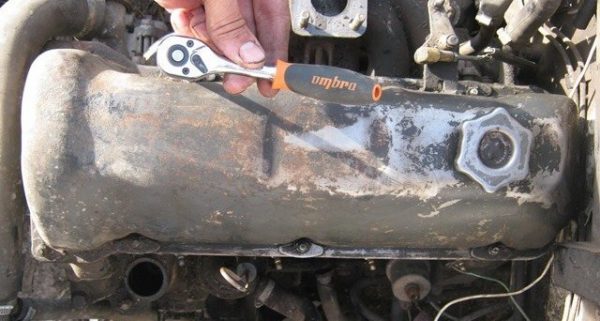
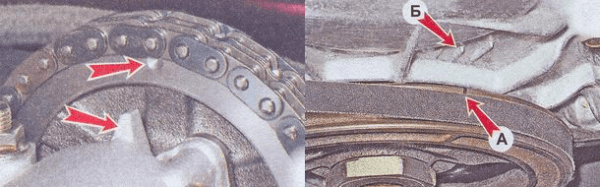
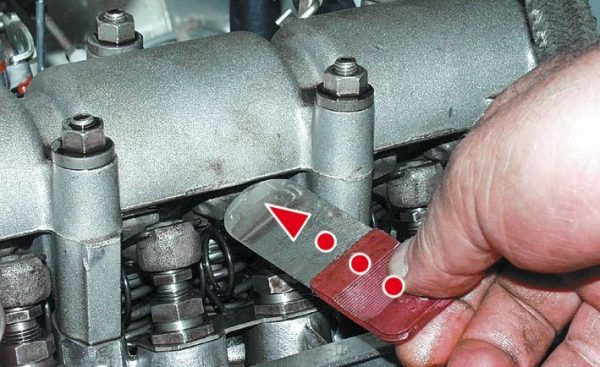

Table: valve adjustment procedure on VAZ engines
| Crankshaft rotation angle | Cylinder at TDC | Numbers of adjustable valves (cams) |
| 0о | 4 | 8 and 6 |
| 180о | 2 | 4 and 7 |
| 360о | 1 | 1 and 3 |
| 540о | 3 | 5 and 2 |
Valve stem seals
While adjusting the valves, it is quite possible that you did not even know that you were next to another very important element of the gas distribution mechanism - valve stem seals.

Purpose of oil seals
When the engine is running, the camshaft, rocker arms, valve springs and valve tops work in oil mist. Oil is deposited on all parts and mechanisms located under the valve cover. Naturally, it also ends up on the top of the valves, called stems.
Under the influence of gravity, the oil will tend to drain into the combustion chamber. As you know, it shouldn't be there. Oil scraper caps are designed to prevent oil from running down the valve stem into the engine combustion chamber.
Engine malfunctions associated with worn caps
The sole purpose of the valve stem seal is to prevent oil from running into the combustion chamber of the engine.. Over time, the rubber of this element loses its functions and collapses under the influence of an aggressive environment. This leads to the penetration of oil into the air-fuel mixture, where it burns successfully.
For a serviceable engine, oil consumption should be about 0,2 - 0,3 liters per 10 thousand kilometers. With worn valve stem seals, it can reach one liter per thousand kilometers.
Oil burning in cylinders:
- clogs and destroys catalytic converters and particulate filters (devices that reduce the content of harmful substances in exhaust gases), which in themselves are very expensive;
- causes overheating and premature failure of the engine exhaust valves;
- greatly increases the opacity of the exhaust;
- increases the risk of engine oil starvation due to lack of oil.
The resource of valve stem seals on domestic cars fluctuates around the mark of 80 thousand kilometers. This parameter very much depends on the quality of the caps themselves and the oil used.
What accessories are best to use
At the moment, the products of such well-known brands as Corteco and Elring are the most trusted among motorists and mechanics - these brands have proven themselves from the best side in the production of gaskets, oil seals, seals, valve stem seals.
There are products of domestic manufacturers on the market. Their quality varies greatly, but nevertheless falls short of the quality of the products of leading companies.
How to change oil seals
The topic of replacing valve stem seals is extensive and worthy of a separate article. Briefly, it is done like this.
- Remove the valve cover.
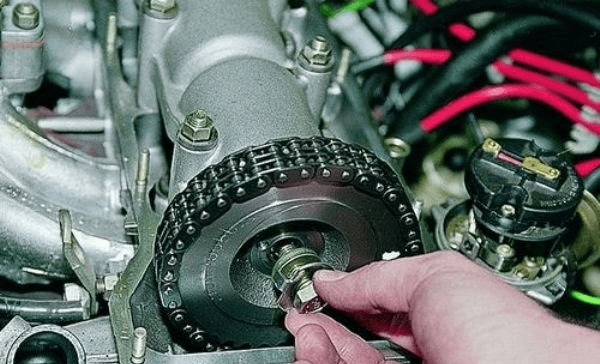
- Remove the camshaft sprocket.To remove the camshaft star, it is necessary to unscrew the bolt holding it with a lock washer
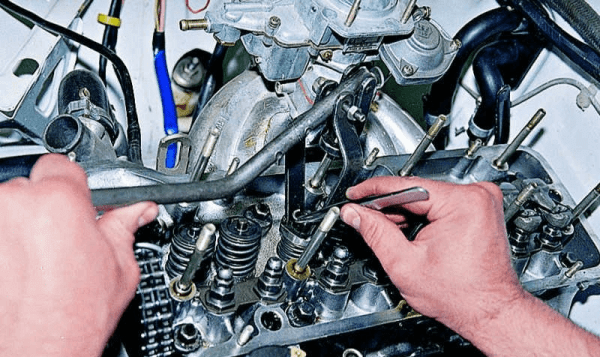
- Remove the camshaft from their beds.To remove the camshaft, you need to unscrew the bolts securing the housing of its bearings.
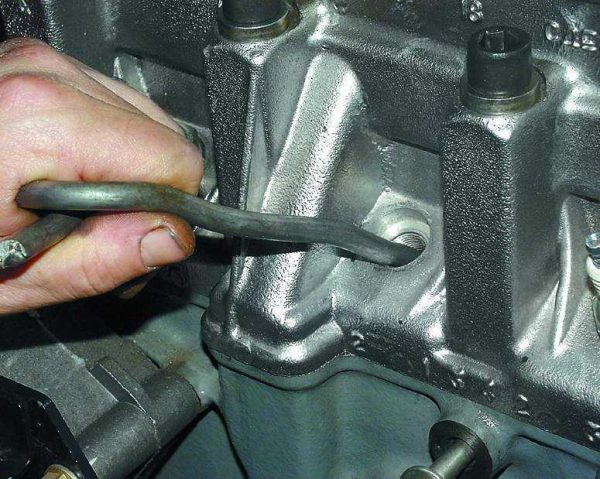
- Support the valves with a tin rod through the spark plug well.To prevent the valves from falling, they need to be supported with a tin bar.
- Dry the valve.Compressing the valve spring, crackers need to be pulled out of the groove
- Replace oil seal.The old oil seal is removed with two screwdrivers.

Video: replacing valve stem seals on the "classic"

Valve lid
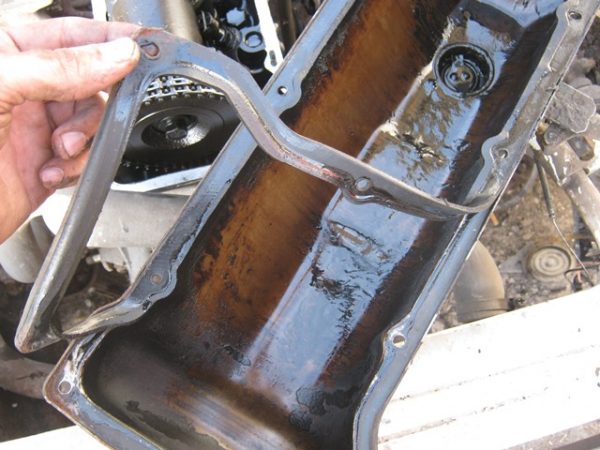
The valve cover protects the gas distribution mechanism from external influences, and also prevents oil leakage. The valve cover gasket is designed to seal the junction of the valve cover with the cylinder head. It is a strip of rubber, shaped exactly following the contours of the valve cover.
Replacing the valve cover gasket
If there are oil leaks from under the valve cover, the gasket must be replaced. To do this, you need to remove the valve cover (you already know how to do this from the section on adjusting the valves) and the gasket. The new gasket is installed without any special tools or fixtures.
The installation site must be thoroughly cleaned from the remnants of the old gasket and traces of sealant. We put a new gasket in place and install the valve cover on the engine.
Valve cover tightening order
After installing the valve cover on the engine, it must be secured with nuts to the cylinder head. To prevent distortion, displacement and damage to the gasket, there is a special tightening procedure for the nuts. The essence of this process is to tighten the fasteners from the center to the edges.
- Tighten the central nut.
- Tighten the second central nut.
- Tighten the outer nuts on one side of the cover.
- Tighten the outer nuts on the opposite side of the cover.
- Tighten the nut on the valve cover tab.The valve cover nuts must be tightened in a specific order to avoid distortion and deformation of the gasket.
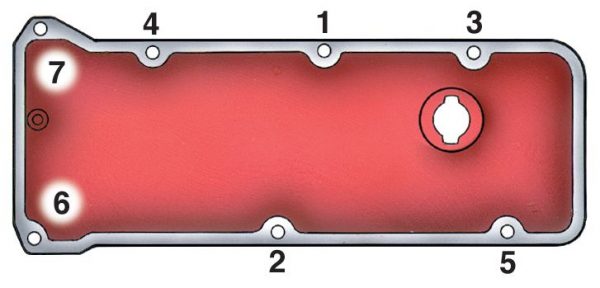
By following the tightening order of the nuts, you are guaranteed to avoid subsequent problems with oil leakage from under the valve cover.
Read also about adjusting the wheel alignment on the VAZ 2107: https://bumper.guru/klassicheskie-modeli-vaz/hodovaya-chast/razval-shozhdenie-svoimi-rukami-na-vaz-2107.html
Video: installing a valve cover gasket VAZ 2101–07

Adjusting valves on the VAZ 2107 is not particularly difficult, does not require special knowledge (except for this article) or a special tool. It is within the power of an amateur auto mechanic to implement in her own garage. Do not be afraid to make your own car, you will definitely succeed.

