
Self-painting a car: equipment and a step-by-step algorithm
Content
Often there is a need to eliminate defects in the paintwork both after an accident and due to the considerable age of the iron horse. Prices for quality work in body paint shops are quite high, even if done through friends with discounts. To reduce costs, many owners are puzzled by the question of how to update the car cover on their own.
Painting a car with your own hands is a laborious and difficult task that requires certain tools and knowledge.
What equipment is needed to paint a car
Painting a car with knowledge alone will not work, you will need to thoroughly prepare for this process.
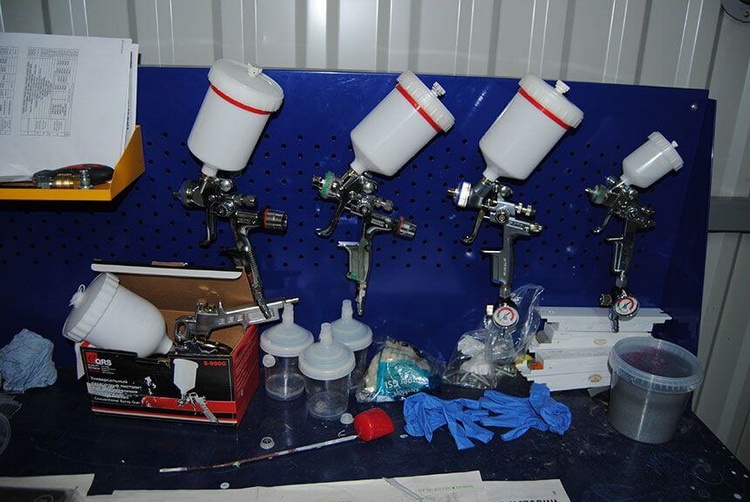
The main equipment and consumables that may be required for body work:
- varnish, paint;
- compressor and consumables for it (filters for collecting oil and water);
- primer mixture;
- sandpaper of various grain sizes;
- putty;
- gloves;
- spray gun with a nozzle for the type of paint;
- nozzles for an electric drill for removing paintwork, corrosion, etc.;
- Sander;
- spatulas;
- welding machine;
- respirator;
- building hair dryer;
- gloves;
- a set of tools for dismantling and assembling body parts.
12 stages of self-painting a car
Before starting work, you must select a place where this action will take place. The main requirements for the place of work is a room closed from wind and precipitation with constant positive temperatures inside the room (garage, box) with the possibility of ventilation.
In addition to having the necessary equipment, you should thoroughly wash the car with car shampoos, if there are bitumen and grease stains, they must be removed with a solvent or special products.
Choosing paint
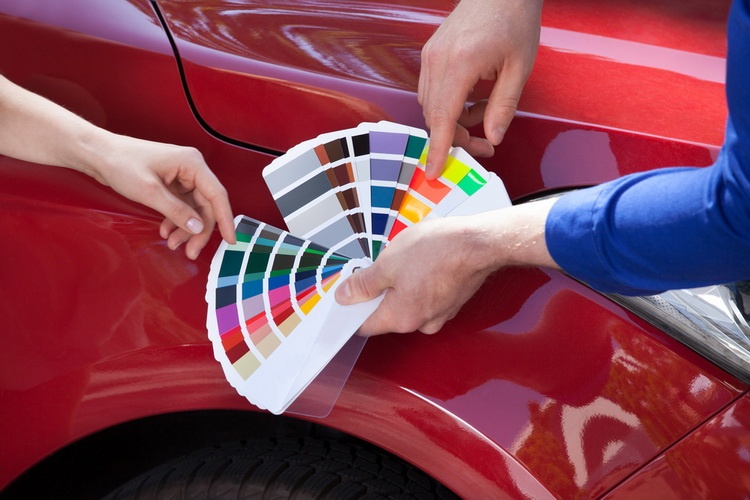
When partially painting the car, the paint is matched to the main color, with the exception of the desire to place accents on certain details using a contrasting color (bumper, hood, roof). With a complete change in the color of the car, the color is selected based on the wishes of the owner.
Paint color options:
- removal of the gas tank cap and computer-assisted color matching based on the existing sample (the most accurate method);
- on the right pillar, in the trunk or under the hood (depending on the brand of the car) there is a Service Parts Identification plate with the parameters of the car, including the color number, but often several shades of colors beat on it;
- visual selection of shades based on the painted part of the car and cards with shades in specialized stores (the least reliable selection option).
Nuances that help to correctly select the paintwork:
- it is necessary to polish the sample and remove the oxide layer so that the selection is according to the natural color without natural fading of the outer layer;
- based on the data from the identification plate, a suitable shade is selected;
- with the help of specialists in stores specializing in the sale of paints and varnishes, and a special program, a paint recipe with its volume and shades is displayed.
Auto dismantling
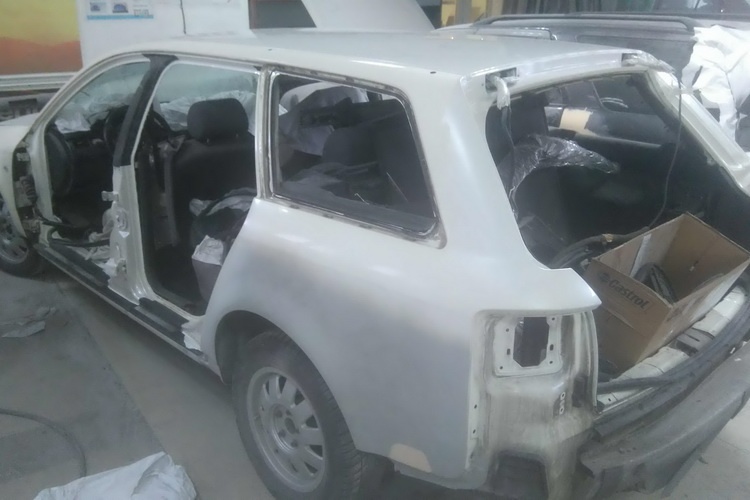
At this stage, all details that will interfere with painting are removed. For example, when painting the front wing, the protective fender liner, lighting fixtures (headlight and repeater, moldings, if any) should be removed.
When painting the entire body, glass, door handles, headlights, moldings and other elements should be removed. Pre-painting disassembly is a purely individual process, which depends on the brand of car, the part and the area of the treated surface.
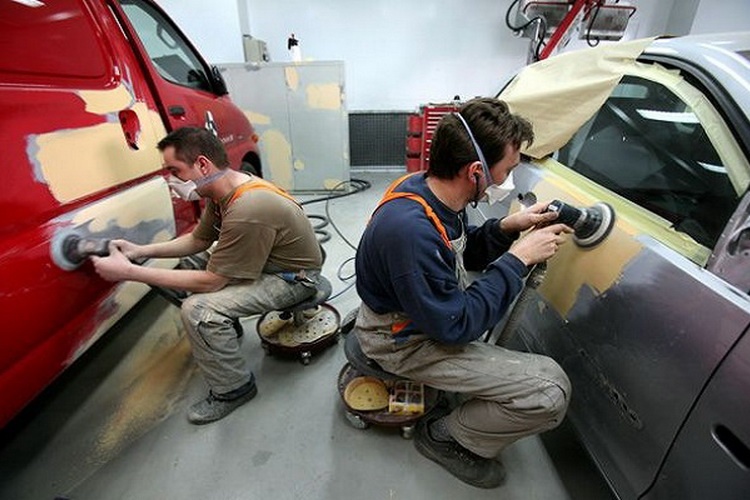
Welding, straightening and bodywork
If there is serious damage to the body, it may be necessary to cut out damaged panels or parts of them (for example, wing arches). After welding new body parts or their parts, the welding seams should immediately be leveled with a grinder and a grinding disc to it, after which they must be treated with a seam sealant.
In most cases, damage can be removed by straightening individual sections. The main straightening methods are:
- squeezing or pulling the damaged area;
- if the metal is deformed (stretched), then the contraction is carried out after heating the area;
- vacuum straightening without subsequent staining of the damaged area, is used with the help of special suction cups on gentle indented areas with a diameter of more than 15 cm.
The inner side of the treated part requires mandatory treatment with anti-gravel, Movil or bituminous mastic, applied in accordance with the requirements of the manufacturer's instructions.
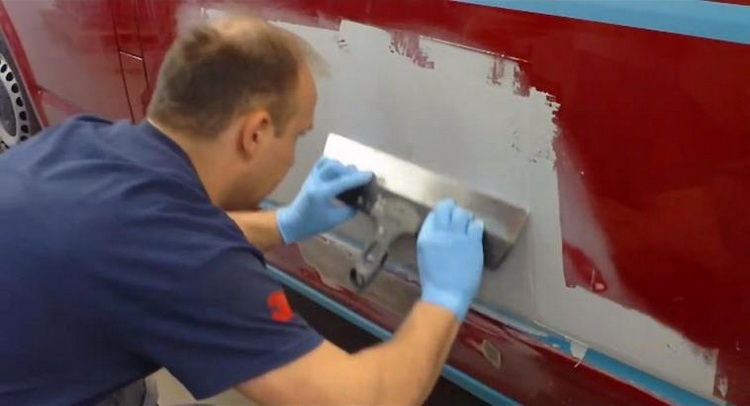
Puttying
At this stage, the body is aligned to its original shape.
For this, the following materials are usually used:
- epoxy resin with fiberglass;
- fiberglass putty;
- soft or liquid putty.
Basically, restoration of the original appearance of the body begins with the use of epoxy, with the exception of minor damage.
Before each stage of puttying, the treated area is dried (usually for an hour at positive temperatures), sanding the required grit with sandpaper and degreasing the surface.
Work is carried out using rubber and metal spatulas with dimensions corresponding to the diameter of the damaged areas.
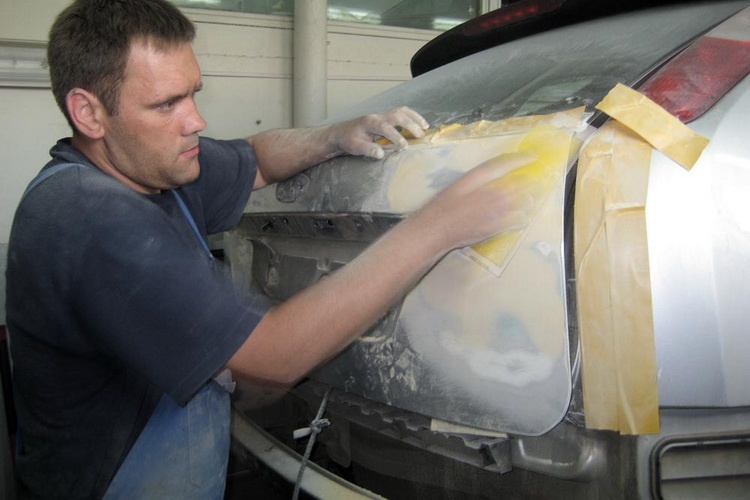
pasting machine
Parts must be protected to protect the bodywork from substances used in priming and painting. To do this, with the help of film, paper, masking tape, everything that does not require staining is blocked.
Ground application and matting
After leveling the body parts, remove the gloss from the part using fine-grained sandpaper (No. 360), degrease the part and prepare the primer mixture according to the requirements of its manufacturer. It is recommended to apply the primer with a spray gun with the desired nozzle diameter.
The first layer should be made very thin to avoid smudges. If necessary, you can additionally apply 1-2 layers and dry the car, usually one day is enough for this. After the primer has completely dried, it should be treated with an iron and sandpaper (No. 500,600) with water.
Soils are of various types:
- Fillers are used to finish the surface and ensure high-quality paint application.
- Anti-corrosion, used to protect metal body parts. In the presence of traces of rust, as well as after welding, treatment with such a primer is required.
- Epoxy, which form a protective layer, but do not have anti-corrosion characteristics. They are used for body preservation and as insulation.

After the primer has dried, a mat should be applied to it, with its alternate processing with sandpaper - 260-480 for acrylic and 260-780 for metallic.
Re-pasting
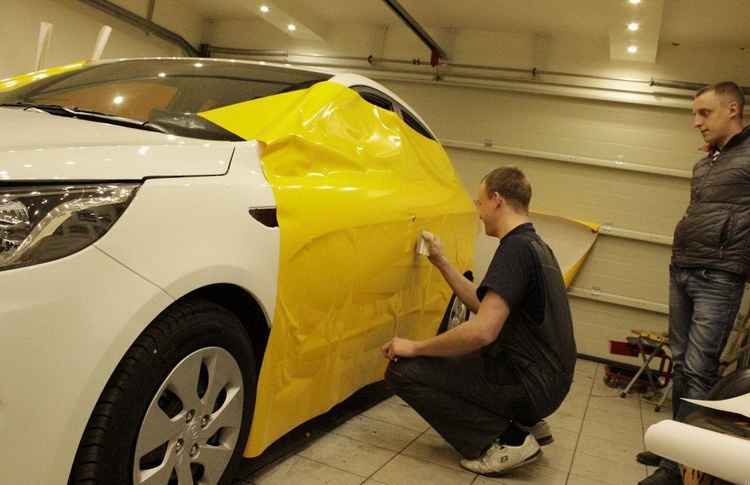
At this stage, it is necessary to replace the protective papers and films on parts that do not require painting, since during the application of paint, elements from previous work may get on it during the application of paint. Before painting, it is more convenient to protect the car with a film.
color
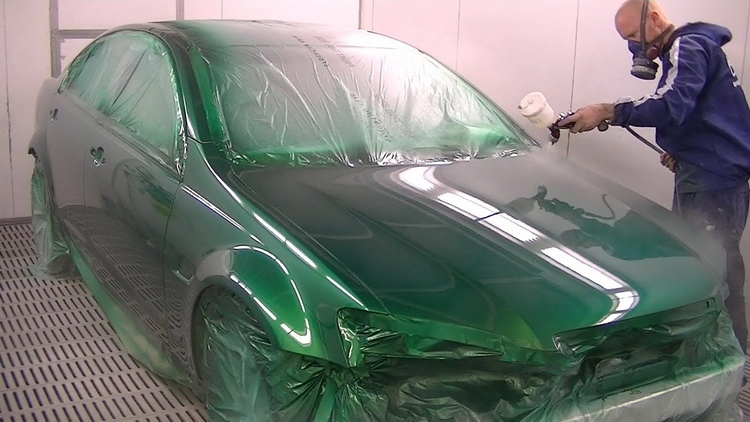
Before applying the paint, the surface to be treated should be degreased, for example with a silicone remover. The paint must be applied with a paint gun in accordance with the wishes of the manufacturer. The diameter of the spray gun nozzle should be 1,1-1,3 mm. In most cases, the paint coating is applied in 3-4 layers. If acrylic paint was used, then you can proceed to drying.
Varnishing
After the paint has completely dried, remove specks and dust from the surface to be treated with a sticky cloth.
Metallic treated surfaces do not need to be degreased. The surface can be varnished 25-35 minutes after applying the final coat of paint.
Lacquer coating should be applied based on the requirements in the manufacturer's instructions. Usually use a nozzle for a spray gun with a diameter of 1,35-1,5 mm.
Drying
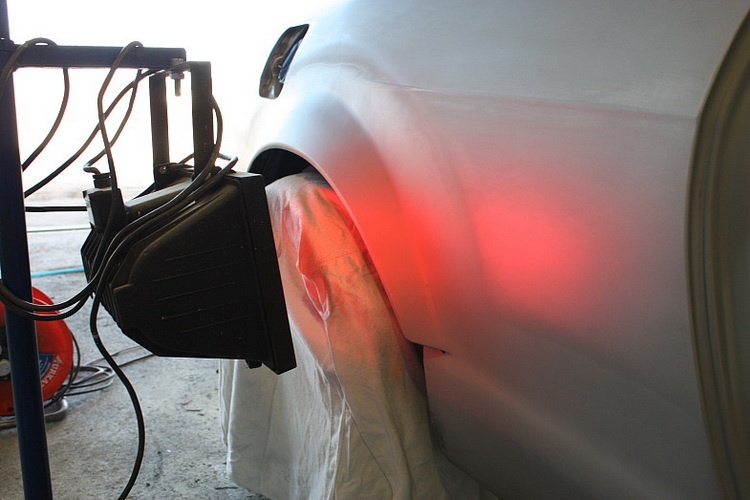
After applying the final layer of varnish or paint (acrylic), it is necessary to dry the treated surface thoroughly. The usual drying time of the treated surface at positive temperatures occurs in a day.
Drying times can be reduced by adding fast hardeners to the paint or by raising the outside temperature. In this case, the drying of the body occurs within 3-6 hours.
The maximum polymerization of paints and varnishes occurs within 7-14 days. Prior to this, the surface will be completely dry, but the coating strength parameters will be noticeably lower.
Assembling the car
After the paintwork has dried, it is very carefully necessary to return to place all the parts removed before painting.
Polishing
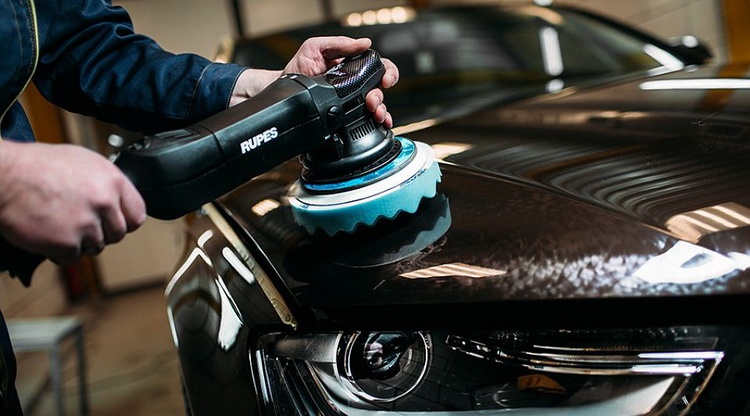
Even when painting indoors, dust and other unnecessary substances cannot be excluded from the freshly painted surface.
To remove such errors, manually rub the wet part with sandpaper No. 800,1000,1500, XNUMX, XNUMX to a matte and smoother surface.
Finishing polishing of surfaces is carried out using a special abrasive paste, after which it is necessary to walk with a finishing polish to increase shine. It will not be superfluous to treat the body with a preservative polish to protect the paintwork from external factors and increase gloss.
Before self-painting your car, you should calculate the cost of work, including the purchase of materials and tools, and compare with similar work carried out by professionals.

In many cases, it is cheaper to entrust such responsible work to qualified painters, especially if straightening is required, since it requires a lot of tools and fixtures, the purchase of which will cost a round sum.