
Do-it-yourself tuning of the VAZ 2106 salon: torpedoes, beards, dashboards
Content
The VAZ "six" is considered the standard of reliability and simplicity of the Soviet automobile industry. She "raised" more than one generation of motorists. With her unpretentiousness and suppleness, she won the hearts of many car owners. Until now, the "six" romp along the roads of cities and villages. To stand out from the general mass of cars, the owners think about tuning, which transforms the external and internal views of the car. You can change the look of the VAZ 2106 interior with your own hands.
Tuning salon VAZ 2106
All car owners know that interior tuning is giving it a new look, improving functionality and safety. With it, you can create an individual and unique style.
Interior tuning consists of several stages:
- torpedo tuning;
- instrument panel tuning;
- beard tuning;
- replacement or hauling of seats;
- radio installation;
- steering wheel tuning;
- gear knob tuning
Let's consider each of these points in more detail.
Tuning torpedo
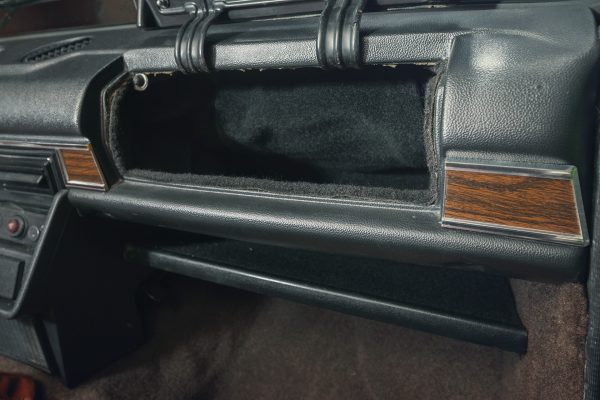
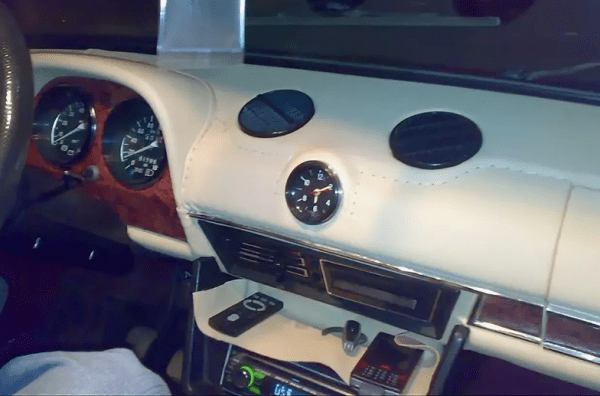
A torpedo is the top front panel of a car. It is a one-piece metal structure, covered with polymer foam and film. It has a dashboard, a glove compartment, a cabin heater, air duct deflectors, and a clock.
The front panel is an important element of the interior, which can be tuned in different ways: replace the torpedo completely with a new one, paint it with liquid rubber, glue the smooth surface of the torpedo with leather, film or flock. Before starting tuning work, you need to remove the panel.
More about tuning the instrument panel VAZ 2106: https://bumper.guru/klassicheskie-modeli-vaz/elektrooborudovanie/panel-priborov/panel-priborov-vaz-2106.html
Dismantling the torpedo
Removing the console is as follows:
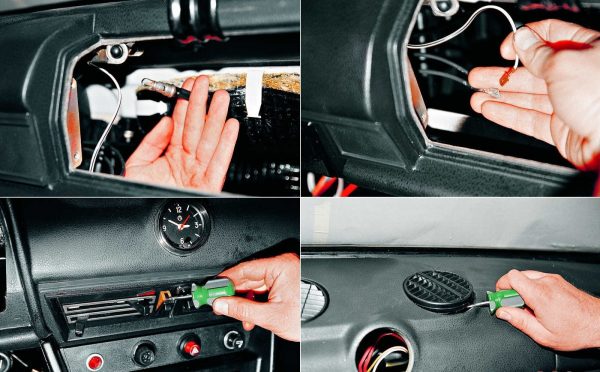
- After unscrewing the four fixing screws, remove the storage shelf.
 Dismantling the torpedo begins with the removal of the glove box
 - Remove the radio panel. To do this, at the very bottom, we unscrew the screws on both sides, after which we unscrew the upper right screw of the panel. Carefully, prying with a screwdriver, remove the bar with additional controls from the radio receiver panel. Under this bar there are two more self-tapping screws, which also need to be unscrewed and, holding the mounting plate, remove the radio receiver panel.We remove the mass from the battery, remove the instrument panel shelf, after that we dismantle the panel intended for the radio receiver, pull out the instrument cluster; there are protective pads on the windshield pillars, they interfere with removing the dashboard, so we remove them
- We dismantle the left and right decorative trims of the windshield pillars.
- We disconnect the decorative lining of the steering column, which are fixed on five self-tapping screws.
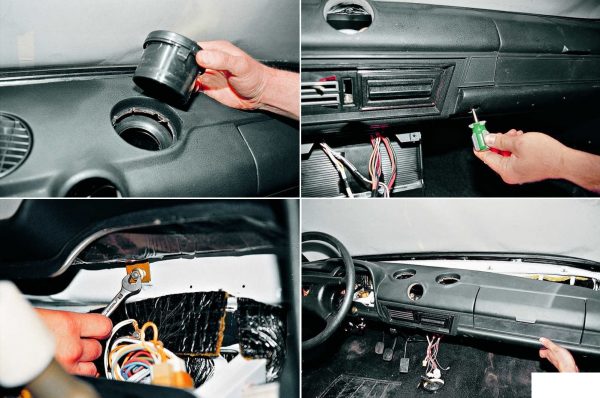
- Next, remove the instrument cluster panel. To do this, use a screwdriver to pick up the panel at the attachment points of the clamps and pull it out a little. Disconnect the cable from the speedometer. We mark the bundles of wires so that they do not get confused during installation, and disconnect them. Remove the instrument panel.We remove the glove box housing and disconnect the two lighting supply wires, pry the heater fan switch with a screwdriver, the handles with which you adjust the degree of ventilation and temperature also need to be pry and removed, dismantle the clock, dismantle the air ducts-deflectors, the instrument panel is additionally screwed with four self-tapping screws that need to be unscrewed , on top of the panel is planted on four nuts, unscrew, if the steering wheel interferes, it can also be removed, remove the instrument panel itself
- We raise the torpedo up and towards ourselves. Now you can get it out of the car.To perform high-quality tuning of the torpedo, it must be removed and removed from the passenger compartment
More about glasses on the VAZ 2106: https://bumper.guru/klassicheskie-modeli-vaz/stekla/lobovoe-steklo-vaz-2106.html
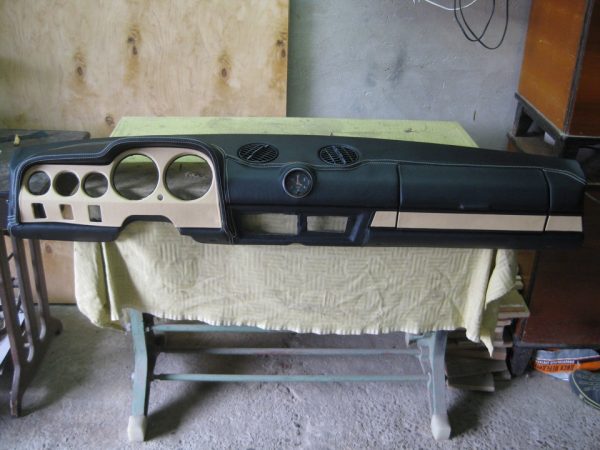
VAZ 2106 torpedo tuning options
There are several options for tuning a torpedo:
- you can replace the standard torpedo with a new one from domestic or imported cars. It is installed entirely with appliances. Since the parts in the "classic" are interchangeable, panels from VAZ 2105, VAZ 2107 are suitable for the "six";
- cover the torpedo with liquid rubber. This embodiment is time-consuming, while such a coating is short-lived and will begin to crack over time. It will need to be updated periodically. The big advantage of this method is its low cost;
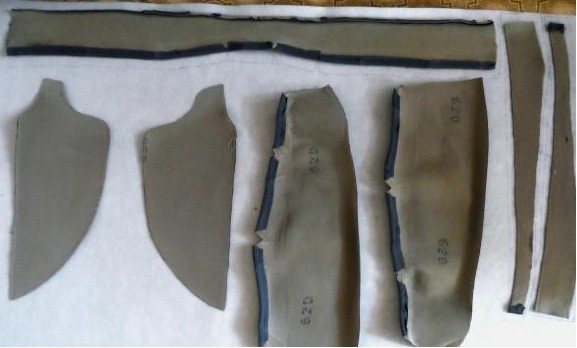
- torpedo upholstery with vinyl film, flock, automotive leather or leatherette. This method of improvement is the most effective, but scrupulous and time-consuming. To perform work, it is necessary to dismantle the torpedo and take measurements from it. It is best to make a pattern of interlining. Cut out the components according to the pattern. Sew all the details of the pattern with strong threads. It is advisable to work carefully so that wrinkles do not form on the material that will spoil the appearance. Then treat the surface of the console with hot glue, pull the cover. And, using a building hair dryer, glue the cover.
Video: do-it-yourself VAZ 2106 torpedo hauling

Dashboard tuning
Modernization of the VAZ 2106 dashboard consists in replacing the backlight and decorative parts of the scales.
Replacement of scales and arrows of the instrument panel
This process is quite simple and you can do it yourself:
- At the start of work, we dismantle the dashboard panel of the "six"
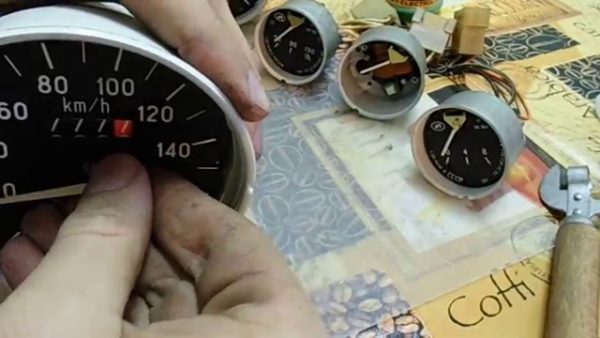
- We get access to the sensors and remove all the index arrows, starting with the tachometer.
- After that, we remove the scales.
- To dismantle the speedometer needle, unscrew the bolts and turn the scale to the left. After that, the arrow of the device will drop a little and begin to oscillate. As soon as it finally freezes, this position must be noted with a marker. All this is necessary so that later the speedometer indicates the correct speed.The position of the speedometer needle must be marked with a marker
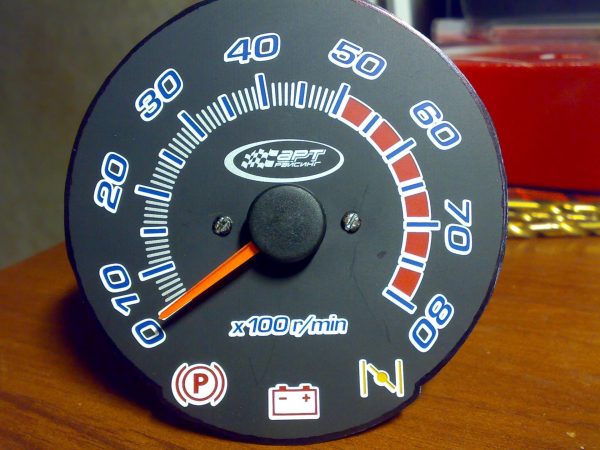
- New designations are glued onto the scales, which can be printed on a printer. The arrows are covered with a contrasting paint so that they do not merge with the scale.Arrows painted with contrasting paint
- Glasses are pasted over with white or interior color self-adhesive paper.
Installation of the removed parts is carried out in the reverse order. After that, the panel is mounted in its original place.
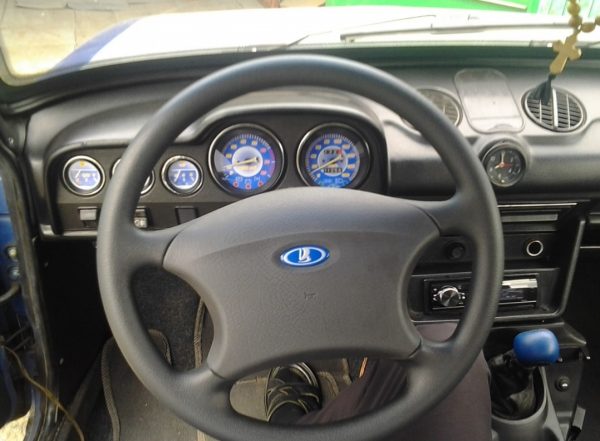
Instrument panel illumination
Many motorists know that in the "six" there is a weak instrument illumination. When updating the panel, you can add LED lighting. Be sure to disconnect the negative terminal from the battery before starting electrical work.

Work order:
- Having dismantled the panel, we remove the devices one by one.
- Let's take each of them apart.
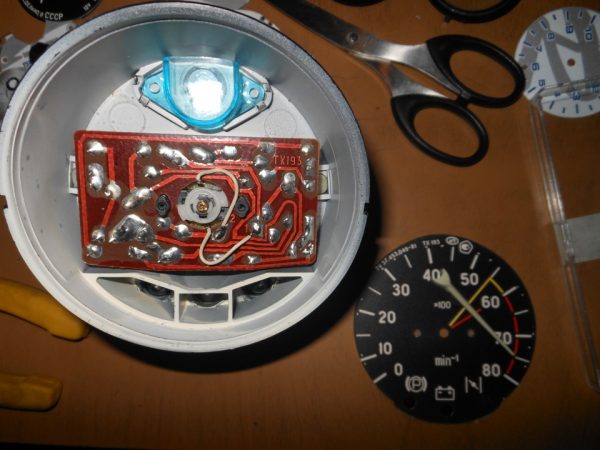
- We glue the links of the LED strip into the case. For small devices, one link of three diodes is enough. For large ones, you will need links 2 or 3, depending on what kind of lighting intensity you like.LED strip links are glued into the body of the device (author of the photo: Mikhail ExClouD Tarazanov)
- We solder the tape to the backlight wires. After that, we assemble the devices back and install them in the panel.
Be sure to wipe the inside of the instrument glass so that there are no fingerprints left.
beard tuning
The center of the car interior is the console, which is called the beard. It acts as a continuation of the torpedo and attracts the attention of all passengers.
When tuning in a beard, you can place:
- clock;
- radio tape recorder;
- small pocket;
- armrest;
- USB sockets;
- switches;
- backlight.
Typically, a beard for the "classics" is made from plywood, fiberglass or from spare parts from foreign cars.
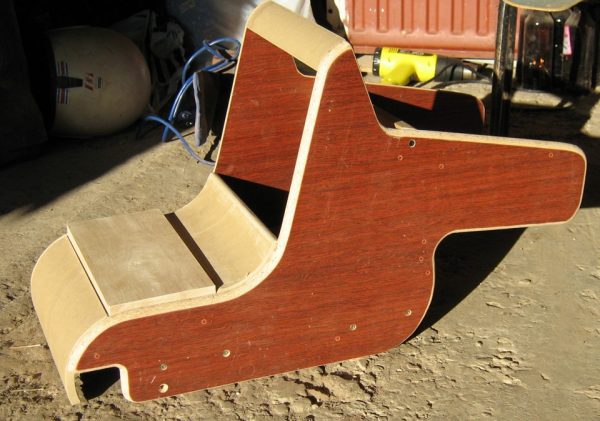
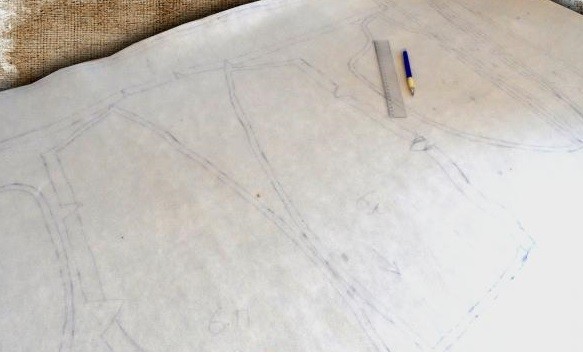
Beard drawings can be found on the Internet or take measurements from an old console. For the pattern, use thick cardboard that holds its shape well. The template is transferred to the plywood and, after carefully checking the dimensions, is cut along the contour. Further, the parts are connected with self-tapping screws. The finished frame is covered with leather or other material in the color of the interior upholstery. The material is attached with a furniture stapler and glue.

Seats
Tuning seats VAZ 2106 can be done in two ways:
- change upholstery;
- replace the seats by taking them from another car.
Seat upholstery
To do the upholstery hauling with your own hands, follow the instructions:
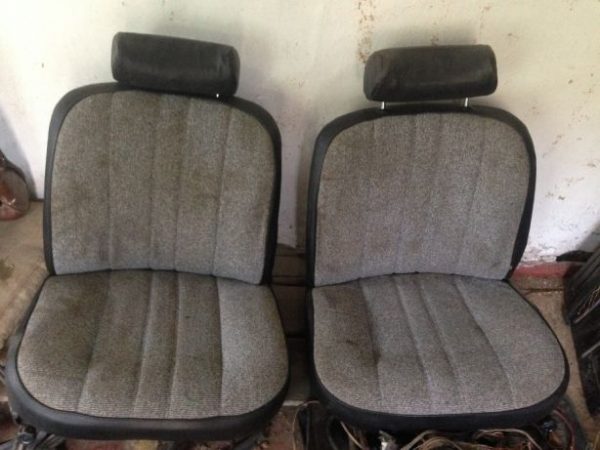
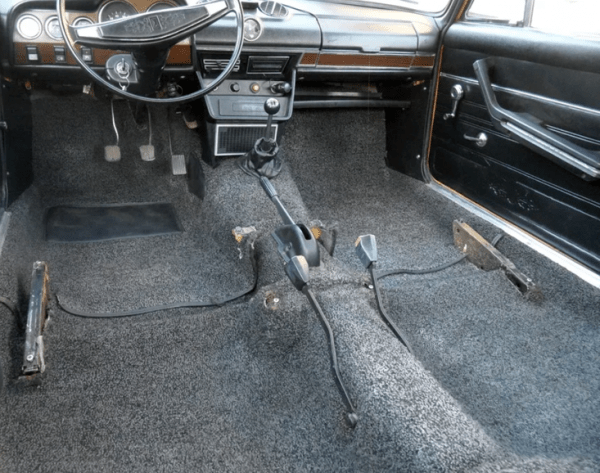
- Remove the seats from the passenger compartment. To do this, move the chair back to the stop and unscrew the bolts in the skids. Then slide it forward and also disconnect the bolts. Remove the seats from the passenger compartment.Dull gray seats do not decorate the interiorTo remove the front seats from the passenger compartment, they must first be pushed back to the stop, and then pushed forward, in both cases, unscrewing the bolts
- Remove the head restraint by pulling it up.
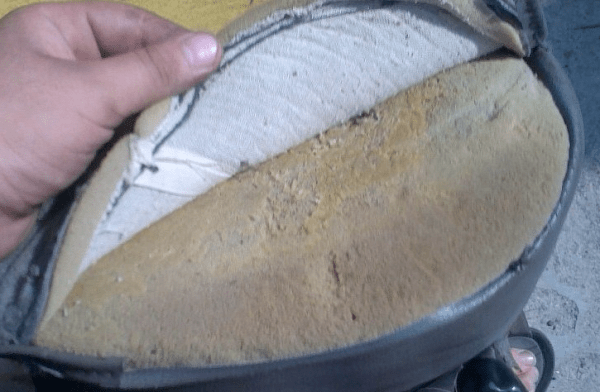
- Remove the old trim. To do this, unfasten the plastic side pads on the seat. They are attached with self-tapping screws. With a flat screwdriver and pliers, bend the antennae located around the entire perimeter of the chair. At the back, between the back and the seat, there is a metal spoke. Remove it along with the upholstery.The foam on the seats must be cleaned of dust and dirt.
- Unzip the upholstery at the seams.In order not to confuse the details, it is better to sign or number them.
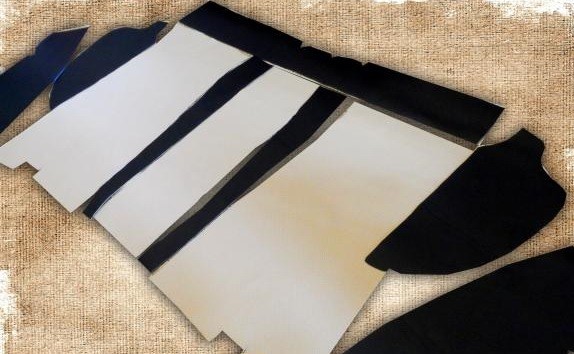
- Cut off the old seam allowances and place the resulting parts on the new material.Lay out the parts correctly on the canvas to save material
- Circle the pattern, adding 1 cm to the seams.Be sure to leave a margin for the seams
- Cut along the contour.Details are cut out - can be sewn
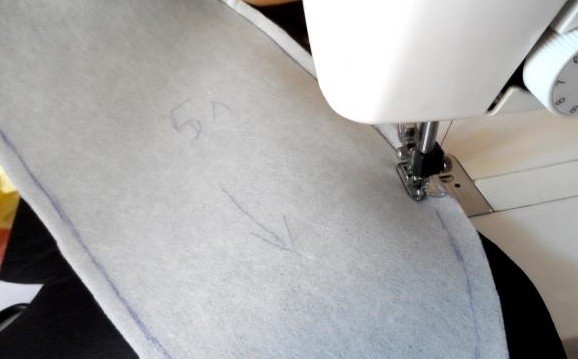
- Sew the details exactly along the contour.Details must be sewn exactly along the contour, without going beyond
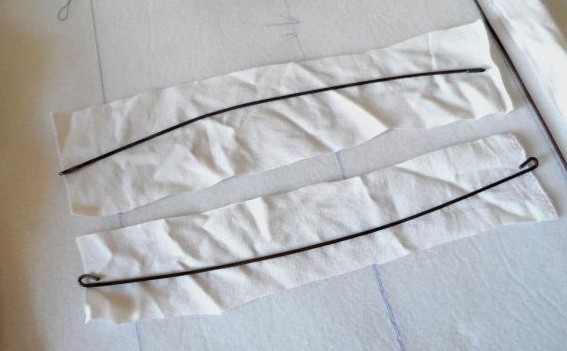
- On the wrong side of the future sheathing, make loops for the knitting needles. Sew the longitudinal strips of fabric in half, stitch them to the upholstery and thread the metal knitting needles.Knitting needles help keep the upholstery in shape, preventing fabric from bunching up.
- Turn out finished covers. Put on the seats and attach to the frame, hooking on the iron antennae. Bend the tendrils so that the fabric holds tightly.

Installing seats from another vehicle
The updated seat upholstery will decorate the interior, but will not give them ergonomics and comfort. To do this, they put seats from another car in the “six”. Seats are suitable here, the distance between the skids of which is approximately 490 mm. Many car owners say that seats from Ford Scorpio, Hyundai Solaris, VAZ 2105, VAZ 2107 successfully fit into the cabin. But to get a good result, you can not do without replacing the fasteners.
Seat mount replacement
The skids on which the seats in the “six” stand are not located on the same level, so the old mount needs to be replaced. For this you need:
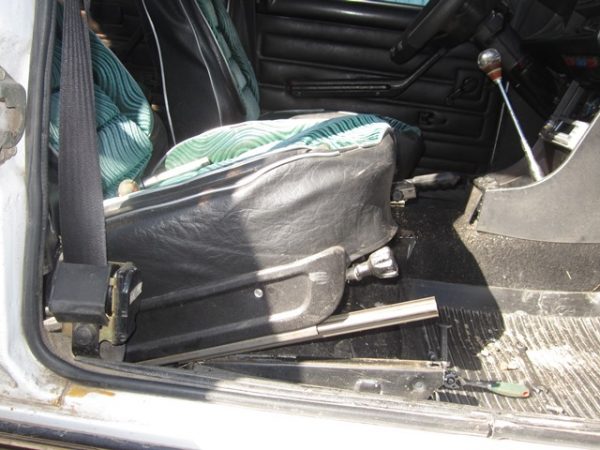
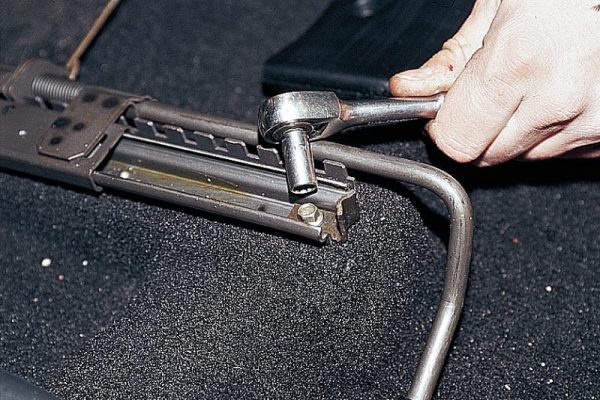
- Move the seat back as far as it will go and unscrew the front bolts. Then move it forward to the dashboard and unscrew two more screws from the skids.To disconnect the front seat slides, you will need an socket wrench with an “8” head
- Turn the seat slightly and remove it from the passenger compartment.
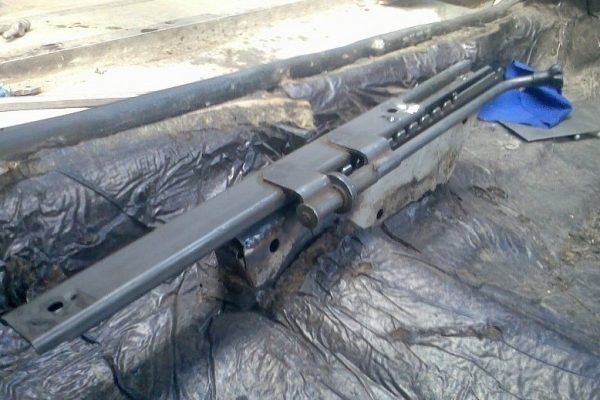
- Cut off the coasters with a grinder.In the interior freed from the seats, you can thoroughly vacuum
- Weld on new fasteners.Welded seams must be treated with an anti-corrosion coating
- Reassemble the cabin in reverse order.
Radio tape recorder
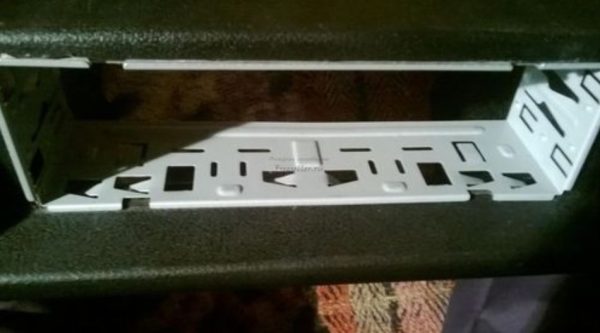
No upgrade of the "six" is complete without installing a speaker system or at least a simple radio. Regular place for the radio in the beard "six" of small size. It should be cut to standard 1DIN. You can do this with a metal saw. Then sand the edges with sandpaper.
Radio installation
The radio tape recorder is attached to the beard with a metal case. Stages of installation of the radio:
- Having unbent all tongues, we take out the radio tape recorder from the case with special blades.
- The metal base is inserted into the prepared hole.
- We fix it with the help of special tongues.You can bend all the tongues or selectively
- Then carefully insert the radio unit itself, which should snap into place.
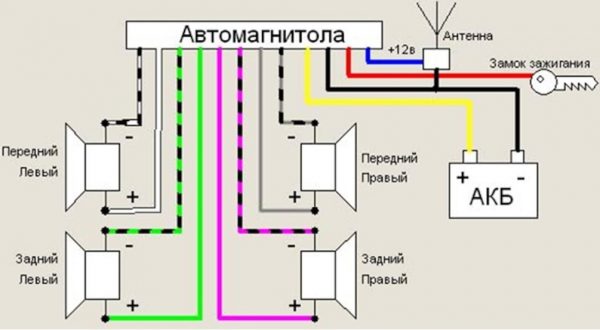
Wires are included to connect the player. The most commonly used are:
- black - "earth";
- red and yellow (often rolled together) - ignition "+";
- blue - power for the active antenna;
- white - left front (FL) speaker;
- gray - right front (FR) speaker;
- green - left rear (RL) speaker;
- purple - right rear (RR) speaker.
You can connect the radio to the ignition lock to the free terminal INT. Then it will only work when the engine is running and the ignition is on. Such a connection scheme will protect forgetful car owners from a complete discharge of the battery.
If you twist the red and yellow core together, then the radio will no longer depend on the ignition. Music can be listened to with the ignition off too.
Usually the connection manual comes with the audio system. Following the instructions and the color scheme, it will not be difficult to install sound equipment in the “classics”.
Speaker mounting
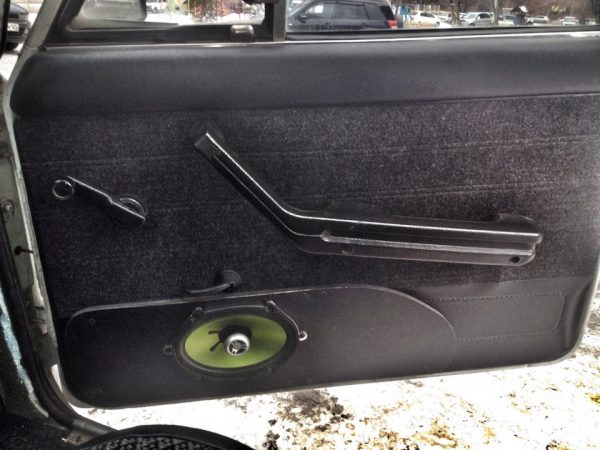
A good place to place the speakers would be the front door cards. If you choose the right size speakers, they will fit here very well. To install, perform the following steps:
- We remove the trim from the doors.
- On the casing, cut a hole for the speaker. A hole of the desired size can be made according to the template. To do this, we circle the speaker on paper. You need to work carefully so as not to miss the size.
- We attach the column and fasten it to the casing using the fastener that comes with the kit.
- We carefully lay the wires in the cavity of the doors so that they do not sag or fall out.
- Install the cover in place.
Don't forget to buy new fasteners for door trim. Often, when removing the skin, the fasteners break.
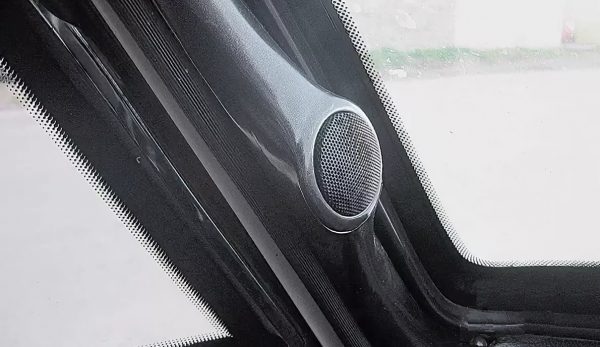
Additional speakers are placed on the dashboard or on the side pillars of the windshield.
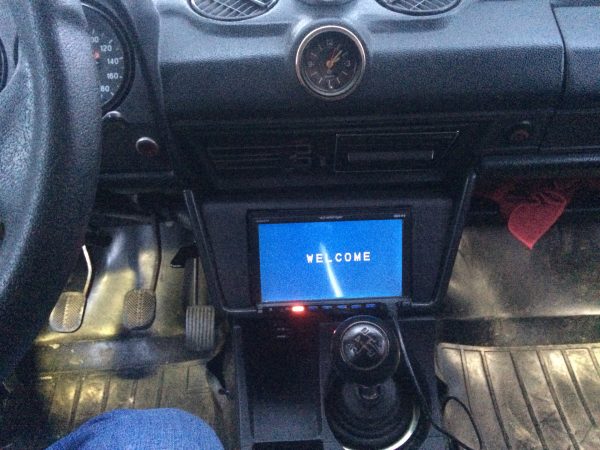
If the car owner changes the entire beard, creates it himself to fit his size, then he can place a 2DIN radio in it. A large screen player will add charm to the appearance of the car.
Video: installing speakers and noise

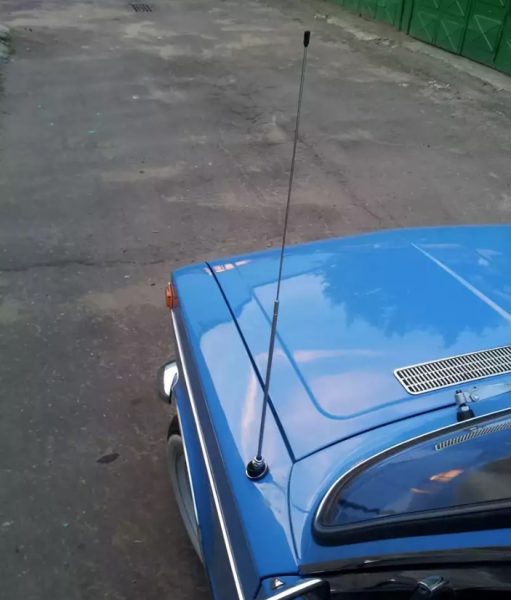
Antenna installation
In the “six”, a standard antenna was not installed, but a place for it was provided on models until 1996. Adherents of original spare parts can find their own antenna in the car market. It is attached to the front fender of the car.
To do this, you need to make a hole in the wing, install the antenna, tighten the bolts and connect the wires to the radio and ground. This installation method is quite complicated and not every car owner decides to make holes in the body.
Ease of installation is distinguished by an in-salon active antenna, which is attached to the windshield. It is not exposed to atmospheric precipitation, does not need additional care, does not interfere with aerodynamics when the car is moving. When buying an in-car antenna, please note that the kit should include instructions, fasteners and stencils to simplify installation. There are two ways to install a radio antenna inside the cabin:
- The body is attached to the glass behind the rear-view mirror, and the whiskers are glued in opposite directions at the top of the glass.
- The body of the antenna is fixed in the upper part of the windshield on the passenger side, and the poles are glued along the edges of the glass at right angles to each other.Antenna mounted in the upper corner of the windshield does not interfere with the view

Learn how to disassemble the rearview mirror on a VAZ 2106: https://bumper.guru/klassicheskie-modeli-vaz/kuzov/zerkala-na-vaz-2106.html
Steering wheel tuning
Comfortable and beautiful steering wheel contributes to comfortable driving. To achieve this, in the "six" you need to update the steering wheel in the following ways:
- install a steering wheel from another VAZ model;
- replace with a sports one;
- pull the steering wheel.
Installing a steering wheel from another VAZ model
The simplicity of the Zhiguli allows you to replace the steering wheel with a steering wheel from other VAZ models. Many car owners believe that it is not worth the work and effort that needs to be applied.
At the chisel, the steering shaft is thinner than that of the classics, and not by much, that is, it is not very easy to make an adapter for the hub. Plus, the steering wheel is higher, it won’t normally engage the turn signal bumper. In a word, you need to suffer a lot in order to put it normally. As for me, it’s not worth it, if you really want a normal steering wheel, then you need to go and buy it, the choice is very rich right now, but you need to look at them carefully, there are so many leftists that it’s just awful.
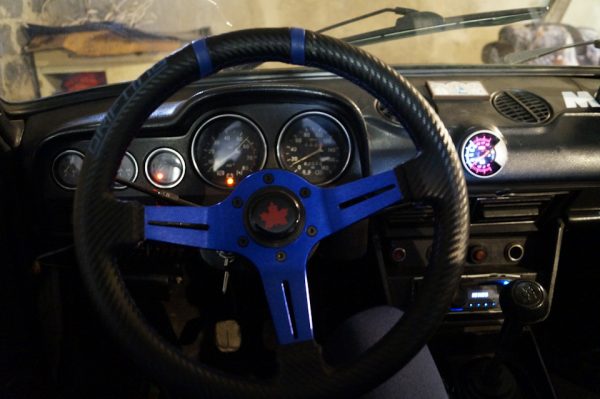
Replacement for sports steering wheel
The sports steering wheel will give the car a beautiful and aggressive look. You just need to know that the "six" is not intended for sharp maneuvers. The sports steering wheel is smaller and harder to turn, so it takes some getting used to.
Steering wheel
In the auto shop you can find a braid on the steering wheel for hauling with your own hands. The composition of such kits includes the braid itself made of genuine leather, strong threads for sewing and a special needle.

Video: steering wheel dismantling

Gear knob tuning
A worn gear lever can be upgraded in three ways:
- replace the gear knob cover with a new cover;
- install a short-stroke lever;
- change headpiece.
A new leather cover for the gearshift lever can be bought at an auto shop. This is a finished product that needs to be put on the lever and fixed in the floor or under the rug with a special ring.
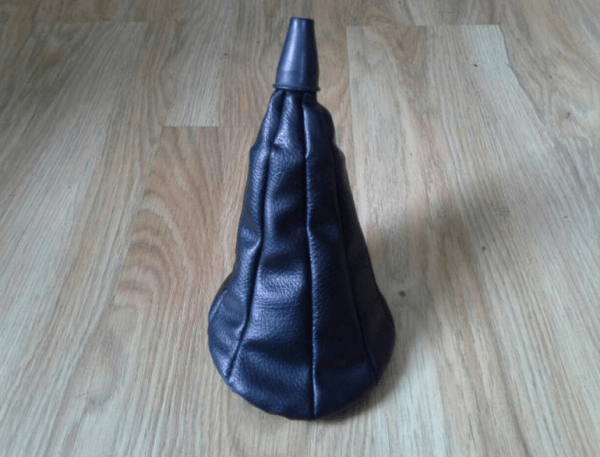
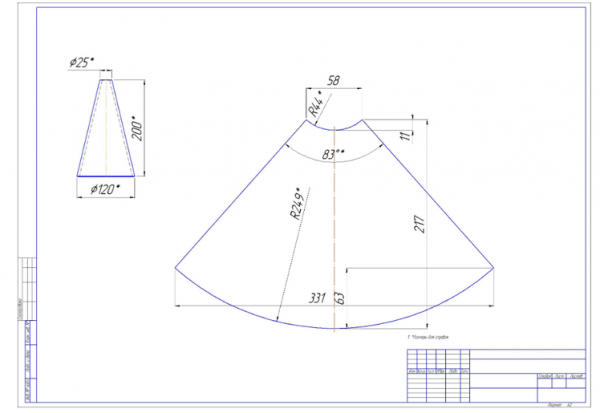
Or you can sew the cover yourself according to the pattern.
Most owners of "sixes" shorten the gearshift lever. To do this, the lever is unscrewed, clamped in a vice and sawed off with a hacksaw for about 6-7 cm.

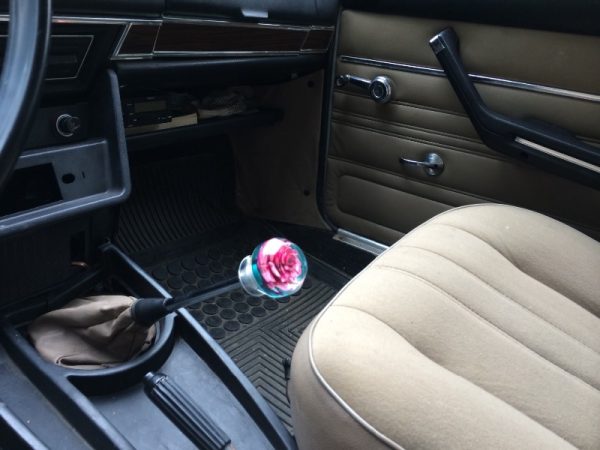
The easiest and most affordable way to tune the gear knob is to replace the knob. A new accessory is screwed onto the lever, which will decorate the interior of the car.
The main advantage of tuning is its uniqueness. For owners who are in love with their cars, the possibility of tuning is a thrill in the soul. In addition, a tuned car reflects the character of the owner. A nondescript car turns into a dream car and attracts the admiring glances of passers-by. Tuning is beautiful, so go ahead and embody your ideas.

