Do-it-yourself tuning of the VAZ 2112 salon
Content
Salon VAZ 2112 can hardly be called a masterpiece of design art. Therefore, do not be surprised that the owners of this car sooner or later have a desire to improve something. Someone changes the seats, someone changes the bulbs in the dashboard. But some go further and change everything at once. Let's see how they do it.
Improved dashboard illumination
The dashboards of the VAZ 2112 have always had one problem: dim lighting. This was especially noticeable at night. So the first thing tuning enthusiasts do is change the bulbs in the dashboard. Initially, there are simple, and extremely weak incandescent lamps. They are replaced by white LEDs, which have two advantages at once - some are durable and economical. Here's what you need to get it going:
- 8 white LEDs;
- medium flat screwdriver.
Sequence of operations
To remove the incandescent bulbs from the instrument cluster VAZ 2112, it will have to be unscrewed and pulled out.
- The steering wheel moves down to the stop.
- Above the dashboard is a visor into which a pair of self-tapping screws is screwed. They are removed with a screwdriver.
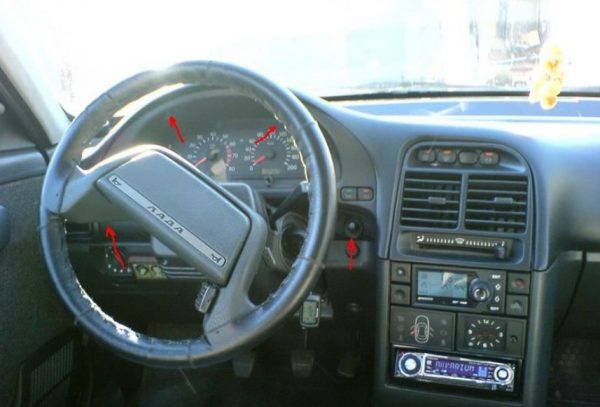
 The location of the screws holding the panel is shown by arrows.
 - The visor is pulled out of the panel. To do this, you need to slightly push it towards you, and then pull it forward and up.
- Under the visor there are 2 more screws that are unscrewed with the same screwdriver.
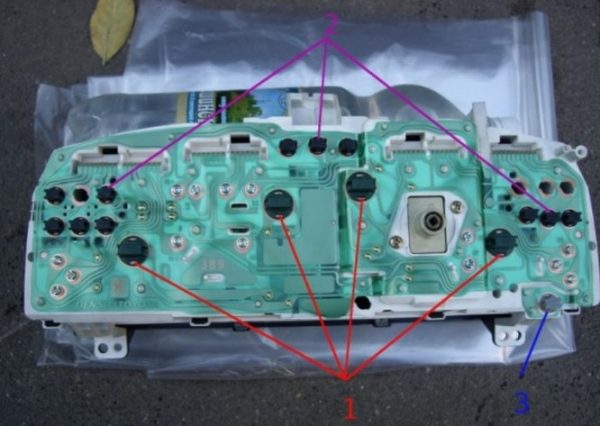
- The block with devices is removed from the niche. The wires located on the back of the unit are disconnected. Light bulbs are located there. They are unscrewed, previously prepared LEDs are installed in their place.Light bulbs from the printed circuit board are unscrewed manually, their location is shown by arrows
- The wires are connected to the block, it is installed in a niche and screwed together with a decorative visor.
Video: removing the instrument panel on the VAZ 2112

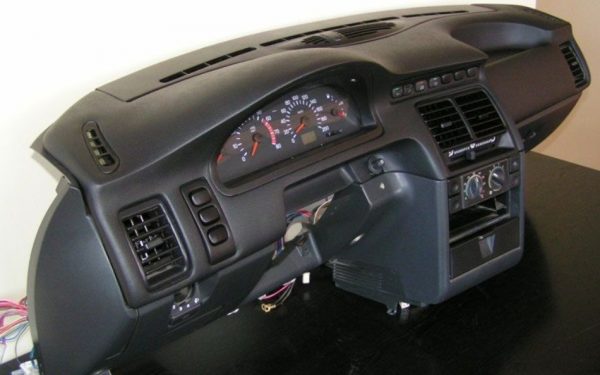
Modernization panels
The appearance of the dashboard on the very first "twelfth" was very far from ideal. In 2006, AvtoVAZ engineers tried to remedy this situation, and began to install "European" panels on these cars. And today, owners of old cars are upgrading their cars by installing europanels on them.
Sequence of work
To remove the panel, you only need a couple of tools: a knife and a Phillips screwdriver.
- The instrument cluster is removed along with the decorative visor as described above.
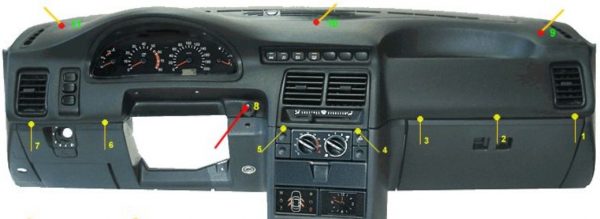
- The car trunk opens. Inside there are 3 self-tapping screws, they are unscrewed with a Phillips screwdriver.To remove the VAZ 2112 panel, only a knife and a screwdriver are required
- There are 4 plugs near the central control unit. They are hooked with a knife and removed. The screws under them are unscrewed.
- The safety box opens. Inside are 2 screws. They roll out too.
- The old dashboard trim is free of fasteners. It remains to remove it by pulling it towards you and up.
- The removed pad is replaced with a new europanel, the fixing screws are returned to their places (all the mounting holes for the old and new pads match, so there will be no problems).
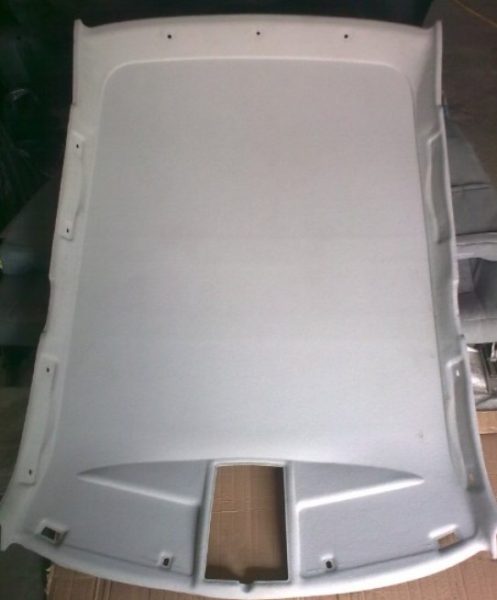
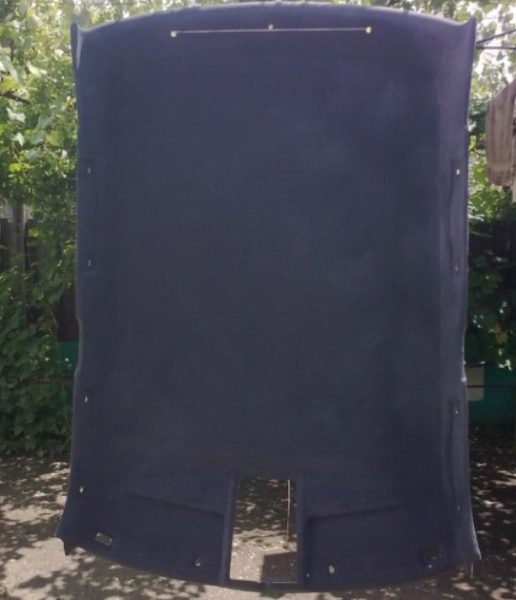
Ceiling coating
The material from which the ceiling covering is made in the VAZ 2112 gets dirty very quickly. Over time, a dark spot appears on the ceiling, directly above the driver's seat. Similar spots also appear above the heads of passengers (but, as a rule, later). Pulling the ceiling covering on your own is not an easy task. And finding a specialist in hauling is not easy, plus his services are not cheap. So the owners of the VAZ 2112 do it easier, and simply paint the ceilings in their cars using universal paint in spray cans (you need 6 of them to paint the ceiling of the “dvenashki”).
Sequence of work
Painting the ceiling right in the cabin is not an option. The cover must first be removed.
- The ceiling covering in the VAZ 2112 rests on 10 self-tapping screws and 13 plastic latches located around the perimeter. A Phillips screwdriver is used to remove the screws. Latches open manually.The ceiling covering material on the VAZ 2112 gets dirty very quickly
- The removed coating is removed from the passenger compartment through one of the rear doors (for this, the coating will have to be slightly bent).
- The selected paint is sprayed from a spray can onto the ceiling (no pre-primer is required - universal paint is well absorbed into the material).
- After painting, the ceiling must be dried. It takes 6-8 days for the smell to completely disappear. Drying is carried out only in the open air.Dry the coating in the open air for 6-7 days
- The dried coating is installed back into the cabin.
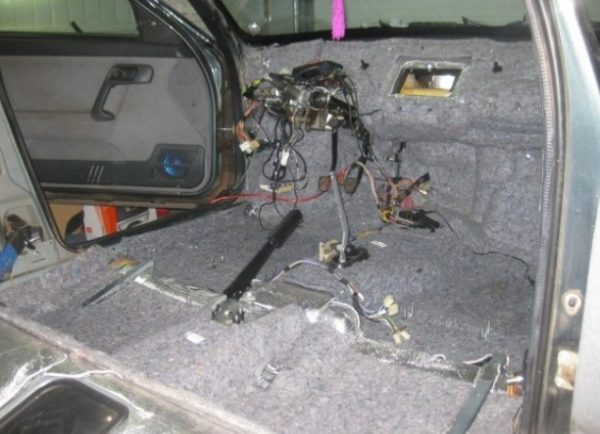
Soundproofing
Salon VAZ 2112 has always been distinguished by a high level of noise. Here is what is used to increase sound insulation:
- vibroplast. From the name of the material it is clear that its main purpose is vibration damping. It looks like thick rubber. Used to isolate metal surfaces;
- isolon. Another material that is always used in combination with vibroplast (the thickness of isolon sheets must be at least 7 mm, and it is better to buy it in hardware stores, and not in automobile ones);
- foam rubber 2 cm thick;
- bank of construction mastic;
- bottle of white spirit.
Sequencing
First, the VAZ 2112 interior is completely disassembled. Almost everything is removed: seats, dashboard, steering wheel. Then all surfaces are cleaned of dirt and dust.
- Glue is prepared on the basis of building mastic. White spirit is added to the mastic with constant stirring. The composition should be viscous and resemble honey in consistency.
- All metal surfaces of the interior are pasted over with vibroplast (it is most convenient to apply mastic on this material with a small paint brush). First, the space under the instrument panel is pasted over with material, then the doors are pasted over, and only after that the floor is pasted over.
- The second stage is the laying of isolon, which is attached with the same mastic-based glue.
- After isolon comes a layer of foam rubber. For it, either universal glue or “liquid nails” are used (the latter option is preferable because it is cheaper). Foam rubber pastes over the place under the dashboard and doors. This material does not fit on the floor, as passengers will quickly crush it with their feet. It will become thinner and will not interfere with the passage of sound.
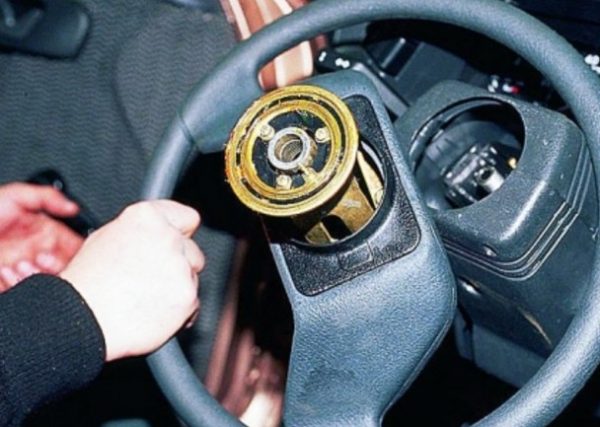
Replacing the steering wheel
Here is what is required to replace the steering wheel on a VAZ 2112:
- large flat screwdriver;
- socket head 22;
- new steering wheel.
Sequence of work
The first step is to get rid of the decorative trim on the steering wheel. The easiest way to pry it off is with a thin knife.
- The trim for turning on the horn is mounted on three self-tapping screws. They should be unscrewed with a large screwdriver.
- There is a 22 nut under the panel. It is most convenient to unscrew it with a socket head on a long collar.It is convenient to unscrew the nut by 22 with a socket head on a long collar
- Now the steering wheel can be removed and replaced with a new one.After unscrewing the central nut, the steering wheel can be freely removed

Replacing the braid on the steering wheel
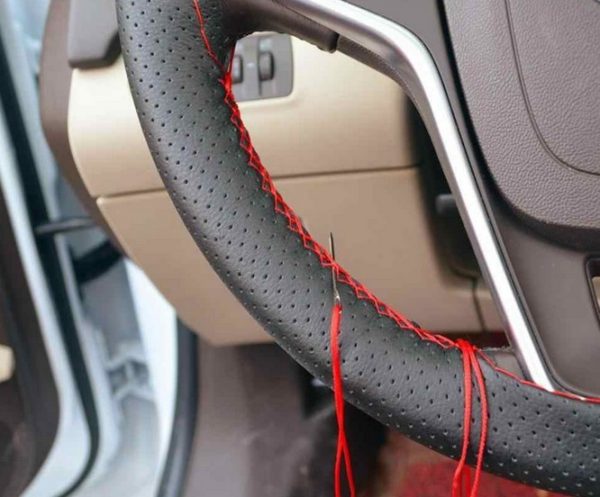
The standard braid on the VAZ 2112 is made of leatherette, the surface of which seems to many to be too smooth. The steering wheel just slips out of your hands, which is very dangerous when driving. Therefore, almost all owners of "twins" change the standard braids for something more suitable. Parts stores now have a huge selection of braids. For the steering wheel of the VAZ 2112, a braid of size "M" is required. It is put on the steering wheel and sewn along the edges with an ordinary nylon thread.
About replacing seats
It is impossible to call the seats on the VAZ 2112 comfortable. This is especially true on long journeys. So, at the first opportunity, drivers put seats from other cars on the “dvenashka”. As a rule, Skoda Octavia acts as a “seat donor”.
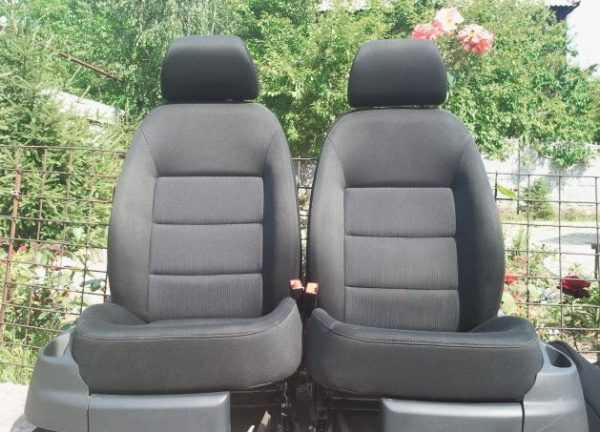
It is impossible to put the seats from this car on the VAZ 2112 in the garage, since a serious fit of fasteners and welding is needed. There is only one option: use the services of specialists with the appropriate equipment.
Photo gallery: tuned salons VAZ 2112
-
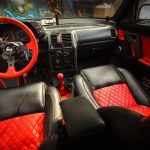
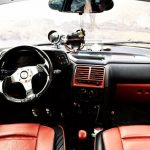
- Interior tuning is made in contrasting red and black colors
-
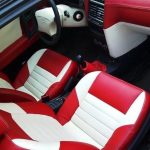
- The red braid of the steering wheel and red seats are evident from another car.
-
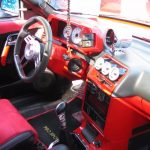
- The steering wheel on this "dvenashka" is small in size, and the interior is trimmed with leatherette
-
- White seat trim looks interesting, but the practical benefits of such a solution are very doubtful.
-
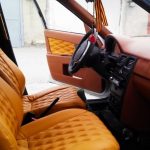
- The dashboard of the VAZ 2112 is trimmed with brown leatherette, the steering wheel is sports
-
- A very successful combination of two colors and a non-standard steering wheel
-
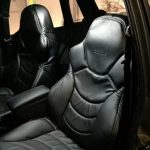
- This VAZ 2112 car owner decided not to save on the interior, and trimmed the seats with leather
-
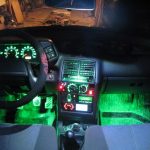
- Floor lighting in the VAZ 2112 is a rather rare occurrence
-
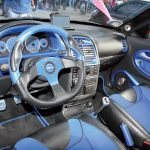
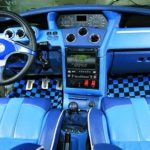
- The owner of this "dvenashki" is clearly not indifferent to the blue color
-
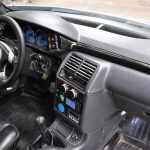
- This car has a new europanel in combination with a non-standard leather-wrapped steering wheel
The car owner is quite capable of making the VAZ 2121 interior a little more comfortable and lowering the noise level in it. But any refinement is good in moderation. Otherwise, the car may turn into a laughing stock.

