VAZ 2114: what to do when the stove heats up, but does not shine
Content
Usually, from a heating device, if it is not a fireplace, high-quality heat is required, and not the delight of the eye with lighting delights. But for a car stove, the backlight is not much less important than the heat it emits. Its front part, together with the switch, being a part of the dashboard of a car, should contribute to a clear orientation of the driver and be accessible to his gaze at any time of the day, especially in the evening or at night. That is, the lighting of the stove carries a purely functional load, which, however, does not in the least prevent it from being beautiful. This is what many drivers are striving for now, replacing standard backlight bulbs with LED strips.
The backlight of the VAZ 2114 stove does not work - why is this happening
Since incandescent bulbs are used in the “native” illumination of the stove on this car, which do not differ in a long service life, most often they burn out and lead to the disappearance of the backlight effect on this device. In addition, the following may be the possible causes of this trouble:
- oxidation of contacts in connectors;
- violation of the integrity of the wiring;
- blown fuses, which disables the entire backlight system on the dashboard;
- damage to the common contact plate.
How to replace the backlight of the stove and its regulator
If you have to replace the burned out stove backlight bulbs with the same or LED ones, you will need the following tools and materials:
- crosshead screwdriver;
- pliers;
- knife;
- new incandescent bulbs or their LED counterparts.
The backlight replacement process is as follows:
- The first step is to disconnect the terminals through which the supply voltage is supplied.
- Then you have to detach the dashboard from the dashboard in order to gain access to the inside of the furnace heating regulator. This is the most difficult stage of replacing the backlight. To do this, unscrew 9 screws.
 To replace the bulbs in the backlight of the stove, you need to remove the dashboard
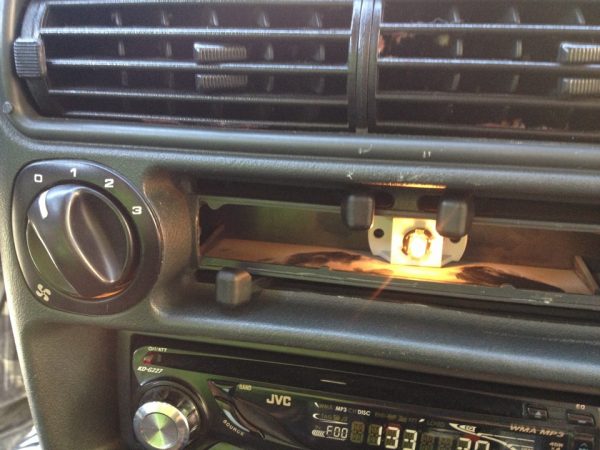
 - The heater has two light bulbs, one of which is fixed directly to the stove regulator itself, and the second is located on the levers that control the air flow in the cabin. Both should be taken out and checked.In the depths of the scale, under the stove control levers, there is a light bulb
- Replacing light bulbs is very useful to coincide with a simultaneous check of the condition of the air ducts in the heating system. Often, their nozzles move away from each other, which creates unnecessary noise when the stove is running and significantly reduces its efficiency.
- Then, the worn-out light bulbs are replaced with the same or more expensive, but with a much longer service life, LED.
- When connecting the terminal with voltage, it is necessary, when the dashboard is disassembled, to check the performance of the new bulbs.
- If everything is normal, the device is installed in place in the reverse order.
How to remake the backlight of the VAZ 2114 stove using LED strip
Many drivers, not content with a simple replacement of bulbs with similar or even LED ones, decide to tune the stove backlight with LED strips.
To do this, they use 2 strips with white LEDs 10 cm and 5 cm long and 2 pieces of strips with red and blue LEDs of 5 cm each. In addition to them, for a similar alteration of the furnace illumination, you will also need:
- crosshead screwdriver;
- knife;
- pliers;
- soldering iron;
- textolite plate;
- self-tapping screws;
- glue;
- insulating tape or shrink tubing.
The tuning process of reworking the backlight using LED strips is as follows:
- The on-board network is disconnected from the battery.
- The instrument part of the torpedo is dismantled to gain access to the stove illumination lamps.
- The textolite plate is cut to length in accordance with the internal dimensions of the oven scale.
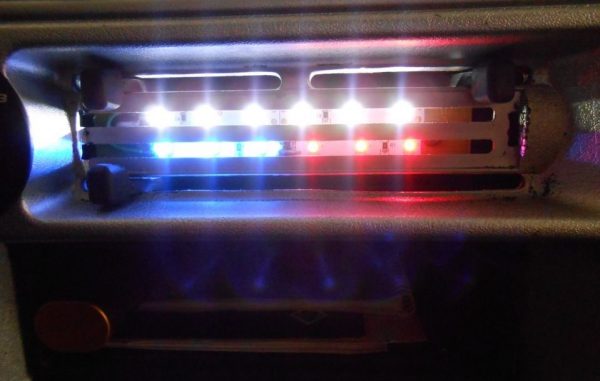
- Sections of LED strip are glued to the textolite plastic prepared in this way. The white LEDs are located at the top of the tape, while the blue and red LEDs form the bottom row, flush with each other.
- A textolite plate with LEDs is attached to the inside of the dashboard using self-tapping screws.
- The wires from the lamp holders are soldered off and soldered to the contacts on the tapes: in the stove regulator, where a 5-centimeter segment of a white LED strip is placed, and on the stove scale, where 3 multi-colored segments are located. In this case, it is imperative to observe the polarity (white wire - plus, and black - minus). The contacts are carefully insulated with electrical tape or heat shrink tubing.
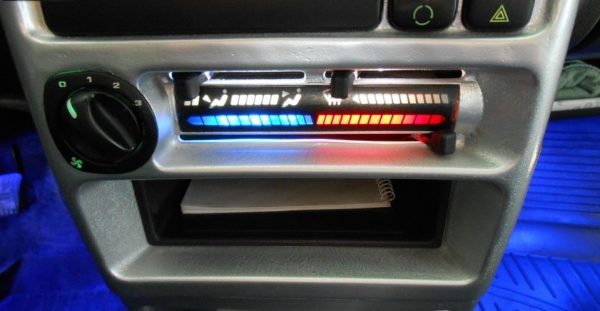
- A filter film (usually Oracal 8300–073) is attached to the back of the oven scale, which dampens the excessive shine of the LEDs.
Such a transformation will not only make the stove regulator more visible, but also bring a new bright element to the overall ambience of the car's interior.
The experience of car enthusiasts
I decided to finally change the bulbs in the backlight of the stove, which did not work for me when I bought the car.
Before that, I scoured the Internet and found out that there are two ways to replace these light bulbs.
The first way is to disassemble the entire torpedo, etc. and so on.
The second way is to get to them through the scale of the stove regulators.
I used the second way.
Tools: Phillips screwdriver, small pliers, flashlight to illuminate the process of changing lamps.
First, the red-blue socket is removed, the rods under this socket are pushed apart with a screwdriver, the old light bulb is carefully pulled out with pliers.
Then he goes across the road to the nearest auto shop, the old light bulb is shown to the seller, the same new one is purchased.
The new bulb is inserted in the same way.
All! The backlight works!
Who needs it - use the method, everything works. The main thing is that your hands do not tremble and do not drop the lamp from tweezers or pliers))))
If after switching on it seems to you that the light is pleasant to the eye, but you want a little more contrast, you can unscrew the plate with ribbons and mount it again, but not directly to the body, but through small bushings that will help bring the LEDs close to the scale. As a result, the lighting will become less diffuse.
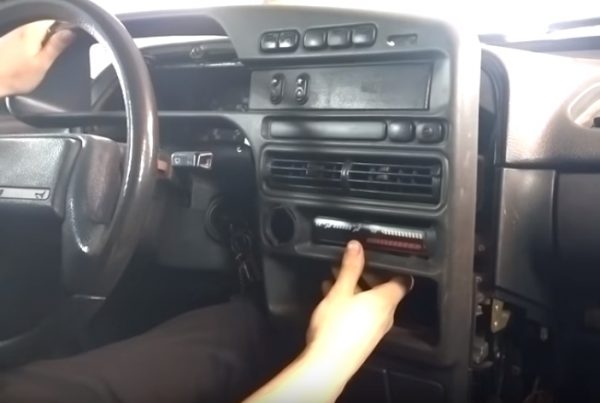
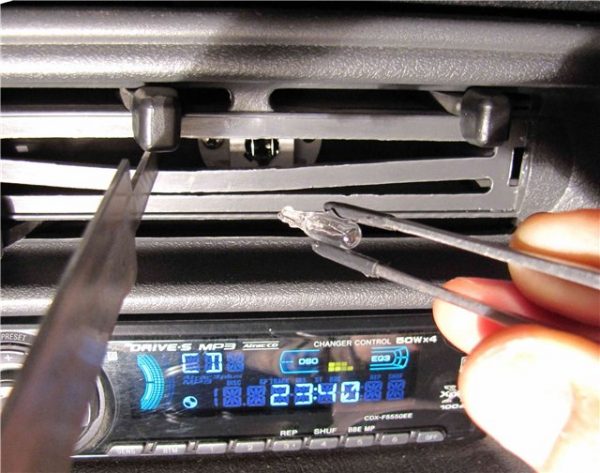
In order not to remove the entire dashboard, you can limit yourself to removing only a translucent scale on the stove. The method is crude, but effective. To do this, with a thin and wide screwdriver, you need to pry off the scale on the right (it is impossible on the left because of the protrusions located there!) And at the same time pull the middle of the scale towards you with your fingers so that it slightly bends in an arc. After that, the light bulb will be visible behind the plastic guides, which must be moved apart. Then, using tweezers with non-slip ends, remove the bulb from the socket and insert a new one instead. When you return the scale to its place, you need to insert it from left to right, again slightly bending the arc.
This crude but effective method allows you to replace a bulb in an oven light without removing the dashboard.
Video: how to put LED strips to illuminate the stove in a VAZ 2114

Of course, the stove in the passenger compartment of the car will regularly perform its functions even when the backlight is not burning. However, this brings obvious discomfort to the driver and passengers in the dark. After all, this device not only regulates the degree of heating of the air, but directs its flows in different directions. The lack of backlight makes it much more difficult to operate this device, while its repair is not too difficult.

