What is an angle guide?
Content
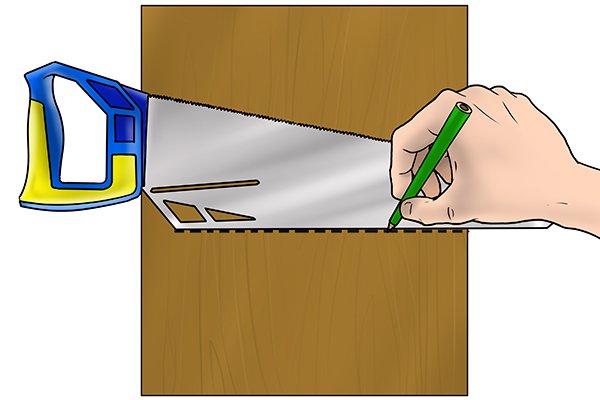
Some hand saws are designed so that you can mark out 45 or 90 degree angles using the handle and the back of the blade. Below are two examples of how to use the angle guide on a hand saw: | ||||
90° angle marking | ||||
| Step 1 – Miter Saw HandlePress the saw handle against the side of the material that you want to mark. | |||
 | Step 2 - Mark your lineHolding the saw with one hand, draw a straight line on the material with the back of the blade. | |||
| Alternatively, you can use a line stencil in the center of the blade, which also creates a 90 degree angle. | |||

 | Step 3 – Record the sawRemove the saw and you are left with a 90 degree angle. | |||
labeling 45° angle | ||||
 | Step 1 – Miter Saw HandlePress the saw handle against the side of the material you want to mark as shown in the previous section. | |||
 | Step 2 - Mark your lineWhile holding the saw in place with one hand, use the angled edge of the blade closest to the handle to mark a straight line on your material. | |||
 | Alternatively, you can use two stencils on the blade that create a 45 degree angle. | |||
 | Step 3 – Record the sawRemove the saw and you are left with a 45 degree angle. | |||
Posted
in

