Photoetching in modeling practice
Photo-etched model. (Edward)
multimedia models? this term refers to sets containing elements made using different technologies. Manufacturers are increasingly adding metal, resin, special versions of decals, etc. to basic models made of cardboard, wood or plastic. To use them correctly, modellers must demonstrate the appropriate skills. For those who would like to have them, the next cycle is dedicated.
Photo-etched
The method of manufacturing model elements from plastics is being improved more and more. However, even the use of digital design of injection molding dies will not eliminate the main drawback of this technology? it is not possible to produce very thin elements. This is most noticeable, for example, in the case of displaying thin sheets or corners on vehicle models. A 1mm thick element on a 35:1 scale would actually be 35mm thick. In the most popular aviation scale, 1:72, the same element in the original will be equal to 72 mm. For many modellers, this is unacceptable, so, in an effort to match the original, they made small elements from aluminum foil or copper plate. This was due to the complexity of the work and the lengthy assembly. This problem was solved by introducing branded (for example, Aber, Eduard) photo-etched elements to the market. These are thin plates, most often made of brass or copper, on which a number of valuable elements are deposited in the process of photolithography. Mass-produced, relatively cheap, allowing to significantly improve the appearance of the models? replacement of incorrectly or incorrectly reproduced details and addition of missed ones. Of course, mistakes sometimes happen here, for example, there is a steering wheel in the kit (anyone saw the original flat? steering wheel??!). Photo-etched elements are also used (and added) to cardboard and wood models.
There are two main groups of photoetch kits on the market. The most numerous kits are prepared for specific models of this manufacturer. The second group consists of universal parts, most often used in the construction of dioramas. That is why we offer gates and wickets, barbed wire, tree leaves, road barriers, signs, etc. All kits are supplemented by manufacturers with detailed instructions: what and how to form and where to mount on the model.
Prepare and the use of photo-etched elements requires the use of appropriate tools and processing methods. Absolutely necessary? precise tweezers, a sharp knife and a tool with which we can bend the sheets. Scissors, a small metal file, a magnifying glass, fine sandpaper, drills and a sharp needle will also come in handy.
Photo-etched elements are assembled into rectangular plates. Separate the individual parts with a knife, while the plate should lie on a hard cushion. In the absence of a lining, the edges of the elements may be bent. Details can also be cut with scissors. In any case, metal tongues (positioning elements in the plate) should be cut as close as possible to the part without damaging it. This is especially important in the case of very small elements, larger ones can be further sanded.
Formation Photo-etching of elements is relatively easy because they are properly prepared for it. Most often, those are etched, the fragments of which should have the shape of an arc. The thinner layer of metal makes it easier to form. It is most convenient to obtain the corresponding bends using ? how is the hoof? drill of the required diameter.
The places where the element should be bent at an acute angle are indicated by a thin line, which is also etched. Small items can be bent with tweezers. Larger ones require the appropriate tool so that the fold line is even and uniform along the entire length. You can buy special bending machines in model shops, which are great for forming various types of long profiles, covers, etc. In the case of very long elements, the side or rear edge of the bending machine is used for fixing. An alternative to this rather expensive piece of equipment is the use of a caliper. Its precise and even jaws allow you to grip and bend most plates perfectly.
Embossing is easily reproduced on photo-etched elements. Does the manufacturer make appropriate, usually oval, cuts in selected places? their grid is visible from the ?left? gills. Leading the tip of the pen (tip with a ball) into them, we form protrusions. When stamping, the part must be on a hard and level surface. Preparing the embossing may slightly deform the element, gently spread it with your fingers. Similarly, larger bulges can be formed, for example, in manholes for tanks. To prepare them, use a small ball from the bearing. The method is very similar, roll the ball in the trimming area until the desired shape is obtained.
Sometimes it happens that the sheet used by the manufacturer is very hard and, despite the undercuts, it is difficult to form it. In this case, it should be calcined over a gas burner and allowed to cool quietly. The material prepared in this way will be more plastic.
installation Photo-etching of elements is possible in two ways: gluing with cyanoacrylate glue or soldering. Both techniques have their advantages and disadvantages. Gluing is simpler, cheaper, allows you to connect metal to plastic, but the weld is less durable. Soldering is harder, more expensive, and relatively complex, but parts joined in this way can withstand heavy loads. This solution should only be used to connect metal elements together in case of large parts (eg tank fenders). In practice, the author uses only gluing, and this, in his opinion, is a sufficient solution. Especially since it has another advantage? Elements connected in this way can be peeled off without damaging them. The so-called debonder (a kind of cyanoacrylate solvent). We lower it to the selected place and after a while you can carefully separate the elements. This way we have the ability to fix a badly glued or badly shaped element without tearing it off or bending it excessively. Unfortunately, soldering does not provide such opportunities? at the junction there will always be remnants of tin.
It is very important to choose the right glue. Some work faster, giving you less time to place elements correctly, others link more slowly, allowing you to make corrections but slowing down the entire build. A fundamental element when working with photo-etching? is to choose the right amount of glue. Too small will dry quickly and may not connect the elements well. Too much of it can splatter, wash out small details (the glue then works like putty) and create bumps that ruin the model after painting. But attention? You can try to remove excess glue with a debonder. And finally, one more rule. Cyanoacrylate adhesives should not be used for gluing transparent elements, as they can cause them to fog up, i.e. the formation of a milky coating.
When gluing, we apply a binder to one of the joined elements and apply it to the other in the selected place. The adhesive must be drawn (capillary) into the gap between them. If the element is very small, apply a drop of glue to a piece of plastic plate and moisten the edge of the fragment captured with tweezers in it. You can also join two connected elements together and apply glue to the tip of the needle.
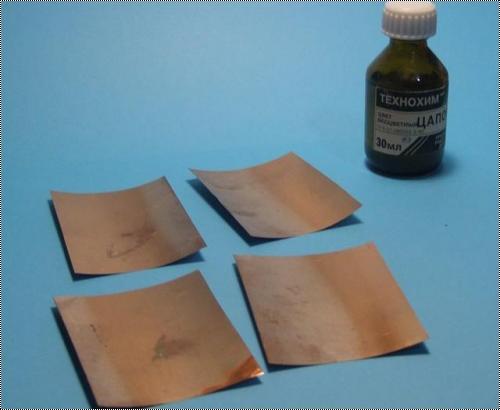
If you want to photo-etch parts, degrease them well. You must use solder paste (acid-free!), and use a temperature-controlled soldering iron or a gas micro-torch to heat the elements to be joined. It must be remembered that the plate, preliminarily overheated, annealed and covered with a layer of oxides, is soldered very capriciously.
Malovanie requires special care. Models with? gills? they must be spray painted with a thin coat of paint. Using a brush may damage or detach small parts. It can also lead to underpainting of the corners of bent sheet metal.