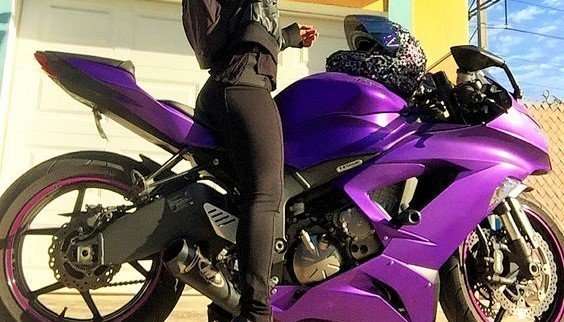
Primer for your motorcycle
Content
Tutorial in 4 steps: preparation, priming, painting, varnish
Supplies, method and advice
Painting is the first clue that distinguishes a beautiful motorcycle from horror, and which, by its state, indicates whether the motorcycle has suffered from the agony of time. And simple makeup doesn't work with the body. Thus, a person may be tempted to give a second life to a tank or fairing after falling or worn out over time.
Placing new paint on a motorcycle can be done by yourself with quality aerosol cans if you spend time there and with a minimum of techniques and precautions. After choosing the color, correct paint and formula, we will tell you everything to install!
Even if they are amateurish, painting work is difficult. Full paint depends on multiple coats, including primer, paint itself and multiple coats of varnish (for better durability).
A good result is obtained only if a number of basic rules are followed. Especially if you want to create effects or apply multiple shades. Let's not forget that painting is the history of chemistry. The reaction and adequacy between the various elements applied to the support significantly determines the quality of the result. As well as a good respect for the process, between observing drying times and finishing between each coat. Precautions to be taken to ensure good retention over time.
Equipment required to prepare the part
- The sandpaper is adapted… to the body. Fine-grained, water-based, used for cleaning parts and preparing surfaces. The larger the number after the name, the thinner it is.
- Grinding wedge. Flat element for smoothing the surface after sandpaper.
Or
- Encryption machine. Preferably eccentric. This allows the parts to be removed and not carry the elbow oil supply. We will have to! Remember to adapt the shock absorber before attaching the sandpaper.
Or
- Stripping paint. Ideal for exposing an already painted surface (e.g. a used part). The stripper lets you attack the lacquer layer and then paint. The operation is long and open space is highly recommended for ventilation, fire or explosion hazard, and health. The chemical solution smells strong. Very strong. This is not our recommendation.
Note: Industrial solvents used particularly in paint strippers are hazardous and toxic. The smell that comes from it is a sign of adverse health effects, which varies depending on the food, the duration and the repetition of the exposure. This ranges from acute to chronic effects. The solvent can cause skin diseases (irritation, burning, dermatosis), damage to the nervous system (dizziness, intoxication, paralysis ...), blood (anemia), liver (hepatitis), kidney and reproductive system, or cancer.
Preparation of parts for painting
The main function of the painting, in addition to aesthetics, is to protect the elements from corrosion. Therefore, it is important to ensure that the surface is flawless before applying any paint coat. If this is not the case, paint surfaces should be prepared and all traces of rust removed. The surface to be painted must be evenly prepared and sanded before switching to acetone or degreaser.
If the part is already painted but does not have any rust or roughness, simply sand by hand with sandpaper to properly prepare the surface for a new coat of paint. You can start with 1000 sandpaper to prepare the part and finish with 3000 or more to fix the imperfections. You will need to submerge the paper in soapy water to limit abrasion and get the best possible effect. Picking up larger paper can dig too much of the support, especially if it is made of plastic. 400 is the minimum to consider and is already a very large grain for this preparation operation.
If the part has small marks of rust, it is important to remove them by hand or with an eccentric sander. There should be no more rust marks before painting. If the rust persists, you can apply a rust converter at the end. Now, if there are a lot of rust or rust holes, you have to close the rust holes by filling them with a two-component fiberglass product, but here we are in a large restoration ...
Part is ready ?! then we can move on to the drawing phase.
Equipment required for painting
- Solvent (acetone or White Spirit). Painting is a challenge. The solvent also dilutes the dropper or limits damage in case of unsafe handling. From all over, an ally, like an enemy. Use in moderation. The paint thinner is also useful for degreasing surfaces to be painted and increasing adhesion.
- Spray paint primer (or primer). A good paint will only work on a good base. see our article on painting motorcycles. The primer hangs the paint and also gives a greater range of paint depending on the base surface.
- If the surface is made of thermoplastic plastic, a plastic primer is also required.
- Bomb paint of the same brand and origin as the primer and varnish (to avoid chemical reactions).
- Simple or two-layer spray varnish. Clearcoat 2K is a high-strength two-component polyurethane clearcoat. It can be matte or shiny. The varnish provides the finish of the paint and especially its protection from external aggressions: weather conditions, ultraviolet (sun) and especially from external aggressions (various fents, gravel, lightning and others).
- Tins / ramps / hanging hooks for stowing parts. To be fully colored, a body element must be completely exposed to the paint. An obvious fact, but how can we not have a "blind spot" when the part is on the support?
- A well-protected and ventilated painting area (a mask that protects you is not a luxury)
Applying an underlay
A primer (or primer) must be applied. 2 coats of primer are a good base. They must be done in two stages, separated by the drying time. The first coat of primer can be sanded with fine grain and soapy water before drying and covered with a second coat. We might be tempted to skip this step, but it would be a mistake if we wanted the painting to last over time.
Spray paint
The paint grinds into several layers. Each layer must be sanded before moving on to the next.
Depending on the paint nozzle, at least how you spray it, the distance is more or less important. It is important not to be too close to the room to paint. This avoids localized over-thickening and allows quick drying. It's all about patience. The theoretical paint spray distance is 20 to 30 centimeters.
Be careful. When you are at the end of the bomb, the risk of spraying "pâtés" paint is more common. Likewise, it is recommended to clean the nozzle between each layer. To do this, turn the bomb upside down and spray until only the gas comes out through the evaporator. This way, you will always have the same flow rate, the same direction and especially not get stuck in the nozzle, which may leave on the next spray.
Opening
In terms of finishing, varnish is an important and difficult step to achieve: too little varnish and protection is not optimal, too much varnish and it dries poorly and may flow on your support. Call.
Installation of varnish.
The paint should "stretch" and slide into place. It is important to dry. It can be homogenized before the bulge of the varnish layer. Depending on its type, it will give a shiny or matte look. The type of varnish to choose from (more or less thick and more or less resistant) is determined by the impact of gravel splashes or scratches on the part. A harder and harder varnish (2K varnish) is applied to sensitive areas. A simple varnish, always applied in several coats, may suffice on other parts.
Professional bodybuilders can lift up to nine coats of paint. Therefore, you must be patient, good respect for the drying time, sand ...
Remember
- Choose an environment with as little dust and animals as possible
- A beautiful varnish is a guarantee of a durable paint.
- Professionals can apply 4 to 9 coats of varnish and work on each coat for a perfect rendering (sanding, etc.). When you are told that it all depends on time!
Not to do
- I want to go too fast and load the room too much with both paint and varnish
- Do not use a primer
- Do not prepare part for upstream painting