How to use the pipe dry test kit?
Content
Step 1 - Plug or seal the pipelinePlug or seal any open ends and use valves to limit the pipeline test run. Using valves to limit the test area means that you can test a specific part of the pipeline depending on where the valves are located. | ||
| ||
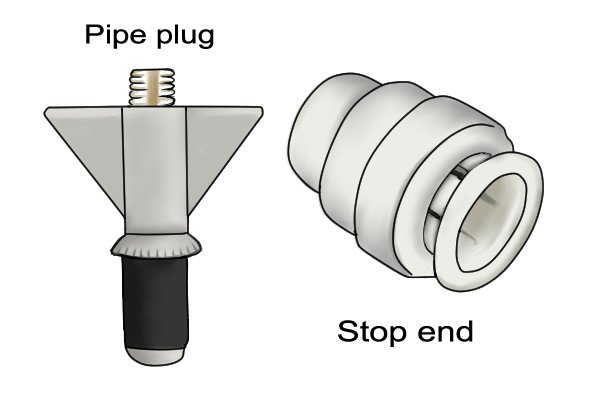
 | Pipe plugs and plugs are used to seal the ends of copper and plastic pipes during testing. Both can be purchased in a variety of sizes to fit different diameter pipes. Make sure there are no burrs on the end of the pipe before installing the plug or plug. A burr is a rough, sometimes jagged edge that remains on the inside and outside of the end of a piece of pipe after it has been cut. Remove burrs with sandpaper, a file, or a special tool on some pipe cutters. | |
 | Insert a plug into the end of the pipe. Once the end of the plug is inside the pipe, turn the wings clockwise to tighten the plug. | |
 | The thrust end will be mounted on the open end of the pipe. It is then pressed against the pipe to lock it in place. (To remove the stop end, insert the ring into the fitting and remove it from the pipe.) | |
 | Step 2 - Connect TesterUse a push-fit fitting to connect a test gauge to the pipeline. Simply slide the pipe into the fitting to secure the pipe clamp around the pipe and lock it in place. | |
 | Step 3 - Test kit readyOnce the test gauge is in place, you are ready to pressurize the system. | |
 | Step 4 - Pressurizing the piping systemTo pressurize the system, use a hand pump, a foot pump, or an electric pump with the appropriate adapter. | |
 | Each of these pumps will require a Schrader Pump Adapter. | |
 | Place the pump adapter on the end of the Schrader valve by pushing and turning the adapter clockwise onto the valve. | |
 | Pump air into the system while watching the dial. Make sure there is enough air in the system so that the needle points to 3-4 bar (43-58 psi or 300-400 kPa). | |
 | Step 5 - Time TestMaintain the test pressure for approximately 10 minutes to see if a pressure drop occurs. You can leave the test for as long as you want, but the minimum test time recommended by professionals is 10 minutes. | |
 | Step 6 - Check pressure dropIf after 10 minutes the pressure has not dropped, the test was successful. | |
 | If there is a pressure drop, then the test was not successful. Cm. How to fix pressure drop? | |
 | ||

