How to clean and repack wheel bearings
Content
The wheel bearing should be cleaned and resealed if there is abnormal tire wear, tire grinding or steering wheel vibration.
Since the invention of the modern automobile, wheel bearings have been used to some extent to allow the tires and wheels to rotate freely as the vehicle moves forward or backward. While the construction, design, and materials used today are very different from those of years past, the basic concept of the need for proper lubrication to perform effectively remains.
Wheel bearings are designed for a long service life; however, over time they lose their lubricity due to excess heat or debris that somehow finds its way into the center of the wheel hub where they are located. If not cleaned and repackaged, they wear out and need to be replaced. If they break completely, it will cause the wheel and tire combination to fall off the vehicle while driving, which is a very dangerous situation.
Prior to 1997, most cars sold in the United States had an inner and outer bearing on each wheel, which were typically serviced every 30,000 miles. "Maintenance free" single wheel bearings, designed to extend the life of wheel bearings without the need for maintenance, ultimately came out on top.
While many vehicles on the road have this new type of wheel bearing, older vehicles still need maintenance, which includes cleaning and refilling the wheel bearing with fresh grease. Most car manufacturers agree that wheel bearing repacking and cleaning should be done every 30,000 miles or every two years. The reason for this is that over time the grease loses much of its lubricity due to aging and heat. It is also very common for dirt and debris to seep into the wheel bearing housing, either due to brake dust or other contaminants near the wheel hub.
We will refer to general instructions for cleaning and repacking wheel bearings that are not worn. In the sections below, we will outline the symptoms of a worn wheel bearing. If you notice any of these symptoms, it's a good idea to replace the bearings rather than just clean the old ones. It is also recommended that you purchase a service manual for your vehicle for the exact steps to find and replace this component on your vehicle as it may vary between individual vehicles.
Part 1 of 3: Identifying Signs of Dirt or Wear in Wheel Bearings
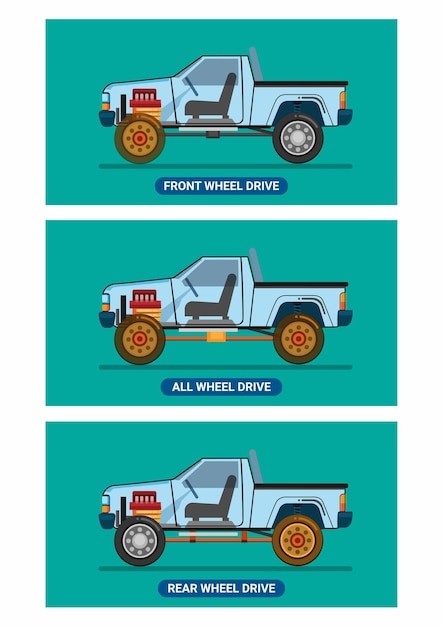
When the wheel bearing is properly filled with grease, it rotates freely and does not generate excess heat. Wheel bearings are inserted inside the wheel hub, which attaches the wheel and tire to the vehicle. The inner part of the wheel bearing is attached to the drive shaft (on front-wheel drive, rear-wheel drive and four-wheel drive vehicles) or freely rotates on a non-driven axle. When a wheel bearing fails, it is often due to a loss of lubricity within the wheel bearing housing.
If a wheel bearing is damaged, it displays several warning signs or symptoms that alert the vehicle owner to replace wheel bearings rather than simply cleaning and repacking them. Abnormal Tire Wear: When a wheel bearing is loose or worn, it causes the tire and wheel to not line up properly on the hub. In many cases, this results in excessive wear on the inner or outer edge of the tire. There are several mechanical problems that can also have similar symptoms, including over-inflated or under-inflated tires, worn CV joints, damaged shock absorbers or struts, and suspension imbalance.
If you’re in the process of removing, cleaning and repacking the wheel bearings and you find excessive tire wear, consider replacing the wheel bearings as preventative maintenance. Grinding or roaring noise coming from the tire area: This symptom is commonly caused due to excess heat that has built up inside the wheel bearing and a loss of lubricity. The grinding sound is metal to metal contact. In most cases, you’ll hear the sound from one side of the vehicle as it’s very rare that the wheel bearings on both side wear out at the same time. If you notice this symptom, do not clean and repack the wheel bearings; replace both of them on the same axle.
Steering wheel vibration: When the wheel bearings are damaged, the wheel and tire are very loose on the hub. This creates a bouncing effect, causing the steering wheel to vibrate as the vehicle accelerates. Unlike tire balancing problems that usually show up at higher speeds, steering wheel vibration due to a worn wheel bearing is noticeable at lower speeds and gradually increases as the vehicle accelerates.
It is also very common for a car to have wheel drive and acceleration problems when the wheel bearings on the drive axles are damaged. In any case, when the above symptoms appear, it is recommended to replace the wheel bearings, as simply cleaning and resealing them will not solve the problem.
Part 2 of 3: Buying Quality Wheel Bearings
While many hobby mechanics often look for the best prices on replacement parts, wheel bearings are not components you want to skimp on parts or product quality. The wheel bearing is responsible for supporting the weight of the car, as well as powering and steering the car in the right direction. Replacement wheel bearings must be made from quality materials and from reliable manufacturers. In most cases, the best option is to buy OEM wheel bearings. However, there are several aftermarket manufacturers who have developed exceptional aftermarket parts that outperform the OEM equivalent.
Any time you plan to clean and repack your wheel bearings, consider doing the following steps first to save time, effort, and money in the long run.
Step 1: Look for symptoms that indicate the need to replace wheel bearings.. The wheel bearing must be in working order, clean, free of debris, seals must be intact and work properly.
Remember the golden rule of wheel bearings: when in doubt, replace them.
Step 2: Contact the vehicle manufacturer's parts department.. When it comes to wheel bearings, in most cases the OEM option is better.
There are a few aftermarket manufacturers that make exceptional equivalent products, but OEM is always best for wheel bearings.
Step 3: Make sure the replacement parts match the exact year, make, and model.. Contrary to what your local auto parts store might say, not all wheel bearings from the same manufacturer are identical.
It is very important to make sure you are getting the exact recommended replacement part for the year, make, model and in many cases trim level of the vehicle you are servicing. Also, when you buy replacement bearings, make sure you are using the recommended bearing sealing grease. You can often find this information in your vehicle's owner's manual.
Over time, wheel bearings are subjected to enormous loads. Although they are rated to last over 100,000 miles, if they are not regularly cleaned and repackaged, they can wear out prematurely. Even with constant maintenance and repair, they wear out over time. Another rule of thumb is to always replace wheel bearings every 100,000 miles as part of a scheduled maintenance.
Part 3 of 3: Cleaning and replacing wheel bearings
The job of cleaning and repacking wheel bearings is a job that most amateur mechanics don't like to do for one simple reason: it's a messy job. To remove the wheel bearings, clean them and refill with grease, you need to make sure the car is raised and that you have enough room to work under and around the entire wheel hub. It is always recommended to clean and pack wheel bearings on the same axle on the same day or during the same service.
To perform this service, you need to collect the following materials:
Necessary materials
- Can of brake cleaner
- Clean shop rag
- flat screwdriver
- socket
- Jack stands
- Wrench
- Pliers — adjustable and needle-nose
- Replaceable cotter pins
- Replacement of inner oil seals of wheel bearings
- Replacing wheel bearings
- Safety glasses
- Latex protective gloves
- Wheel bearing grease
- Wheel chocks
Set of keys and heads
A warningA: It's always best to purchase and review the vehicle service manual for your specific make, year, and model to complete this process. Once you have reviewed the exact instructions, proceed only if you are 100% sure that you will complete this task. If you are unsure about cleaning and resealing your wheel bearings, contact one of our local ASE certified mechanics to perform this service for you.
The steps to remove, clean and repack wheel bearings are fairly simple for an experienced mechanic. In most cases, you can make each wheel bearing within two to three hours. As noted above, it is very important for you to service both sides of the same axle during the same service (or before re-entering the vehicle). The steps below are GENERAL in nature, so always refer to the service manual for the exact steps and procedures.
Step 1: Disconnect the battery cables. Many vehicles have sensors attached to the wheels (ABS and speedometer) that are powered by a battery.
It is always recommended to disconnect battery cables before removing any components that are electrical in nature. Remove the positive and negative terminals before lifting the vehicle.
Step 2: Raise the vehicle on a hydraulic lift or jacks.. If you have access to a hydraulic lift, use it.
This work is much easier to do while standing. However, if you don't have a hydraulic lift, you can service the wheel bearings by jacking up the car. Be sure to use wheel chocks on the other wheels that are not raised, and always raise the vehicle with a pair of jacks on the same axle.
Step 3: Remove the wheel from the hub. Once the vehicle is raised, start on one side and complete it before moving on to the other.
The first step here is to remove the wheel from the hub. Use an impact wrench and a socket or torx wrench to remove the lug nuts from the wheel. Once that's done, remove the wheel and set it aside and away from your work area for now.
Step 4: Remove the brake caliper from the hub.. To remove the center hub and clean the wheel bearings, you will have to remove the brake caliper.
As each vehicle is unique, the process is just as unique. Follow the steps in your service manual for removing the brake caliper. Do NOT remove brake lines during this step.
Step 5: Remove the outer wheel hub cap.. After removing the brake calipers and brake pads, the wheel bearing cap must be removed.
Before removing this part, inspect the outer seal on the cover for damage. If the seal has been broken, this indicates that the wheel bearing is damaged internally. The inner wheel bearing seal is more critical, but if this outer cover is damaged, it should be replaced. You should proceed with buying new bearings and replacing both wheel bearings on the same axle. Using a pair of adjustable pliers, grasp the sides of the lid and gently rock back and forth until the center seal breaks. After opening the seal, remove the cover and set aside.
- Functions: A good mechanic usually follows a procedure that helps him keep all parts in a controlled area. A tip to look out for is to create a shop rag pad where you place the pieces as they are removed and in the order they are removed. This not only helps reduce lost parts, but also helps remind you of the installation order.
Step 6: Remove the center pin. After removing the wheel bearing cap, the center wheel hub nut and cotter pin will be visible.
As shown in the image above, you will need to remove this cotter pin before removing the wheel hub from the spindle. To remove the cotter pin, use needle nose pliers to bend the pin straight, then grab the other end of the cotter pin with pliers and pull upward to remove.
Set the cotter pin aside, but always replace it with a new one whenever you clean and repack wheel bearings.
Step 7: Remove the center hub nut.. To unscrew the center hub nut, you will need a suitable socket and ratchet.
Loosen the nut with a socket and ratchet and manually unscrew the nut from the spindle. Put the nut on the same rag as the center plug to make sure they don't get lost or misplaced. Once the nut has been removed, you will need to remove the hub from the spindle.
There is also a nut and outer bearing that comes off the spindle as you remove the hub. The inner bearing will remain intact inside the hub as you remove it. Pull the hub off the spindle when you’ve removed the nut, and place the washer and outer wheel bearing on the same rag as the nut and cover.
Step 8: Remove the inner seal and wheel bearing. Some mechanics believe in the old «place the nut on the spindle and remove the inner wheel bearing” trick, but that’s really not a good way to do this.
Instead, use a flathead screwdriver to carefully pry the inner seal from the inside of the wheel hub. Once the seal has been removed, use a punch to pry the inner bearing out of the hub. As with the other pieces you removed, place them on the same rag when this step is complete.
Step 9: Clean the wheel bearings and spindle. The best way to clean the wheel bearings and axle spindle is to remove all the old grease with a rag or disposable paper towels. This will take a while and can get pretty messy, so make sure you use latex rubber gloves to protect your hands from the chemicals.
Once all excess grease has been removed, you will need to spray a generous amount of brake cleaner inside the wheel bearings to remove any excess debris from the inner "wheel" bearings. Be sure to complete this step for both the inner and outer bearing. The inner and outer wheel bearings, the inner wheel hub and the wheel spindle must also be cleaned with this method.
Step 10: Fill bearings, spindle and center hub with grease.. Not all greases are the same, so you should always check if the grease you are using is for wheel bearings. Tier 1 Moly EP grease is best suited for this application. Basically, you want to apply new grease to every corner of the wheel bearing from all sides. This process can be very messy and, in a way, inefficient.
To complete this step, there are a few tricks. To pack the wheel bearings, place the clean bearing inside of a plastic zip lock bag along with a liberal amount of new wheel bearing grease. This allows you to work the grease into each small wheel and bearing without causing a lot of mess outside of the work area. Do this for both the inner and outer wheel bearings Step 11: Apply fresh grease to the wheel spindle..
Make sure you have a visible layer of grease along the entire spindle, from the front to the backing plate.
Step 12: Apply fresh grease to the inside of the wheel hub.. Make sure the outer edges are completely closed before inserting the inner bearing and installing a new bearing seal gasket.
Step 13: Install the inner bearing and inner seal. This should be rather easy since the area has been cleaned.
When you press the inner seal into place, it clicks into place.
Once you've inserted the inner bearing, you want to apply a fair amount of grease to the inside of these parts, as shown in the image above. Install the inner seal after the entire area is completely filled with new grease.
Step 14: Install the hub, outer bearing, washer and nut.. This process is the reverse of deletion, so the general steps are as follows.
Slide the outer bearing inside the center hub and insert a washer or retainer to align the outer bearing right on the hub. Place the center nut on the spindle and tighten until the center hole lines up with the spindle hole. A new pin is inserted here. Insert the cotter pin and bend the bottom up to support the spindle.
Step 15 Spin the rotor and hub to check for noise and smoothness.. When you’ve correctly packed and installed the clean bearings, you should be able to freely spin the rotor without hearing a sound.
It should be smooth and free.
Step 16: Install the brake calipers and pads.
Step 17: Install the wheel and tire.
Step 18: Complete other side of the vehicle.
Step 19: Lower the car.
Step 20: Torque both wheels to manufacturer's recommended torque..
Step 21: Reinstall the battery cables..
Step 22: Check out the repair. Take the vehicle for a short test drive and make sure the vehicle turns left and right easily.
You should listen carefully for any signs of grinding or clicking as this may indicate that the bearings are not mounted directly on the hub. If you notice this, return home and check all the steps above again.
If you've read these instructions, read the service manual, and decide you're better off leaving this service to a professional, contact one of your local AvtoTachki ASE certified mechanics to clean and repack the wheel bearings for you.