How to clean oxidized headlights
Content
Ever since vehicle manufacturers made a widespread shift in the 1980s from glass headlights, which are easy to break, to headlights made from polycarbonate or plastic, headlight fogging has been a problem. It has to do with oxidation...
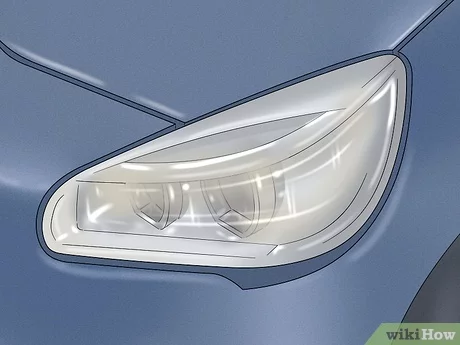
Ever since vehicle manufacturers made a widespread shift in the 1980s from glass headlights, which are easy to break, to headlights made from polycarbonate or plastic, headlight fogging has been a problem. This is caused by oxidation that occurs naturally over time - headlight oxidation is not necessarily the result of poor maintenance and happens to even the most conscientious vehicle owners. UV radiation, road debris, and atmospheric chemicals are common culprits.
This cloud cover reduces visibility at night and should therefore be cleared periodically. Fortunately, repairs to oxidized headlights can often be done on your own.
Haze in polycarbonate or plastic lenses is not necessarily the result of oxidation. Sometimes, accumulated sand and dirt can give these surfaces a hazy appearance. Rinse your headlights thoroughly before deciding to repair oxidized headlights.
If they still look cloudy after thorough cleaning, try one of these three methods to restore oxidation:
How to clean oxidized headlights with toothpaste
Gather the right materials - To clean the headlights using the toothpaste method, you will need: Car wax, Masking tape, Plastic or vinyl gloves (optional for people with sensitive skin), Soft cloth, Toothpaste (any), Water
Start by washing with soap - First wash with soap and water in a steady back and forth motion with a cloth or sponge, then rinse with clean water. After letting it air dry for a while, take a close look at your headlights again.
Protect your surroundings with masking tape - Using painter's tape, cover the areas around the headlights to protect them from accidental abrasion.
wear gloves - Wear plastic or vinyl gloves if you have sensitive skin. Dampen a clean, soft cloth with water and add a drop of toothpaste.
Use a cloth soaked in toothpaste - Wipe the surface of the headlights firmly with a cloth and toothpaste in small circles. Add water and toothpaste as needed and expect to spend up to five minutes cleaning each affected light.
Rinsing - Then rinse with water and let air dry.
Apply car wax - To protect your headlights from future damage, you can apply car wax to your headlights using a clean cloth in a circular motion and then rinse again with water.
Why does it work
Just as toothpaste can remove unwanted particles from the enamel on your teeth, it can also remove stains from your headlights. This is because toothpaste - even the gel and whitening variety - contains a mild abrasive that polishes the surface, giving it a smooth and smooth appearance, resulting in sharper headlights.
How to clean oxidized headlights with glass cleaner and car polish
Gather the right materials - To clean your headlights with glass cleaner and car polish, you will need the following materials: car polish, car wax (optional), glass cleaner, masking tape, plastic or vinyl gloves (optional for people with sensitive skin), rotating buffer (optional). , Soft cloth, Water
Cover the area with duct tape - As with the previous method, tape around the headlights to protect the trim or paint, and wear plastic or vinyl gloves if you have skin sensitivities.
Spray headlight cleaner Spray the headlights liberally with glass cleaner, then wipe the surface with a soft cloth.
Apply car polish - Apply car polish to another clean, soft cloth and thoroughly rub the surface of each headlight in a circular motion, adding polishes as needed. Plan to spend at least five minutes on each light in this way. For a faster repair, you can use the rotating buffer to apply the polish.
Rinsing Rinse with water and, if desired, apply car wax as a protection against future damage caused by oxidation, as described in the previous method.
Why does it work
Another simple method, which is often an effective means of repairing oxidation, is to use standard glass cleaner and car polish, available from auto parts stores and department stores. The glass cleaner prepares the surface, and the polish, containing a little more coarse abrasives than toothpaste, polishes the surface of the headlights.
How to clean oxidized headlights with a polishing kit
Gather the right materials - To begin cleaning your headlights with a polishing kit, you will need the following: car wax or sealant from the kit (optional), cloth, masking tape, mild detergent such as dishwashing detergent or cleaner from the kit, polishing compound, array of sandpaper. (grit size 600 to 2500), water
Cover around with masking tape - Cover the areas around the headlights with masking tape (as in methods 1 and 2) to protect against abrasives in the polish and wear gloves if you have sensitive skin.
Wash and rinse - Moisten a clean cloth with water, add a mild detergent or the cleaning agent supplied, then wash the headlight surfaces. Wash off with plain water.
Apply a polish - Apply polishing compound with another cloth in small circular motions. Take your time - up to five minutes per headlight - for the mixture to work properly.
Wet sand of your headlights - Dampen the coarsest (least grit) sandpaper in cool water, then carefully rub the surface of each headlight in a back and forth motion. Make sure the sandpaper is always damp by dipping it in water as needed. Repeat with each sandpaper from coarsest to smoothest (smallest to coarsest grit).
Rinsing — Rinse the polish thoroughly with plain water.
Apply car wax -Apply car wax or sealant for future protection using a clean rag in a circular motion and then rinse again if desired.
Why does it work
For more heavily oxidized headlights, and in case the previous methods didn't work, consider using a do-it-yourself heavy repair polishing kit. Such kits are often available at auto parts stores and are widely available for purchase online and contain most, if not all, of what you need to repair oxidized headlights and restore them to a clean look. Refer to the kit of your choice to find out what additional materials, if any, you will need from the list of required materials above.
Moisture drops on the inside of the headlights
Oxidation can occur both on the outside and inside of your flashlights (although it tends to show up most often on the outer and easily accessible parts). If you notice tiny droplets of moisture on the inside of your headlights, you'll need to remove them in order for any repair attempts to be effective. Treat the inside the same way you treat the outside.
If any of these methods fail to reduce foggy headlights, you may need to seek professional services such as AvtoTachki to fully diagnose why your headlights are not working.
