How to dip a car in plastic
Plasti Dip is a relatively new product that can be used to temporarily change the color of your vehicle. It is essentially a liquid form of the material used for car vinyl wrapping and can be sprayed on like normal paint. It dries into a flexible material that protects the paint underneath. Done right, Plasti Dip is not only a good exterior finish for your car, but it also helps keep the body and interior finishes intact. Plasti Dip can withstand low temperatures and direct sunlight without warping or melting, so it is very durable. At the same time, Plasti Dip can be easily removed and peeled off if necessary.
Part 1 of 2: Prepare your car for Plasti Dip
Necessary materials
- Buckets
- Coveralls or old disposable clothes
- Sunglasses
- Many newspapers
- Masking tape in various widths
- Mask of the artist
- Strata Dip
- Rubber gloves
- Razor blade or box opener
- Soap
- sponges
- Spray gun and trigger
- Towels
water
AttentionA: If you buy Plasti Dip in cans and plan to cover your entire car, expect to use up to 20 cans. A small car can only fit 14-16 cans, but a shortage halfway through can be a real problem, so get more. If you are using a spray gun, you will need at least 2 one-gallon buckets of Plasti Dip.
Step 1: Decide on a location. The next thing to do is choose where you will apply the Plasti Dip. Because the car will have to stand for some time to allow Plasti Dip to dry after each coat, and because Plasti Dip generates a lot of fumes when applying Plasti Dip, location is important. Here are some things to look for in a location:
Good smoke ventilation
Constant illumination for a more even application of Plasti Dip
Place indoors as it prevents debris from getting stuck in the Plasti Dip while it dries.
A shady location, as in direct sunlight Plasti Dip will dry intermittently and unevenly.
Step 2: Prepare for Plasti Dip. Now you need to prepare the car for applying Plasti Dip to it.
A firm application will result in Plasti Dip looking great and lasting for a long time. Here are a few steps that will ensure a good result:
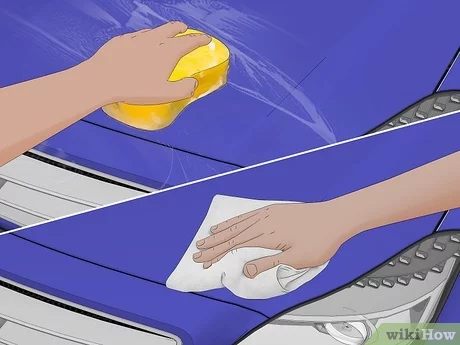
Step 3: Wash your car. Wash the car with soap and water, scraping any dirt off the paint surface until it is completely gone. The car should be washed several times to ensure that nothing remains on the paint surface when Plasti Dip is applied.
Step 4: Let the car dry. More important than any other step is drying the car thoroughly. This will ensure that there is no moisture on the surface of the paint. Use dry towels to wipe the surface dry a couple of times before applying.
Step 5: Close the windows. Use masking tape and newspaper to cover windows and any other surfaces you don't want Plasti Dip to cover.
Lights and emblems can be painted over, as once Plasti Dip dries, precise cuts around them will remove any excess.
Part 2 of 2: Applying Plasti Dip
Step 1: Wear appropriate clothing.Put on a mask, goggles, gloves and overalls.
- Functions: Keep some water handy to quickly wash off anything that might spill on you in the process.
Step 2: Use Plasti Dip. Cans are tricky but not impossible to use within the time it takes to paint an entire car. Instead, it's best to use a professional spray gun for the task, as this will likely result in a more consistent finish.
- Attention: Jars should be shaken for at least a minute each to ensure the color is evenly mixed into the Plasti Dip, and gallon-sized containers should be stirred for a minute or until all of the liquid is uniform in color.
Step 3: Get ready to paint. Plan on applying 4-5 coats of Plasti Dip if you want an even and uniform coat of paint. The thicker coating also makes it easier to peel off the material when you're done with it. This goes for anything you want to paint with Plasti Dip.
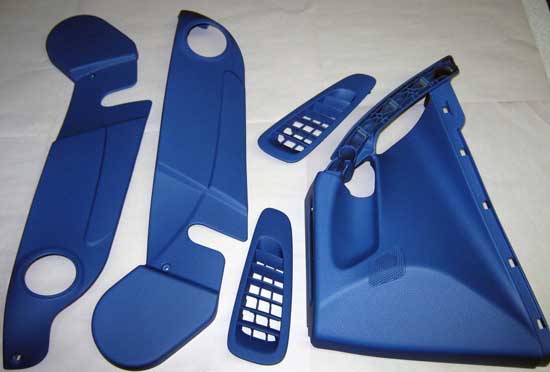
Step 4: Decide Where to Use the Plasti Dip: Decide which parts will and will not be immersed in plastic. The Plasti Dip can be easily removed from the lights and badges, but it's best to seal the rubber trim and tires so they don't get any material on them.
Grilles and trim can be removed and painted separately, or left in place and painted. Just be sure to protect the parts behind the bars before you spray it.
Step 5: remove the wheels. In order for Plasti Dip wheels to work correctly, they must be removed from the vehicle, washed and dried.
Step 6: apply paint. Hold the can or spray gun six inches from the surface of the car while painting. Swipe forward and backward and don't stop at any place.
- Attention: The first coat is called "tie coat" and should be sprayed onto the original paint. It may seem counterintuitive, but it allows the next coats to stick to both the car paint and the previous Plasti Dip coats. Aim for 60% coverage.
Each coat needs to dry for 20-30 minutes before another can be added, so the fastest way to paint the entire car is to work piece by piece, switching between pieces to allow the freshly painted coats to dry while another coat is applied to the dry ones. .
Cover everything smoothly and patiently, emphasizing consistency above all else. Take your time, because correcting mistakes will be difficult or impossible.
Once all the layers have been applied, it's time to remove all the tape and paper. Wherever the Plasti Dip comes in contact with the tape, cut the tape with a razor blade to ensure a good edge when removing the tape. Carefully cut around the emblems and taillights with a razor and remove any excess Plasti Dip.
If something looks too thin, apply another layer within 30 minutes and work as usual.
Step 7: Let the car sit. It is imperative that the vehicle is left to dry for at least four hours in order for Plasti Dip to fully cure.
Keep moisture or debris away from the surface of the vehicle during this time. If this step is done in a hurry, it is likely that the finish will not be satisfactory.
Step 8: When Plasti Dip Is Dry. Once Plasti Dip dries, the factory paint is protected by a durable, flexible material that looks professional and is easy to remove. Just find the edge of the Plasti Dip and pull it up. As soon as it comes off a little, the entire patch can be removed.
- AttentionA: Once you complete the process, you can change the color of your car whenever you want.
So Plasti Dip is both an easy way to change the color of your car and an effective way to protect your factory paint for maximum life. This is something that can be done without too much trouble for the owner and quickly and painlessly removed when you're ready. Whether you're looking to spruce up your car with something new or keep it looking good, Plasti Dip is a viable option available to the average consumer.