How to polish car lamps? How to clean and regenerate headlights in a few steps?
Content
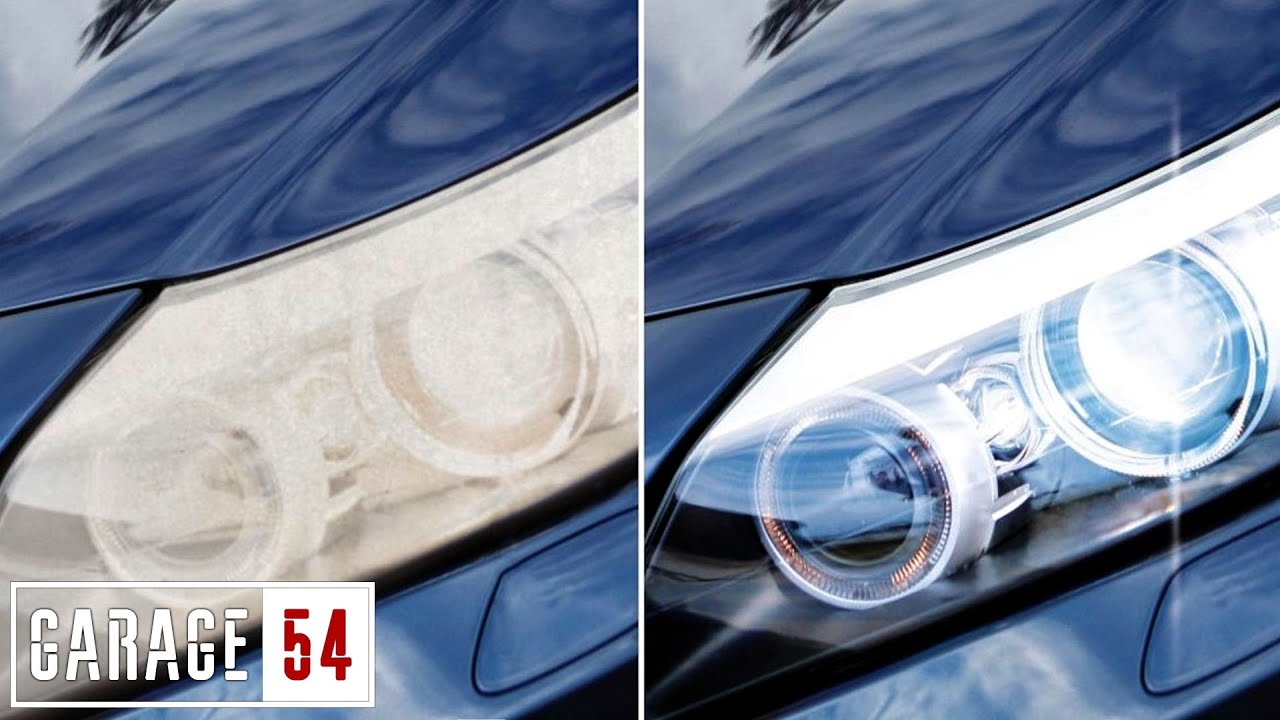
Fogging headlights are not just a problem for old car owners. Some types of plastic used in the manufacture of lamps tend to turn yellow and fade after a few years of use. Such a car looks much older, which makes the owner less happy, it is more difficult to sell it, but most importantly, the efficiency of the headlights is also reduced, which can cause numerous problems. Luckily, a well-made polishing machine can do wonders, so read carefully if you've noticed this problem on your car too. Prepare the paste, sponge and several types of sandpaper - and let's get started!
Why do headlight lenses fade and turn yellow over time?
In the past, when lampshades were made of glass, the problem of lamp surface tarnishing was virtually non-existent. Due to various factors (safety, production cost or ecology), almost every modern car has polycarbonate lamps, which, depending on the composition of the mixture, headlight design and external conditions, dim and turn yellow to varying degrees. The main factor here is the high temperature emitted by the bulb when using headlights, as well as scratches caused by contact with external factors such as sand and pebbles while driving. Fortunately, this almost never means replacing them.
Polishing car lamps is not difficult. You will do it yourself!
Although parts dealers and service people will convince you that self-regeneration of headlights is impossible or will not bring the best results, in fact there is nothing difficult that a person armed with sandpaper, polishing paste and toothpaste could not do. she advised. The vast majority of people have the necessary tools to accomplish this task in their home and garage, which, with some determination and some free time, can achieve satisfactory results. In fact, polishing headlights is not as difficult as you think! See our guide.
How to polish lamps - step by step regeneration
Before starting work, you need to organize the necessary materials and prepare the spotlights themselves for the procedure. You will need to use paper with different grits - preferably 800 and 1200, and even go up to 2500 in the end. You will also need a polishing paste, perhaps a mechanical polisher. After the procedure, the headlights can be protected with varnish or special wax for lamps. You will also need something to coat the body while you work, as well as a degreaser - you can use a silicone remover or pure isopropyl alcohol. So we start by washing the surface that will be treated with this product, and then we glue all the elements in the area of \uXNUMXb\uXNUMXbthe lamp with adhesive tape.
Polish the headlights yourself with sandpaper - no machine needed
After fixing the body (bumper, wheel arch, fender and hood) and degreasing the lights, we proceed to restore their transparency. At the beginning, we reach for 800 paper, which will quickly remove most of the scratches and haze. We consistently increase the gradation, passing through 1200, 1500 and ending at 2500 p. Wet paper is a good choice because it is softer. We alternate vertical and horizontal movements, but not oval. A special polishing pad will come in handy, because a standard wooden block will not adapt to the oval of the lamp. After the initial grinding, you can proceed to the next stage of work.
The second stage, i.e. sponge or soft cloth and polishing paste
The headlights, blunted with sandpaper, now need to be brought to full brightness. At this stage, we are waiting for the actual polishing of the lamp with polishing paste. Apply a small amount to a cloth (if you plan to polish the lamps by hand) or a polishing pad and start polishing the lampshade. You can easily polish by hand in a circular motion due to the small surface area, although of course the polishing process will be faster with a machine. Be careful not to exceed 1200 rpm (ideally 800-1000 rpm) and don't polish too long in one spot. At the end, you can remove the paste with microfiber or wash the headlight with washer fluid.
Protect the reflector from repeated scratches with varnish or wax.
A well-done polishing with sandpaper and polish should give excellent results. However, it is worth taking steps to prevent re-fading, or at least delay this process. After restoring the shine of the headlights, apply a protective layer on them - in the form of a special wax intended for headlights or varnish. Of course, this will not protect against all factors affecting the headlights in your car, but it will help protect against external factors such as road salt, sand or pebbles on their surface. Before painting, it is worth degreasing them again and letting them dry, preferably within a day, before proceeding to wash the car.
Do not hesitate - do repairs as soon as possible!
If you notice that the headlights in your car do not look the same as before, do not hesitate to take the appropriate measures to restore them to their former appearance. The process of restoring car headlights is not particularly difficult, but further delaying the necessary work will not only negatively affect the appearance of your car, but will also reduce the efficiency of the headlights, dazzle oncoming drivers and reduce your safety on the road. In extreme cases, this can even result in the seizure of a registration certificate by the police or problems with passing a diagnostic examination. Therefore, you should not wait any longer and get down to business as soon as possible - especially since you could see that it is not difficult.
Headlight polishing is not complicated or overly time consuming. Contrary to the claims of some people, almost everyone can handle it. A few hours is enough to not only renew your lampshades, but also protect them from further yellowing and scratches. So it’s worth at least trying to increase the safety of yourself and your loved ones.