How to paint your own car
One of the first things people notice about a car is not only its make and model, but also its paint. Anytime, anywhere, your car's paintwork is on display, and its condition and color greatly influence how others see it. You may need a fresh paint job for a custom look, or an update to an old paint job that has been worn down by time and the elements. However, professional paint jobs can be expensive. Many people choose to do their own repainting to save money, while others want to learn a new skill or take pride in being involved in every step of vintage car restoration. Whatever your reason for wanting to paint your car yourself, it can be done with the right materials, time, and dedication.
Before proceeding with the collection of the necessary materials, it is necessary to decide how much of the existing paint needs to be removed. Visually inspect the exterior of your vehicle from all angles, looking for paintwork defects. If there are cracks, bubbles, or flaking areas, sand all of the original paint down to metal before applying the primer sealant. If the existing paint is in relatively good condition and has just faded or you need a new color, you will only need to sand enough to get a smooth finish before applying the new paint. Here's how to paint a car:
Gather the right materials – To paint a car, you will need the following materials: Air compressor, Automotive varnish (optional), Automotive paint, Catalyzed glass putty (optional), Clean cloth, denatured alcohol (optional), Electric grinder (optional), Masking tape , moisture filter, airbrush, plastic or paper sheets (large), primer (if necessary), sandpaper (320 to 3000 grit, depending on original paint damage), water
Prepare your workstation — In a weather-protected area, prepare your work area. Protect other valuables by covering them with plastic.
Wet sand of old paint Sand down existing paint to the desired level while keeping the surface wet. While you can do the sanding by hand, it's much faster to use an electric grinder. If you need to sand down metal to metal to completely remove the original paint along with any rust that may be present, first use coarse grit sandpaper, then repeat the process with medium grit and finally fine grit once you have achieved the desired finish. bare metal. If you only need to smooth out the existing paint, use only the finest grit to prepare the surface for the new paint.
Fill in any dents - In case you have sanded down to metal, fill in any dents or dents with catalytic glazing putty and allow to dry completely. Sand it down with fine paper until smooth and then clean the surfaces with denatured alcohol and a clean cloth to remove any oils.
Prepare the car and apply a primer Remove or cover with masking tape and plastic or paper any parts of your car that you don't want to paint, such as bumpers and windows. For paint jobs that require metal sanding, a primer sealer should be applied to protect the metal from rust and create a porous surface as a base for new paint.
Functions: Many people prefer to use a spray primer for this step, although you can also use a spray gun to apply it.
Let the primer dry - Regardless of the method you choose to apply the primer, allow it to air dry completely (at least XNUMX hours) before proceeding to the next step.
Double protection, clean surfaces — Make sure that the masking tape and protective plastic or paper are not peeled off, if necessary, replace them. Clean surfaces to be painted with acetone on a cloth to ensure they are free of dust or oily residue.
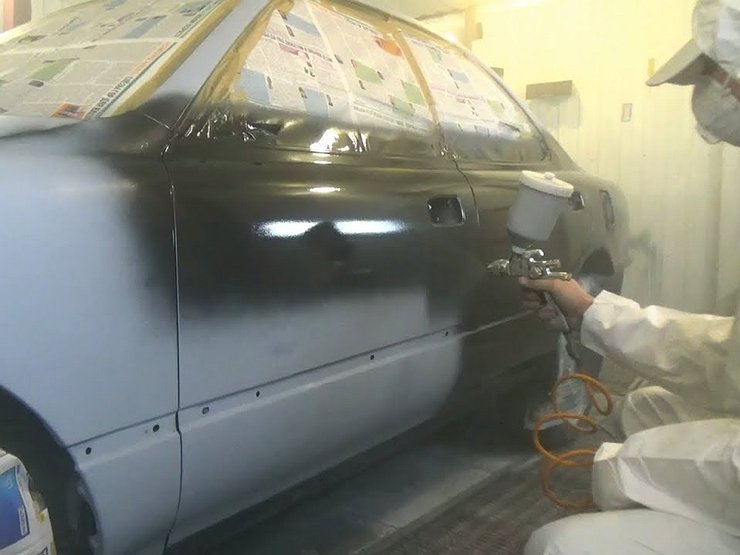
Set up your airbrush rig - The air compressor is connected to the water separator filter, which is then connected to the spray gun. Add the car paint of your choice after it has been thinned according to the specific brand's instructions.
Spray onto the surface of your vehicle in smooth, broad strokes. - Take your time to make sure each serving is completely covered. Let the paint dry or cure according to the manufacturer's instructions, which usually takes one to seven days.
Wet sand and apply a clear coat - For a glossier finish, consider wet sanding the new paint with 1200 grit or finer sanding paper and applying a clear coat after thoroughly rinsing with water.
Take away - After the paint is completely dry, remove the masking tape and protective covers you applied in step 4. Finally, replace all of your vehicle components that you removed so you can enjoy your new painted look of your vehicle.
While painting a car yourself can be a rewarding experience, it takes a lot of effort and time. That is why many people turn to professionals for painting. There is also a risk that some of your paint work will not be smooth if you do it yourself, requiring additional repair work.
In this case, the final cost could be comparable to paying a professional in the first place, and you would be under a lot of stress in the process. The cost of professional painting varies depending on the type of vehicle, the paint used and the intensity of labor. If you're unsure about this or any other issue with your vehicle, feel free to call one of your mechanics today.