How to properly set up an airbrush for painting a car: step by step instructions
Content
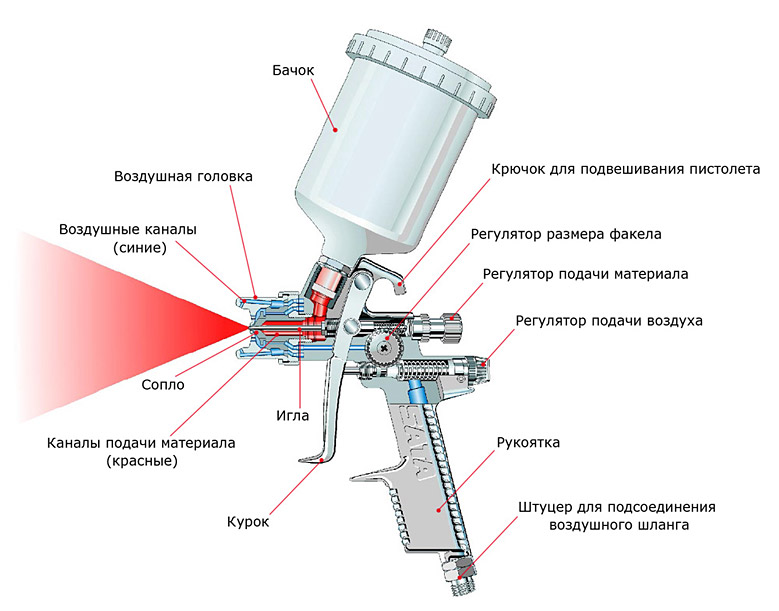
The device atomizes the liquid composition with compressed air through a narrow nozzle. Further, small drops of the mixture are evenly distributed on the surface. The setting of the spray gun for painting a car can be done using the screws and buttons on the spray gun.
The machine is protected from corrosion and abrasive particles by spraying base enamel and varnish. Setting up the spray gun for painting a car will allow you to get a uniform layer without defects. In the device, the supply of the mixture and air is regulated, and the required pressure is selected.
The principle of operation of the spray gun
The device atomizes the liquid composition with compressed air through a narrow nozzle. Further, small drops of the mixture are evenly distributed on the surface. The setting of the spray gun for painting a car can be done using the screws and buttons on the spray gun.
Advantages of the automatic device:
- uniform painting of the surface of the car;
- absence of foreign particles in the layer;
- saving materials;
- great performance.
According to the principle of operation, there are 3 types of devices - pneumatic, electric and manual. High capacity, low pressure HVLP spray guns are well suited for acrylic and primer applications. Type LVLP devices are designed to spray small volumes of mixture in a thin layer. Devices of the CONV system have the highest productivity, but the quality of the coating is lower, material losses reach 60-65%.
How to set up a spray gun for painting a car
The layer sprayed by the device on the surface must be uniform, without bumps and smudges. Therefore, the automatic spray gun must be adjusted before starting work. You can set up the spray gun for painting a car according to the instructions with your own hands.
Spray gun setting
The main steps for adjusting the device:
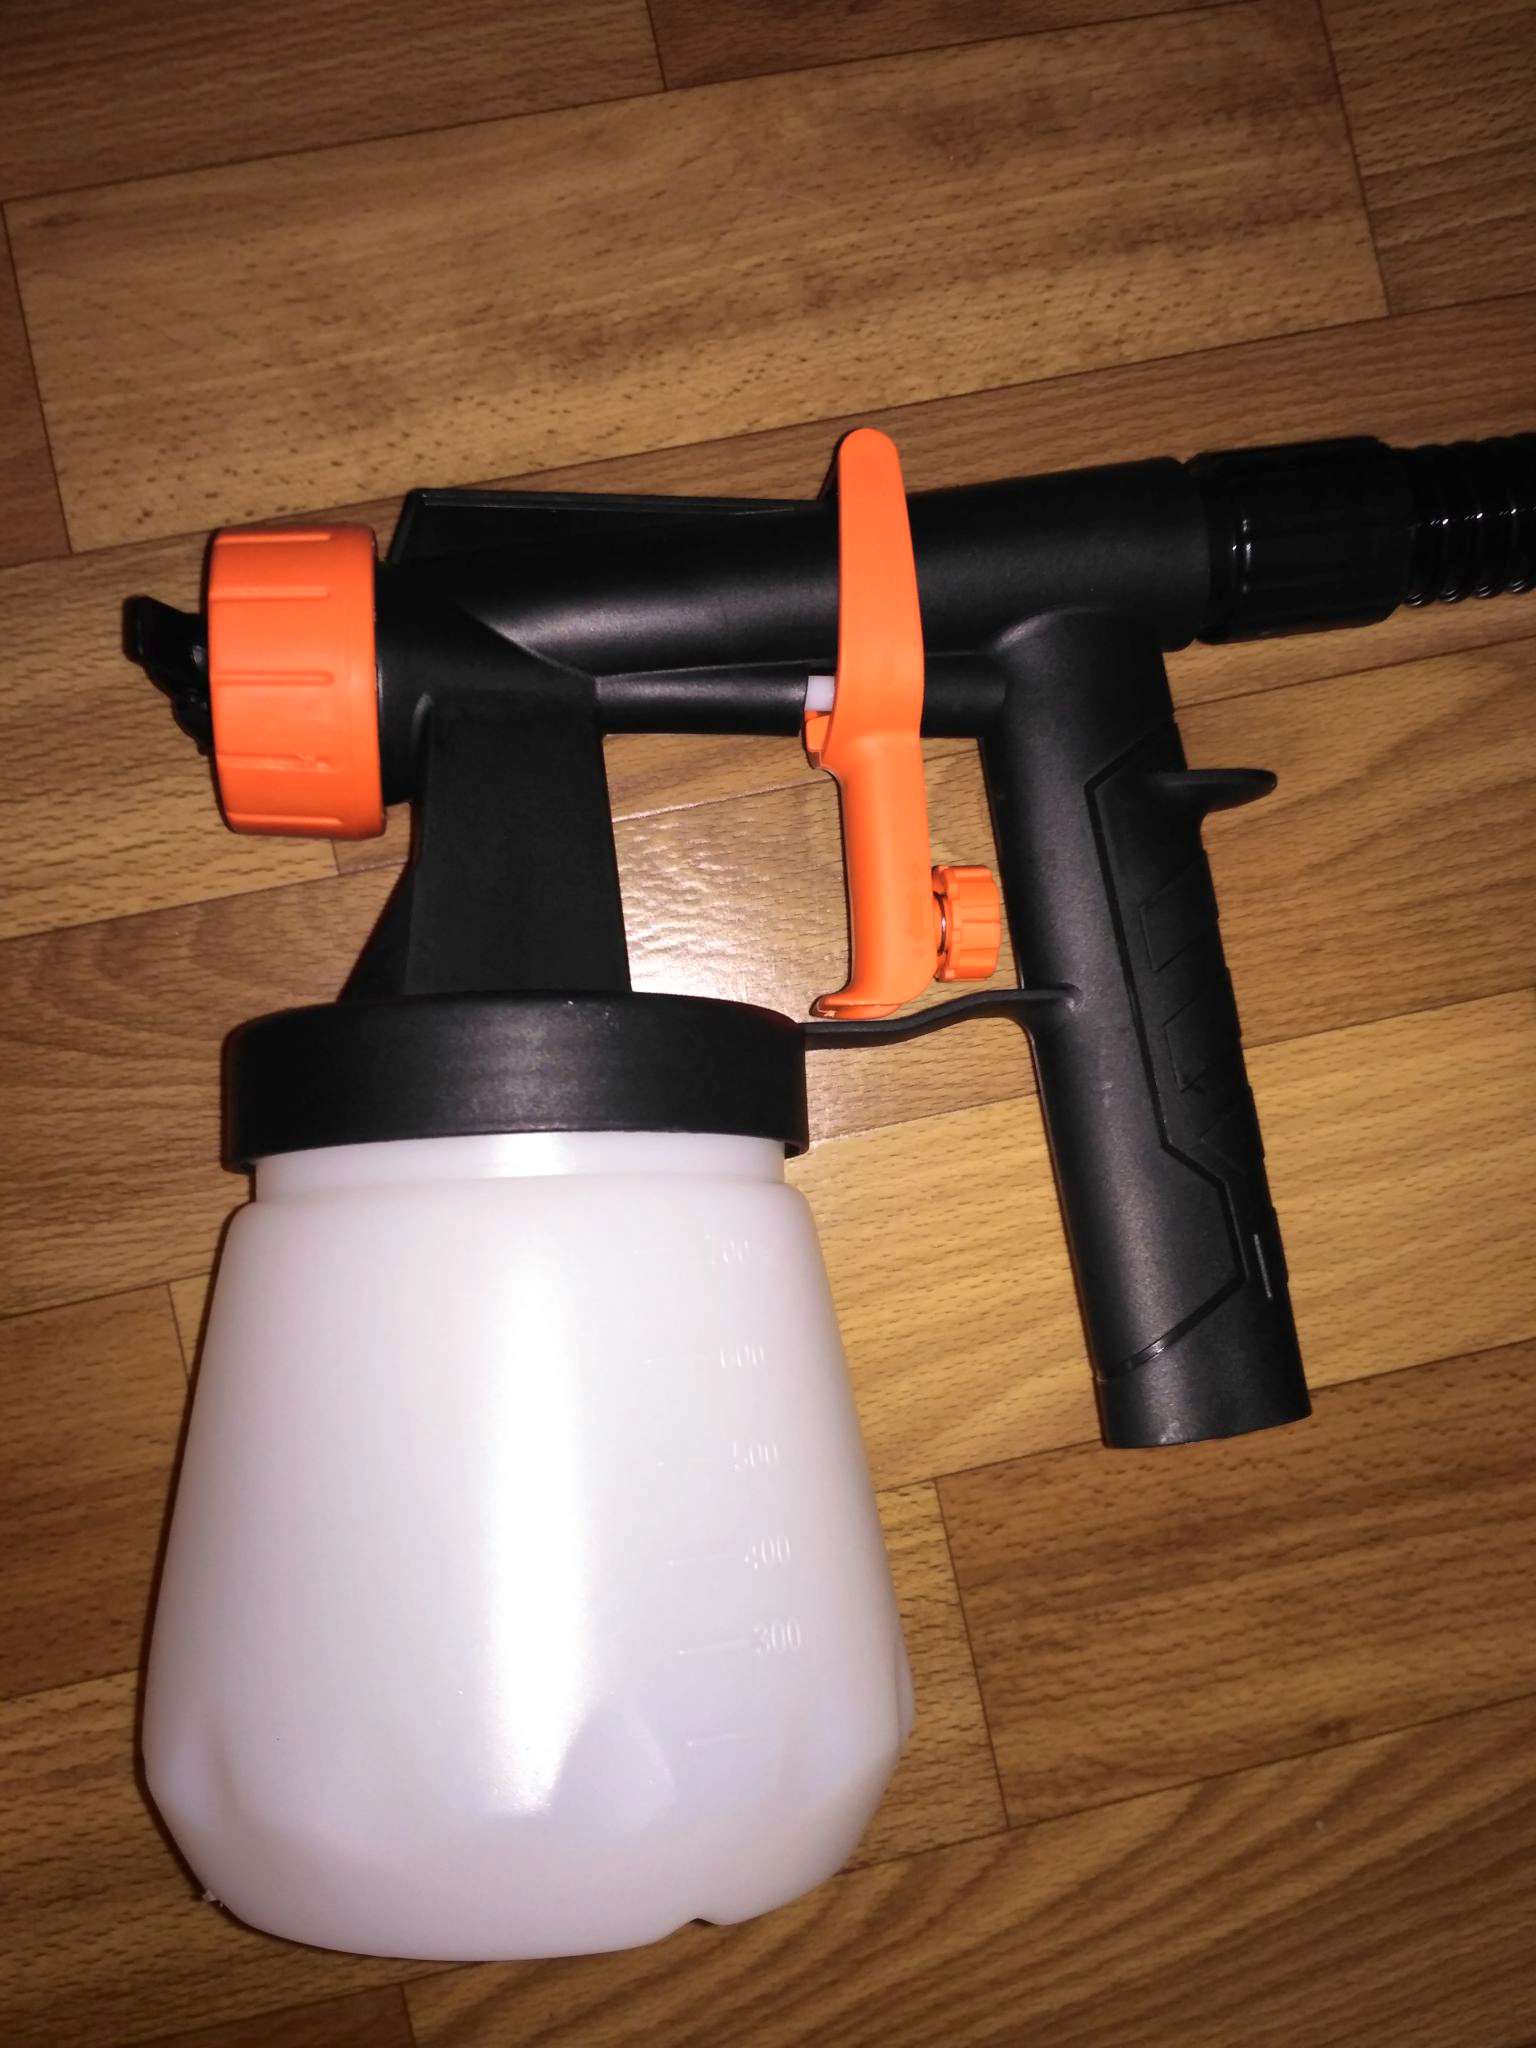
- Preparation according to the recipe, filtering and filling the tank of the device with the working mixture.
- Selection of the required size, shape and dispersion of paint particles in the torch.
- Adjustment of air pressure in the spray gun with or without pressure gauge.
- Adjustment of the flow of the working mixture into the mixing chamber.
- Trial application of paint on the surface and finishing mood.
A well-executed calibration of the device will provide a high-quality coating of the car surface with primer, varnish, acrylic base and matrix-metallic with the lowest consumption of the working solution.
Torch Size Adjustment
The nozzle opening through which the mixture is applied can be changed by a movable rod with a conical head. By turning the adjusting screw, the nozzle clearance and the size of the torch are adjusted. With a smaller overlap of the hole, the stream is sprayed with a wide cone, with the formation of a round or oval paint spot on the surface. With a limited air supply, the jet of the mixture narrows to one point. The fan adjustment screw is located on the gun gun.
Setting the air pressure
The quality of the automotive surface coating depends on the size of the sprayed paint particles. Smaller ones form a thin uniform layer on the surface without smudges and irregularities. Proper dispersity of the mixture flow is ensured by optimal air pressure.
With pressure gauge and regulator
The automatic paint sprayer has the best performance at regulated air pressure. For preparation, a pressure gauge and regulator must be connected to the spray gun. Unscrew the air and mixture adjustment screws. Turn on the sprayer and set the desired pressure in the system.
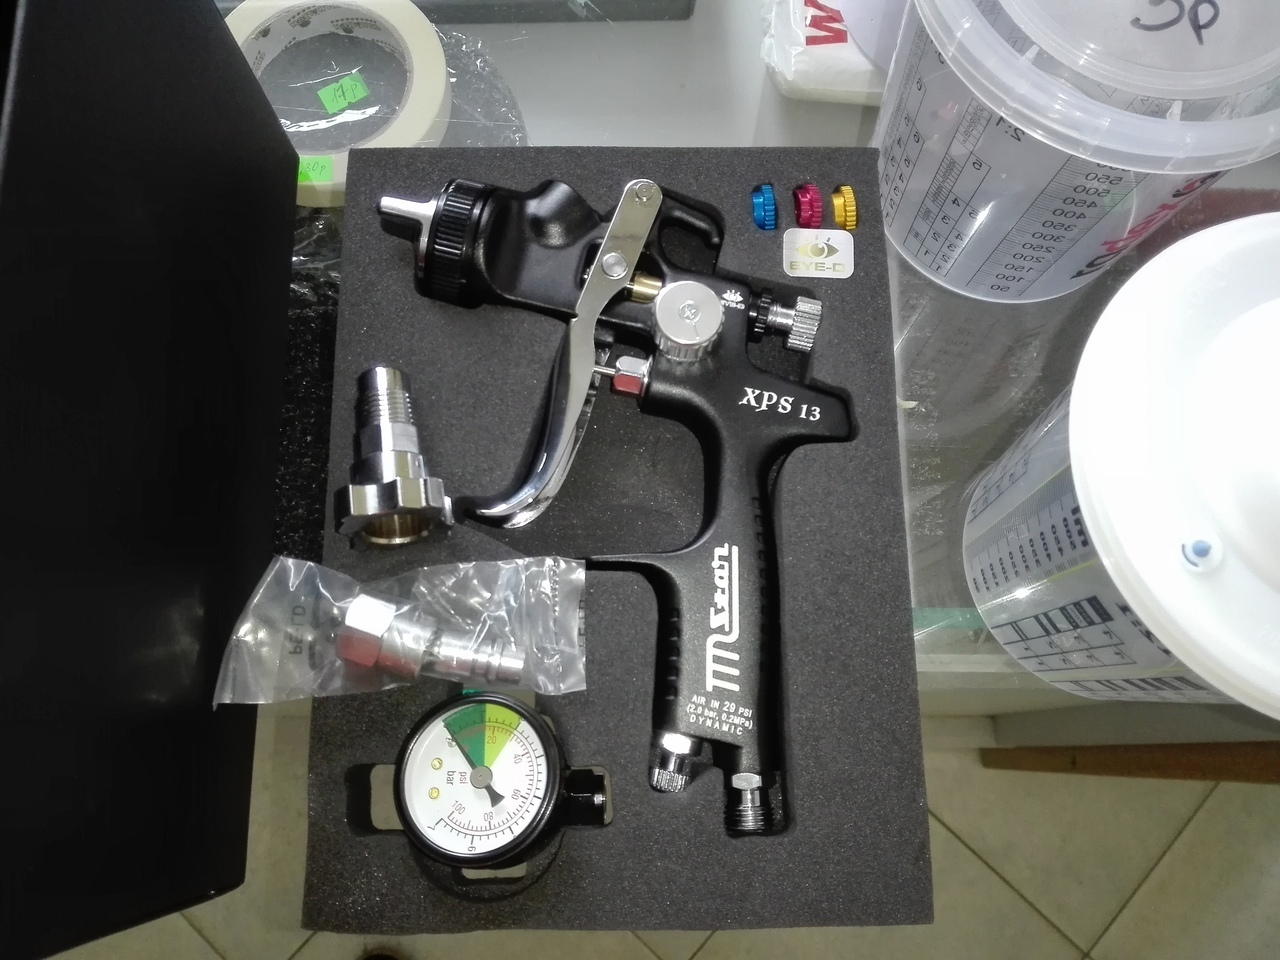
Built-in pressure gauge
It is possible to adjust the spray gun for painting a car, equipped with a device for measuring flow parameters, without connecting external devices. When adjusted, the outlet of air and paint is fully opened. The flow is measured using the built-in pressure gauge. The adjustment screw sets the required air pressure in the system.
Pressure gauge without regulator
Some Chinese models of spray guns only measure flow parameters, without the possibility of adjustment. It is necessary to check the air pressure readings with an open gun. If the parameters have deviations, then adjust the gearbox of the external compressor.
The manometer is missing.
Inexpensive models are not equipped with measuring instruments. Therefore, in order to fine-tune the spray gun for painting a car, it is necessary to take into account the pressure drop in the hose and gun of the spray gun. Next, on the gearbox of the external compressor, the pressure required for operation is set, taking into account losses in the system.

Ink setting
After setting the working pressure and the size and shape of the torch, it is necessary to adjust the flow of the mixture into the mixing chamber of the gun. To properly set up the spray gun for painting cars, the feed screw must be unscrewed 1-2 turns to set the minimum flow. Then add the flow of the mixture until a uniform distribution on the surface to be painted is obtained. The trigger of the spray gun also allows you to adjust the flow during the spraying process.
Preparing the paint
A properly prepared mixture of components provides a high-quality layer of paintwork on the surface. To set up a spray gun for painting a car with acrylic paint, use a viscometer to determine the viscosity and a thinner.
The required volume of components is set according to the table. Add to the mixture in small portions, stirring with a rod of neutral material. To set up an airbrush for painting a car with metallic, use measuring cups or a ruler. A solvent is also used to reduce the viscosity to the required value.
Spray gun testing
Spray gun evaluation parameters:
- torch imprint shape;
- distribution of the mixture on the surface;
- the quality of the applied layer.
In order to properly set up the spray gun for painting a car with metallic, when testing the device, the composition must be sprayed evenly without changing the set settings. It is necessary to evaluate the result after setting the layer on the test surface.
If, when setting up an airbrush for painting a car with acrylic, the mixture is applied unevenly, and there are coating defects, then you need to repeat the steps again. After the second air and mix adjustment, spray test on the subsurface.
Torch print shape test
If you correctly set up the spray gun for painting a car, then the gun applies the mixture in the form of a round or oval symmetrical spot with smooth edges. When the nozzle is clogged or the pressure is exceeded, the torch imprint deviates from the center, local seals appear on the painted surface. The test for the correctness of the shape of the sprayed spot is carried out at the maximum supply of the mixture. The gun is directed vertically to the surface and turned on for 1 second.
Test for uniformity of material distribution in the torch
To obtain the correct layer of paint on the surface, a uniform application of drops of the mixture is necessary. Therefore, the spray gun must create a fine mist of particles with the same bulk density. To test for uniformity of material distribution, the torch is directed at an angle to a vertical surface. Then they begin to spray the paint until smudges appear, by which the concentration of the particles of the mixture in the torch is determined.
Spray gun test
Spray quality test
After checking the print and the density of the working composition, it is necessary to adjust the painting. It is necessary to spray the mixture with a gun at the same distance from the object at a constant speed. Check the resulting print for defects.
If you set up a paint gun well for painting a car, then the applied layer will be uniform, without shagreen and smudges. A small difference in the particle size of the mixture and a decrease in the layer thickness at the edge of the torch are allowed.
Major malfunctions and their elimination
Small deviations from the normal operation of the spray gun can be corrected. The usual minor repairs are done by hand, more serious breakdowns - in the workshop.
The main malfunctions of the spray gun and methods for restoring performance:
- If the mixture does not flow from the tank, then it is necessary to clean the filter or install a new valve.
- When the paint splashes unevenly from the nozzle, the worn nozzle tip should be replaced.
- Air bubbles usually get into the mixture tank when the outlet nozzle is worn - the defective part must be replaced.
- Incorrect shape of the torch may occur due to clogging of the gun. You will need to disassemble the device and clean it.
- If the mixture supply is reduced and the pump is leaking, tighten the stuffing box nut more tightly or change the cuff.
The main lesson is that thorough cleaning and maintenance of the spray gun will extend the service life, ensure the quality of the paintwork on the surface of the car.