How to choose and connect a rear view camera in a car
Content
To install or not, a reverse camera, each driver decides for himself. Connecting a rear view camera requires some knowledge and skills, so not everyone can do it on their own. With a small set of tools and basic skills, you can easily figure out how to connect a rear view camera.
Side mirrors, and your head turned 180 ° will not give the desired effect, some little things, or maybe not little things, you still may not notice. And then disassembly with the owner of the scratched car can begin, and this can cost you ten times more than connecting a reverse camera. Further in the article, we will consider which camera you can choose, whether the Chinese manufacturer is right for you, or whether you prefer something more solid. We will also discuss whether it is possible to install a rear view camera with your own hands, and how to properly connect the device of your choice.
How to choose a camera
The modern electronics market, and especially China, is overflowing with a variety of cameras, and this makes the choice of the right thing more difficult. In order to make your job easier, decide on your priorities, which worries you more - price or quality. Not everyone needs high definition cameras, or cameras that can show even in low light. For some drivers, an inexpensive rear-view camera for a radio tape recorder is enough.
What parameters you need to pay attention to if you decide to purchase a better quality product, then in this case there are at least five points that you need to consider when buying:
- In what resolution the camera writes, the higher the video resolution, the better the recording quality. And high definition of the image is not always needed.
- The next point is the sensitivity of the camera to lighting. In cheaper models, recording quality in low light can be very poor. Therefore, if, due to circumstances, you often use the car at night, then you should pay attention to this moment.
- If you have already decided where to put the rear view camera before buying, then you need to pay attention to the installation method of this particular model.
- The next point is this angle of view that captures the camera lens. Usually it is in the range from 120 to 180 degrees. It is better to take something in between these two indicators so that you have a good rear view, but there is no panorama, because it distorts reality.
- Selection of the monitor on which the camera will display the image. But if you already have a radio with a screen in your car, then you just need to think about how to connect a rear view camera to the radio.
How and where should it be installed
Later in the article, we will look at how to install a rear view camera. There is more than enough space in the car to install a video camera, but we need the most advantageous position. The camera peephole must have a good view, which is not limited by any part of the machine. Any camera will reach its full potential if it is installed in the most favorable location.
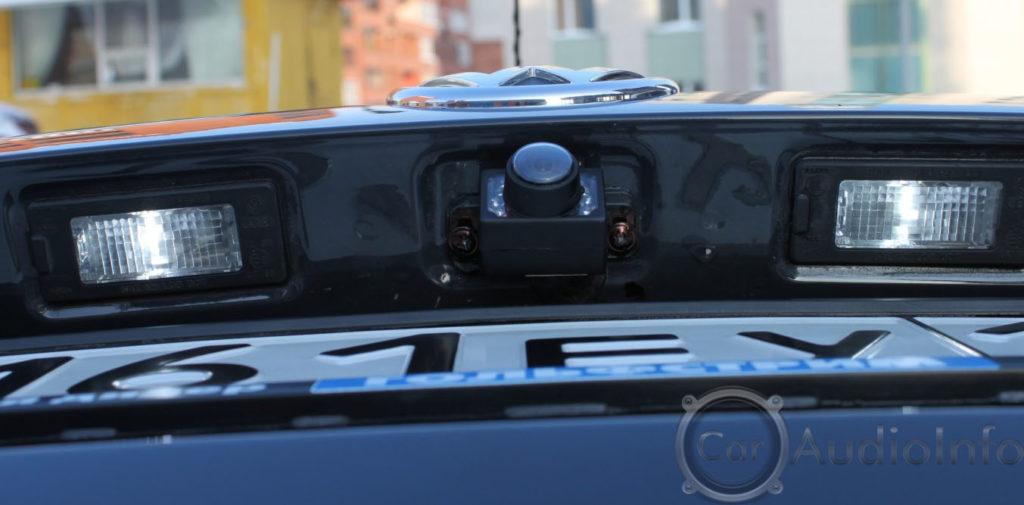
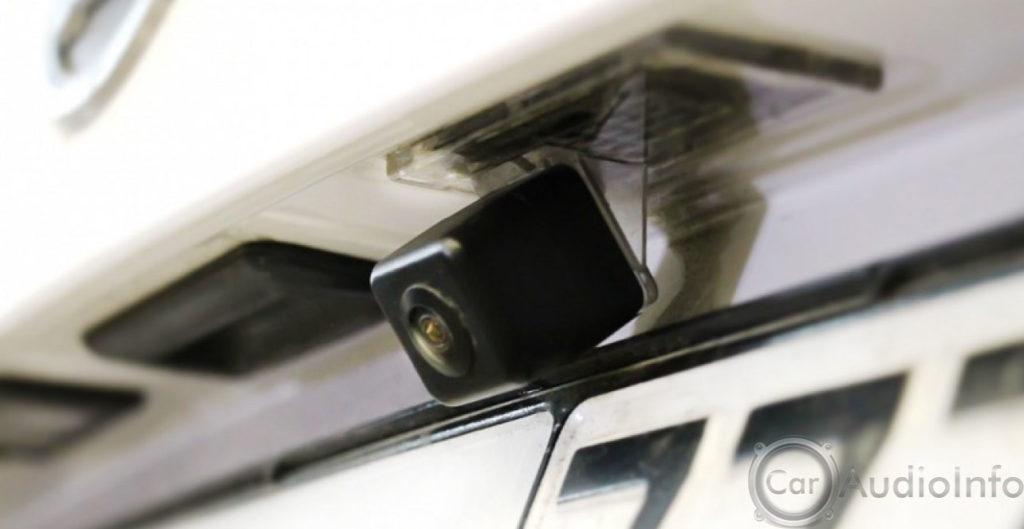
In our case, such a place is a niche above the rear bumper of the car, the camera should be placed in its upper part above the state number of the car. What this gives - viewing angles, your car radio will show only the road, and not parts of your car. But it must be positioned so that it is not strongly recessed, but also does not stick out.
However, there is a minus here - your camera is accessible to dirt and the hands of others. If you place it inside the cabin on the rear window, then half of the screen will be occupied by the trunk, the viewing angles will decrease and the image quality will suffer to some extent due to the glass. But on the other hand, it will be clean and inaccessible to outsiders.
So you personally have to calculate all the pros and cons of the external and external location of the camera.
The procedure and diagram for connecting a rear view camera
And now in more detail about how to install and connect a rear view camera to the Pioneer radio. Why to this model, because it is the most common. If you install the radio yourself, we advise you to first familiarize yourself with the connection diagram of the radio in the car.
If we take into account the insecurity of our video camera, and the best view, then its place should still be above the number, outside. You need to install it closer to the edge to improve visibility, but not so that it is exposed. Mounting the camera itself is not difficult. The camera has the necessary bracket for installation, you will only need to drill a couple of holes for mounting bolts, and one hole for the cable.
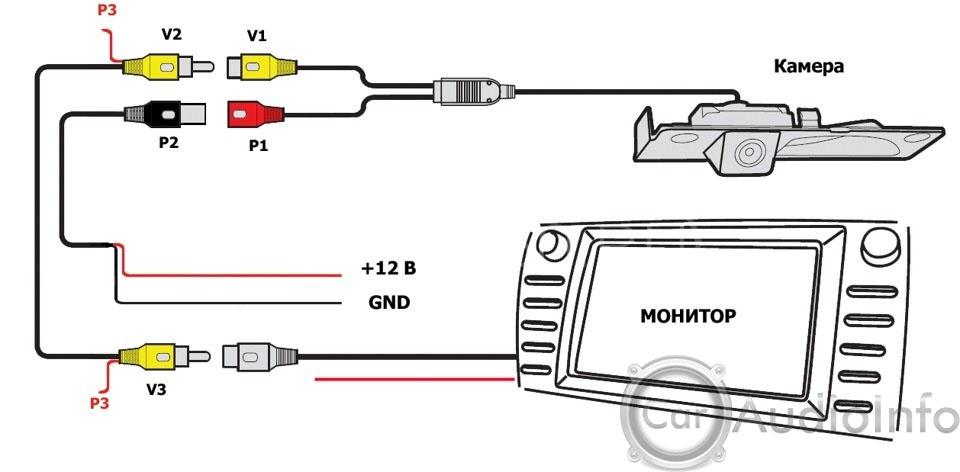
And then the rear-view camera is included in the general electrical network of the car. If you are not strong in electrics, then it is better to turn to car service specialists, but if you have at least basic knowledge, then you can quite figure it out on your own. So, the order of connection in stages:
- Any camera has two wires, one for transmitting the video signal from the camera to the monitor, and the other for power. Since the camera itself has short wires, you will need to extend them so that there are enough of them from the front panel to the end of the trunk (as a rule, an extension cable for the video signal is included in the kit).
- Where can I get power for the camcorder? Usually the camera is connected to the rear lights. Therefore, immediately after turning on the reverse, the rear view camera is also turned on.
- All wires that are pulled through the cabin and in the trunk must be secured and hidden. This will help avoid unexpected network interruptions while driving.
- If you use a monitor instead of a radio, you will need to find a power source for it. If you have a Pioneer multimedia radio, this issue is automatically resolved for you.
Connecting a reversing camera to a Pioneer radio
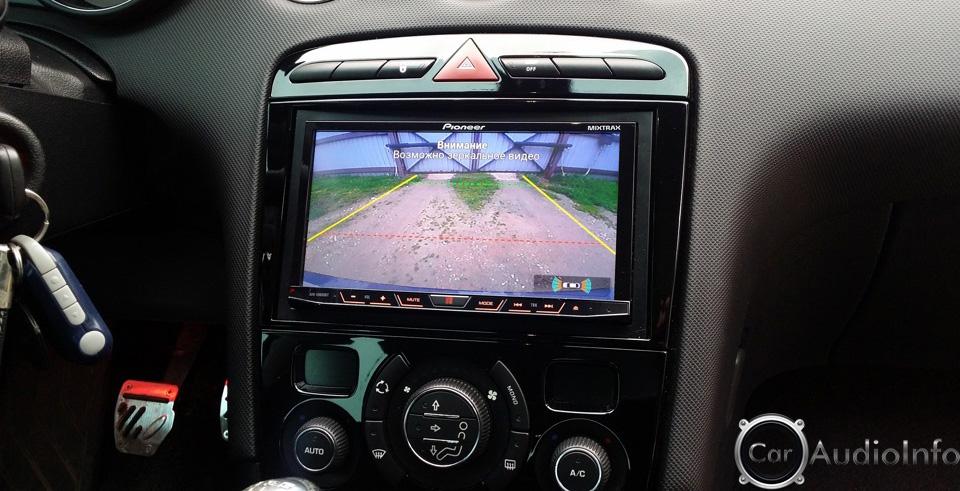
Now we will specifically talk about how to set up and connect the reversing camera to the Pioneer radio tape recorder. There are small nuances here that mislead everyone. We connect the camera to the reversing light, all the power is on the camera, then the wire through which the video signal will go. In the pioneer, this is a brown tulip not to be confused with yellow. We go into the settings, find the section in the rear view camera menu, put the item on, and switch the polarity to battery mode.

Our camera works, you can check it by going to the main menu and select the camera icon, but it will not turn on automatically. This can be corrected by connecting the purple wire to the taillight (where the camera is). As a result, when reverse gear is turned on, the flashlight comes on, power is supplied to the camera, and the radio tape recorder understands that it is necessary to switch to reverse gear.
The whole connection diagram for a rear view camera is quite simple, and therefore most drivers often cope with its installation on their own. In cars equipped with automatic transmission, accidental activation of the rear view camera may occur.
To eliminate this trouble, you need to install an additional camera turn-on delay sensor. In each car model, the installation of the camera may differ, but in the details, the connection principles are similar. The connection process is more complicated for video cameras that transmit a signal via radio, but they have the advantage that several such cameras can be connected. There are more and more cars on the streets of the city, so a rear view camera is already a necessity. It will not only help you park correctly, but it will also preserve the evidence of your innocence in the event of a collision.
Video how to connect a reverse camera

We hope that this article helped to figure out how to properly connect a reverse camera. Rate the article on a 5-point scale, if you have comments, suggestions, or you know something that is not indicated in this article, please let us know! Leave your comment below. This will help us make the information on the site even more useful.
Conclusion
We have put a lot of effort into creating this article, trying to write it in a simple and understandable language. But it is up to you to decide if we did it or not. If you still have questions, create a topic on the "Forum", we and our friendly community will discuss all the details and find the best answer to it.
And finally, do you want to help the project? Subscribe to our Facebook community.