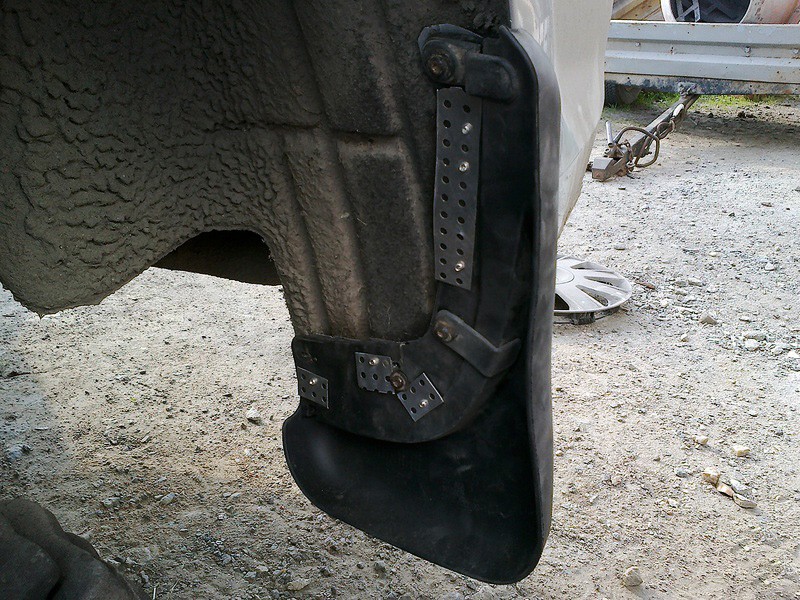
How to Attach Aftermarket Mudguards
Content
Mudguards can be a very useful addition to any vehicle that has the potential to go off-road, as rocks, mud, and snow thrown from a tire can damage the car body or suspension components. Mudguards are usually located behind the vehicle's wheels to deflect any debris that is thrown out while driving over loose terrain. This article will look at some of the options available to those looking to add mudguards to their current vehicle, as well as a rundown of some common installation methods.
Part 1 of 3: Knowing the Options
For the sake of this article, we will divide mudguards into two groups, non-standard and universal. Of these two groups, we can also further divide into shields that need to be fixed with a drill and those that do not. We'll look at a few different options to see how these groups overlap.
Step 1: Decide how heavy your mudguards should be.. Regular SUVs may not need the same protection as drivers who frequently drive off-road.
If you plan to ride off-road frequently or in more extreme weather conditions, you may want to invest in more durable mudguards.
Step 2: Decide if you want special guards or universal ones.. As you might guess, generic guards will be less expensive, but may not fit as well as custom-made guards.
Guardrails that are specifically designed for your vehicle will be most effective in preventing potentially harmful debris from entering the wheel arch or other body components.
Step 3: Find the best price. Different websites may offer different prices depending on the type of mudguard you are looking for.
For example, custom made Husky Liners mudguards for a 2012 Jeep Wrangler cost the same whether you buy them from Husky Liners or JC Whitney. Through your research, you may find that you can get better deals on one website than on another.
Part 2 of 3: Installing Mudguards Without Drilling
WeatherTech and Gatorbacks offer mudguards that don't require you to drill holes in your car's body. Complete installation instructions for the WeatherTech system are available online and the instructions are shipped with the Gatorbacks product; however, to complement these instructions, we've included some helpful tips for those who may have some concerns about attempting this installation on their own.
Necessary materials
- Hex wrench (included)
- Wrench or ratchet and socket set
Step 1: Park your vehicle on a level surface before installing mudguards.. For your own safety, always assume that the vehicle may roll or run away by working under or around the wheels.
Step 2: Turn the wheel towards the side you are working on.. This can create more space for your work.
For example, if you are working with the front left wheel, you must turn it to the left and vice versa.
Step 3: Once installed, gently pull on each mudguard to ensure it is secure.. Also, be sure to tightly tighten all fasteners that were used in assembly.
Part 3 of 3: Installing Mudguards with Drilling
Other mudguards will require you to drill holes in the vehicle for assembly. Below are some general installation instructions, but be sure to read any specific installation instructions that come with the product you purchase.
Necessary materials
- Drill with 1/8" bit
- Screwdriver (Phillips)
Step 1: Wash the area where the mudguards will be drilled.. As you drill through paint, primer, and bodywork, you can create an area for rust to form if the area around these new holes is not properly cleaned.
Step 2: Make sure you have enough space to fit the mudguards properly.. Even if you bought mudguards tailored to your vehicle, you still need to make sure they fit well.
Custom mudguards may not work properly if the vehicle has been raised or fitted with larger tires. Poorly fitted mudguards can wear out faster than properly fitted mudguards and may not protect as well.
Step 3: Mark the places on the fender where the holes will be drilled. Use the splash guard as a template.
Custom mudguards usually indicate where to drill a hole to ensure a good fit.
Some vehicles come with pre-drilled holes for mudguards. Be sure to use the vehicle's pre-marked locations when installing any new mudguard that requires a drill.
- Functions: If you're having trouble marking the wing, have a friend hold the mudguard while you mark.
Step 4: Drill holes in each of the places you marked.. For this step, set aside the mudguard.
Apply constant pressure to the back of the drill to make sure the drill goes straight through the chipper.
Step 5: Using the included fasteners, attach the mudguard to the fender.. Do not tighten any of the screws until each one is attached and you can check if the fit is correct.
- Attention: Some mudguards, such as the Husky Liner, have a thin film to protect the paint on the inside of the fender. Be sure to follow the included instructions when applying the protective film.
Adding mudguards to a vehicle that will be driven on various types of terrain can go a long way in extending the life of body panels and suspension components. Mudguards can also add style to a car, especially if you buy mudflaps with the car's logo on them.
