How to check the camshaft sensor BMW E39
Content
Checking the condition and replacing the camshaft position sensor (CMP)
Checking the condition and replacing the camshaft position sensor (CMP)
Performing the following procedure may cause an OBD fault to be stored in memory, which will be illuminated by the "Check Engine" warning light. After completing the test and recovering accordingly, do not forget to erase the system memory (see the section On-Board Diagnostic (OBD) - the principle of operation and fault codes).
1993 and 1994 models
The CMP sensor is used to determine the engine speed and the current position of the pistons in their cylinders. The recorded information is sent to the built-in processor, which, based on its analysis, makes appropriate adjustments to the injection duration and ignition timing settings. The CMP sensor consists of a rotor plate and a wave signal generating circuit. The rotor plate is divided into grooves for 360 divisions (in increments of 1). The shape and location of the slots allow you to monitor the engine speed and the current position of the camshaft. A set of light and photodiodes is integrated into the formation circuit. As the teeth of the rotor pass through the space between the light and the photodiode, a successive interruption of the light beam occurs.
Disconnect the wiring harness connector from the distributor. Turn on the ignition. Using a voltmeter, check the black and white terminal of the connector. If there is no voltage, check the condition of the wiring in the circuit between the ECCS relay and the battery. (don't forget the fuses). Check up also a condition actually of the relay and the electroconducting going from it to a distributor socket (Schemes of electric connections at the end of the Head the Onboard electric equipment see). Use an ohmmeter to check the black wire terminal for ground.
Switch off ignition and remove the distributor of the engine (the Electric equipment of the engine see the Head). Restore the original wiring connection. Connect the positive lead of the voltmeter to the green/black terminal on the back of the connector. Ground the negative test lead to ground. Turn on the ignition and slowly start turning the distributor shaft, watching the pressure gauge. You should get the following picture: 6 jumps with an amplitude of 5,0 V per shaft revolution against the background of a zero-based signal. This test confirms that signal 120 is registered correctly.
With the ignition off, connect a voltmeter to the yellow-green wire terminal. Turn on the ignition and slowly start turning the distributor shaft. This time there should be regular bursts of 5 volts with a frequency of 360 pcs per revolution of the shaft. This procedure makes sure that signal 1 is generated correctly.
At negative results of the checks described above assembly of the distributor of ignition (the Electric equipment of the engine see the Head) is subject to replacement, - the CMR sensor is not subject to service individually.
Models since 1995 about.
The CMP sensor is located in the timing cover at the front of the power unit. The sensor consists of a permanent magnet, core and wire winding and is used to detect grooves in the camshaft sprocket. As the sprocket teeth pass close to the sensor, the surrounding magnetic field changes, which in turn becomes the signal output voltage for the PCM. Based on the analysis of information from the sensor, the control module determines the position of the pistons in their cylinders (TDC).
Disconnect sensor wiring. Using an ohmmeter, measure the resistance between the two pins of the sensor connector. At a temperature of 20 C, there should be a resistance of 1440 ÷ 1760 Ohm (sensor manufactured by Hitachi) / 2090 ÷ 2550 Ohm (sensor manufactured by Mitsubishi), the faulty sensor must be replaced.
If the result of the above test is positive, refer to the electrical connection diagrams (see the Head On-board electrical equipment) and check the electrical wiring coming from the PCM for signs of a break. Check for signs of a bad ground on the black wire of the wiring harness (use an ohmmeter). If the sensor and wiring are ok, take the vehicle to a PCM repair shop if necessary.
Camshaft position sensor
I have a two year old BMW E39 M52TU 1998. Everything would be fine, but I'm already tired of breaking the camshaft position sensor. In these two years, I am now buying the sixth sensor. I buy a sensor, I drive for 1-2 months, it fails, and another 1-2 hedgehogs with a broken one. I bought both the original, like hell, and the original bu, and other companies cost one, two months and you can go for a new one. On the Internet they write only breakdowns or how to check what does not work, but no one writes why it fails. Who can help? Where to dig? Is it because of Vanus?
Yes, I forgot to clarify that the intake camshaft sensor
Start with power What is a crankshaft or camshaft sensor? Ordinary induction coil. If you burn, look at the food. XM I have an ordinary Chinese and 1 and 2. Everything works.
I went to the electricians, I thought they might come up with something. Maybe some kind of damper or something like that. They didn’t help, they said that most likely they would have to look at the gene, the condition of the brushes. And what kind of annoying flattery is there that works anyway, usually after that the brain starts to explode
Checking the generator is easy. Take a regular (Chinese) LCD voltage meter and set it to automatic to see voltage spikes. The issue price is about 100 rubles. Should be 14-14,2
I just blew two coils last weekend. In one - resistance, in all contacts - infinity, that is, a gap. In the second, only in green and brown there was resistance, but 10 times more than it should be, and in red there was also a gap. And so on to the same coil. I'm already thinking that maybe this is due to the fact that I run the cable through the body of the gene. Perhaps there is some sort of magnetic field at work here. Although there the cable is short and it is difficult to fix it differently. And here is the sixth sensor. In the near future I will call what is worth and try to put the wire of the new coil somehow closer to the entrance, and not to the gene. And the voltage is measured directly on the gene or can it be on the Akum?
Yes, there is a gap in the sensor itself. I don’t quite understand what this will give me, and I don’t have an electrician, so I’ll do it without questions, but tell me where to get the pinout of the ECU chip.
Between the 1st and 2nd leg on the "father" of the sensor should be about 13 ohms, between the 2nd and 3rd about 3 ohms. (in some sensors they write the numbers of the legs, in others they do not)
Then you will know that the sensor itself is not shorted.
I measure on the sensor at the extreme contacts 5,7, change the polarity, 3,5 is displayed. Between the first and middle 10.6 if you change the polarity, then infinity. Between the middle and the last 3,9, if you change the polarity, then infinity. How to understand where the contact is?
Superficially looked for schemes on e39, found nothing. The sensor may just be the weak link in your circuit, but I can't find where or how it goes.
How to check the camshaft sensor bmw e39
On a “beautiful” day, my “samurai” did not want to start the first time, although it started up without problems on the second try (this was already a small touch of attention to my intuition)
After a short trip (warming up), I immediately noticed that the car became sluggish - it accelerates slowly, reacts poorly to gas, it drives more or less only after 2500-3000 rpm, there were failures during acceleration, the engine sound became a little rougher. At this time, the speed XX were stable and normal, there were no twitches along the way, there were no errors in the order either.
I connected the INPU and the culprit appeared in the engine ECU: error 65, camshaft sensor.
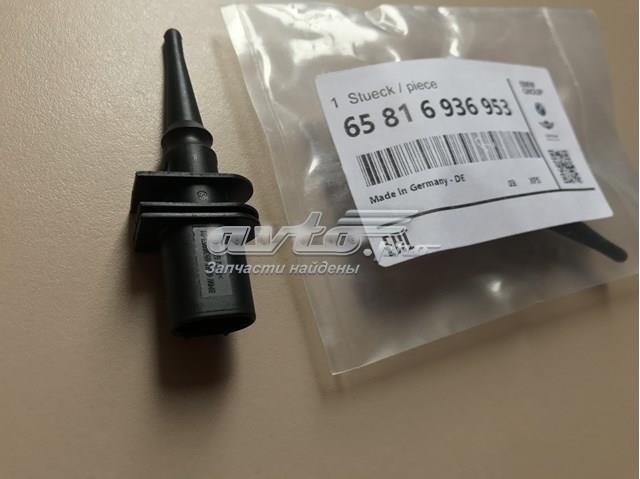
I decided to replace it myself, I bought the VDO sensor in a trusted store, since the original was not available, and also the same seller said that the VDO was original, but with the BMW logo and in the box.
I decided to make a replacement like in the video below, where, by the way, the guy used the Meile sensor.
Before replacing the sensor, it is reasonable to let the engine cool down, otherwise climbing under the hood is inconvenient and stressful!
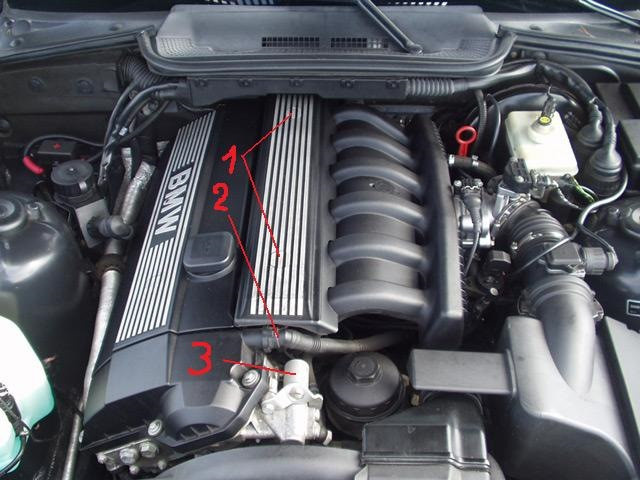
- Remove the right engine cover
- Disconnect the vent tube from the Vanos:
- We disconnect the connector (chip) from the Vanos solenoid, in the photo it is indicated by a blue arrow:
- Carefully (without fanaticism) we unscrew the Vanos solenoid with a 32 open-end wrench:
- Carefully unscrew the lower hose from the Vanos valve with a 19 wrench, holding the washer in the place indicated by the arrow and the bolt with the other hand, then take the unscrewed hose to the side: For convenience, you can unscrew the oil filter (I did not do this)
- Now access to the sensor is open, unscrew the sensor bolt with a “torx” (I unscrewed it with a hexagon) and clamp the bolt so as not to look!
- Remove the sensor from the socket (a lot of oil will pour out)
- Disconnect the sensor connector, it is easy to find
- Carefully remove the o-ring from the sensor and, after lubricating it with new oil, install it on the new sensor
- Insert the sensor into the “socket”, connect the sensor “chip” and tighten the sensor mounting bolt.
- Lubricate the O-ring on the Vanos solenoid with fresh oil and install in reverse order.
- We connect the scanner and reset the sensor error in memory
Additions and notes:
- for me personally, the most difficult (and long) was to disconnect and then connect the connector of the sensor itself, I was saved by the fact that I have small hands and not thick fingers, and even so I suffered!
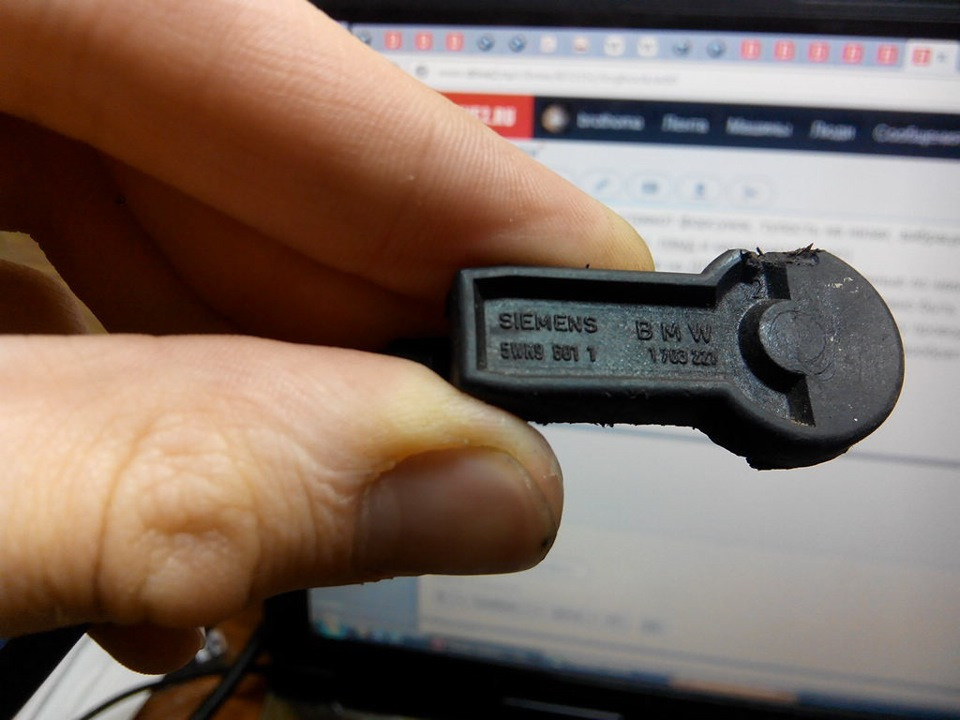
With the filter removed it would be much more convenient. - the non-original VDO sensor is no different from the original BMW sensor: both say Siemens and the number 5WK96011Z, they just added the BMW logo to the original.
- after replacing the sensor, acceleration and overall engine dynamics have improved significantly, I hope this will continue to be the case
How to check the camshaft sensor bmw e39 m52
While I figured out what the problem was, I found people with similar problems, this post is for them.
The symptoms were as follows: injector squealing, dullness at the bottom, vibration at idle, increased consumption by 20%, a rich mixture (pipe, lambda and catalyst does not smell).
ATTENTION! Symptoms are typical only for M50 2l engines with Siemens injection and M52 up to 98 onwards, possibly for later models, I can’t say others.
I connected INPA, pointed to the DPRV, looked at its data, it seems that it does not complain.
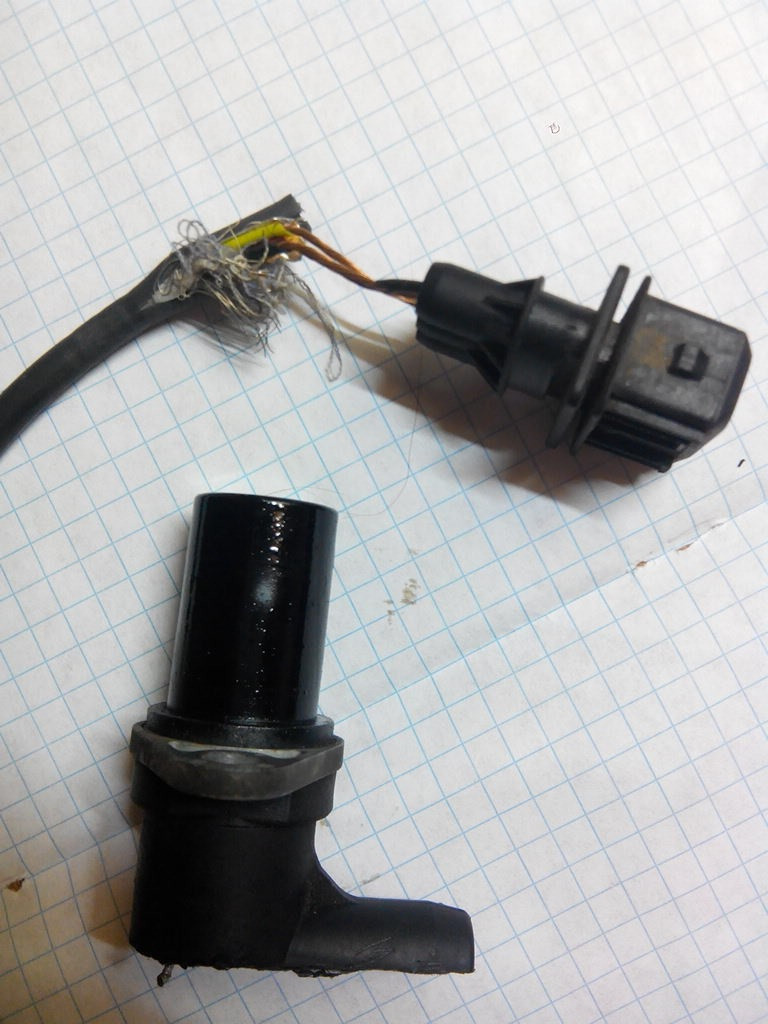
I removed the sensor, checked with an ohmmeter between 1 and 2 contacts should be 12,2 Ohm - 12,6 Ohm, between 2 and 3
0,39 ohm - 0,41 ohm. I had a gap between 1 and 2. I removed the wire braid, it turned out that the wires were dead. I tried to measure directly on the sensor, the same thing. Dismantled, measured the contacts and made sure that it was ready.
It changes very easily. The second time I changed it in 15 minutes, the first time I dug for 40 minutes.
You will need: a well-lit area, wrenches (32, 19, 10 open-ended), a 10-inch socket with a wrench, a thin flat-blade screwdriver, and grasping hands. It is better to do everything on a cold engine, your hands will be safer.