How to check tire pressure when it's cold outside
Content
Tire pressure helps maintain good traction, support and control of the vehicle. If your tires are too low, you will burn excess gas (which will cost you extra money) or they may burst. If the tire pressure is too high, the vehicle may be difficult to drive or the tires may burst.
Checking tire pressure in cold weather is especially important because tire pressure drops one to two pounds per square inch (PSI) for every ten degrees outside temperature drops. If it was 100 degrees when you filled your tires and now it's 60 degrees, you will potentially lose 8 psi of pressure in each tire.
Below are a few simple steps to follow to check your tire pressure in cold weather so you can drive safely during the winter months.
Part 1 of 4: Park your car next to the air supply
If you notice that your tires are starting to look flat or flat, it's a good idea to add air to them. Typically, the tire starts to look like it's losing air and flattens out where the tire is pushing against the road.
If you need to add air to increase tire pressure, you will need an air pump. If you don't have one at home, you can drive to the nearest gas station.
Park close enough to the air supply so that the hose can reach the tires. If you only want to bleed the air out of your tires, you won't need an air pump.
Part 2 of 4: Determine your recommended tire pressure
Your tires should always be inflated to the recommended safe pressure level. You can check the sticker on the inside of the driver's door or the owner's manual for the recommended PSI (pounds of air pressure per square inch) range at various loads and temperatures.
Step 1: Find your tire's PSI. Look at the outside of your tire. You should be able to find the recommended PSI (pounds per square inch) range printed in very small print on the outside of the tire.
This is usually between 30 and 60 psi. The text will be slightly raised to make it easier to read. Again, refer to the sticker inside the driver's door or owner's manual to determine the correct PSI based on vehicle load and outside temperature.
- Functions: Be sure to check the recommended PSI for each tire before adding or bleeding air. If your vehicle has different types of tires, they may require slightly different pressures.
Part 3 of 4: Check the current pressure
Before you add or bleed air from your tires, you need to check their pressure to get an accurate indication of how much pressure they currently have.
- Functions: You should always let the tires cool down for a few minutes before checking the pressure, because frictional heat generated by rolling on the road can cause inaccurate readings.
Necessary materials
- Tire sensor
Step 1: Unscrew the tire valve cap. Keep it in a safe and easily accessible place because you'll put it back on when you're done.
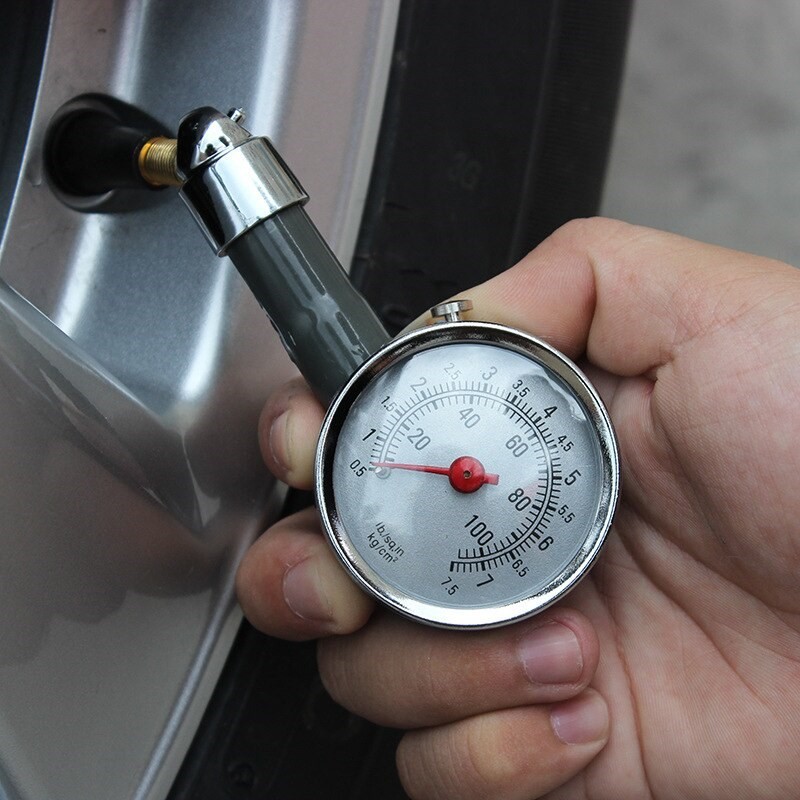
Step 2: Install the nozzle on the valve. Press the tip of the tire pressure gauge directly onto the tire valve and hold it firmly in place.
- Functions: Hold the pressure gauge evenly over the valve until you can no longer hear air coming out of the tire.
Step 3: Measure tire pressure. Your gauge will either have a numbered stem that comes out of the bottom of the gauge, or your gauge will have a digital display. If you are using a stem gauge, be sure to accurately read the pressure as indicated on the stem markings. If you are using a digital screen pressure gauge, read the PSI value from the screen.
Part 4 of 4: add or release air
Depending on the current PSI level, you will need to either add or bleed air to the tires.
Step 1: Put the air hose on the valve. Take the air hose and attach it over the tire nipple in the same way as the pressure gauge.
You will no longer hear air escaping when the hose is evenly pressed against the valve.
If you are letting air out, simply press the small metal tip of the air hose in the center of the valve and you will hear air coming out of the tire.
Step 2: Don't add or release too much air at one time.. Be sure to stop from time to time and recheck the PSI level with a pressure gauge.
In this way, you will avoid overfilling the tires or releasing too much air from them.
Step 3: Continue this process until you reach the correct PSI for your tires..
Step 4: Install the caps on the tire valves..
- Functions: Check each tire individually and only do this one at a time. Do not fill tires in anticipation of cold weather or in an attempt to compensate for expected temperature changes. Wait until the temperature drops and then check the tire pressure.
Keeping your vehicle running is important to safety, and this includes maintaining proper tire pressure. Be sure to check your tires regularly, especially during the colder months when tire pressure can drop faster. Adding air to low tires can be done quickly and easily if you follow the steps above. If you notice that one of the tires wears faster or that your tires need to be rotated when you add air to them, be sure to contact a qualified mechanic, such as a mechanic from AvtoTachki, to perform these services at your home or office for you. – our mechanics can even add air for you.