
How to test a solenoid with a multimeter
Content
The solenoid is the answer for those wondering how the electrical energy in a car battery makes the starter turn to start the engine.
This is a very important component of your car that determines whether it works or not.
However, when a solenoid fails, few people know how to test it.
This is especially important given that solenoid testing does not follow traditional voltage and continuity testing procedures.
Check out our blog for a step-by-step guide to checking your solenoid for problems, including how a multimeter comes in handy.
Let's get started.
What is a solenoid
A solenoid is a device that converts electrical energy into mechanical energy through its electromagnetic coil.
This coil consists of wires tightly wound around an iron or metal core or piston.
When current passes through the coil, a magnetic field is created which causes the metal piston to move in different directions.
Because the solenoid works with other electrical devices, the movement of the piston drives parts of that other electrical device, such as a starter motor.
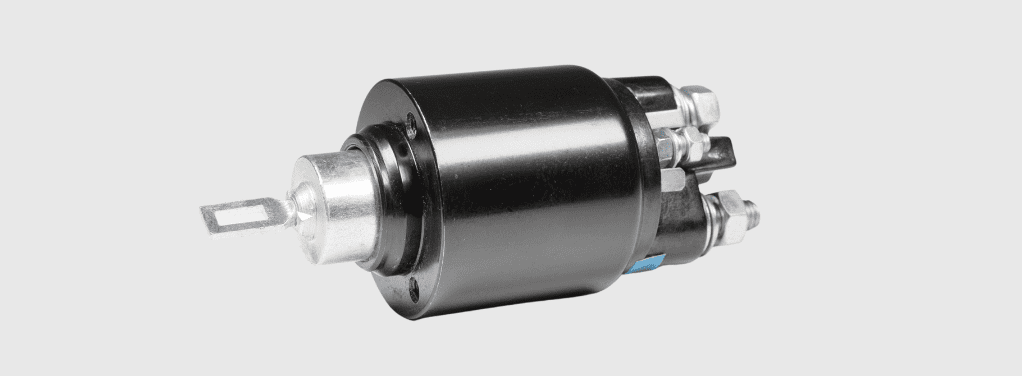
The solenoid usually has four terminals, consisting of two identical sets.
The two smaller sets are the power supply terminals that receive current from the power supply, and the two larger sets help complete the circuit with an external electrical device. These terminals will be important for our diagnoses.
How to know if the starter is defective
External signs of a failed solenoid vary depending on the device with which it works. For example, in an automobile starter, a faulty solenoid causes the engine to start slowly or not at all.
In order to perform proper solenoid tests, you must remove it from the device it is connected to.
Tools needed to test the solenoid
The tools you need to diagnose your solenoid for problems include:
- Multimeter
- Multimeter probes
- Connecting cables
- AC or DC power supply
- Protective gear
If you have all this collected, proceed to the test.
How to test a solenoid with a multimeter
Set the multimeter to ohms, place the black probe of the multimeter on one large terminal of the solenoid and the red probe on the other large terminal. When you apply current to the solenoid, the multimeter is expected to read a low 0 to 1 ohm value. If it doesn't, you need to replace the solenoid..
There is more to this continuity test, as well as other types of tests for your solenoid, and they will all be explained in detail.

- Wear protection
To diagnose a solenoid, you work with the voltage applied to it. For your safety, wear protective equipment such as insulating gloves and goggles to avoid electric shock.
- Set the multimeter to ohms
The functionality of your solenoid mainly depends on the continuity between your large contacts or solenoid terminals.
While a regular continuity test may be fine, you also want to check the resistivity between the solenoid terminals. That's why we choose the Ohm setting instead.
Turn the multimeter dial to the Ohm setting, which is represented by the Omega (Ω) symbol on the meter.
- Put your sensors on the solenoid terminals
A solenoid usually has two large terminals that look the same. If you have three terminals, the third one is usually a weird ground connection, while the two you have to check still look the same.
Place the black negative test lead on one of the large terminals and the red positive test lead on the other large terminal. Make sure these connections are making the correct contact.
- Apply current to solenoid
When you apply current to the solenoid, the circuit closes and that's when you expect continuity between the two terminals of the solenoid. This is the only way to correctly diagnose what is wrong with your solenoid.
To do this, you will need a power source such as a car battery and connection cables. Connect one end of the jumper cables to the battery posts and the other end to the small solenoid power supply terminals.
- Rate results
First, you expect to hear a click from the solenoid as soon as current is applied to it. If you don't hear a click, the solenoid coil has failed and the entire unit needs to be replaced.
However, if you hear a click, you know the solenoid coil is working properly and it's time to look at the multimeter reading.
For a good solenoid, the counter shows a value between 0 and 1 (or 2, depending on the number of connections). This means that the coil makes good contact with the two terminals, thus ensuring proper circuit continuity.
If you are getting an OL reading, then there is an incomplete circuit in the solenoid (perhaps due to a bad coil or wire) and the entire unit needs to be replaced.
This is only a continuity test, as you may also need to perform a voltage test. Voltage testing is important to make sure the solenoid is receiving or operating with the correct amount of volts supplied from the power supply.
Checking Solenoid Voltage with a Multimeter
To perform a voltage test, follow these steps.
- Set multimeter to AC/DC voltage
Solenoids work with both AC and DC voltages, so the multimeter must be set up correctly to get accurate results. Because many solenoids are used with fast acting switches or controls, you will most likely be using an AC voltage setting.
However, given that the solenoids used in automobiles, for example, run on DC voltage, setting the DC current is also important. Refer to the solenoid manual (if you have one) for specifications.
AC voltage is represented on the multimeter as V~ and DC voltage is represented as V– (with three dots) on the multimeter.
- Place multimeter probes on solenoid terminals
Place multimeter leads on each of the large solenoid terminals, preferably using alligator clips. It doesn't matter which terminal you put the multimeter's negative or positive probe on, as long as they connect properly to the solenoid.
- Apply current to solenoid
As with the continuity test, connect one end of the jumper cable to the battery terminals and the other end to the small solenoid power terminals.
- Rate results
Along with the click of the solenoid, you would expect the multimeter to read about 12 volts (or 11 to 13 volts). This means the solenoid is operating at the correct amount of volts.
If your car or other electrical device is still not responding, the problem could be with either the solenoid relay or external wiring to or from the solenoid. Check these components for faults.
On the other hand, if you don't get the correct reading when checking the voltage of the solenoid, it's possible that a component inside the solenoid is damaged and the entire unit needs to be replaced.
The use of a car battery as a current source in voltage and resistance tests is done in the context of a DC solenoid. If you are using an AC solenoid, look for an AC source that provides a safe voltage for the solenoid circuit.
The multimeter is expected to show about the same amount of volts applied to the solenoid.
Conclusion
Following the visual steps for testing a solenoid is easy when you set your multimeter to the correct settings and look for the correct reading.
A multimeter helps make sure that the tests you run on the solenoid and other electrical components are very accurate.
F.A.Q.
How many ohms should the solenoid have?
A good solenoid is expected to have a resistance of 0 to 2 ohms when checking resistance with a multimeter. However, this depends on the model of the solenoid being tested.
Should the solenoid have continuity?
The solenoid is expected to have continuity between the two large terminals when current is applied to it. This means the circuit is complete and the solenoid coils are working properly.
