How to check the leakage current on a car with a multimeter
Content
The electrical system has long become an integral part of the car, without the normal functioning of which it is impossible not only to move - even to unlock the doors for access to the salon. This situation often occurs when the battery is deeply discharged due to high leakage currents.
In addition, the current leakage contributes to the accelerated wear of electrical equipment, first of all - the battery, in which, due to the constant deep discharge, the sulfatization of the lead plates is significantly accelerated. Let's try to figure out what reasons can cause a leakage current and how to determine it using an ordinary household multimeter.
The main reasons for the leak
All leaks occurring in a car can be roughly divided into normal and defective. The first group includes currents caused by the operation of standard systems at rest, for example, by alarms, as well as those arising from the potential difference of static electricity and the "minus" of the battery connected to the mass of the car. Such leaks are almost inevitable and usually insignificant - from 20 to 60 mA, sometimes (in large cars stuffed with electronics) - up to 100 mA.
Defective leaks involve much higher currents (hundreds of milliamps to tens of amperes) and are usually the result of the following problems:
- poor fixation, contamination or oxidation of contacts;
- short circuits inside devices (for example, in the turns of the windings);
- short circuits in external circuits (usually accompanied by arcing and heating, which is hard not to notice);
- malfunctions of electrical equipment;
- incorrect connection of optional devices (audio systems, heating systems, video recorders, etc.), including bypassing the ignition switch.
The higher the leakage current, the faster the battery discharge will be, in especially advanced cases it will take several hours. Therefore, it is important to diagnose the leak in time, determine and eliminate the cause of its occurrence.
Leakage diagnosis with a multimeter
For those who are still new to the multimeter, we suggest reading the article: how to use a multimeter for dummies, in which all configuration modes and rules for using the device are considered in detail.
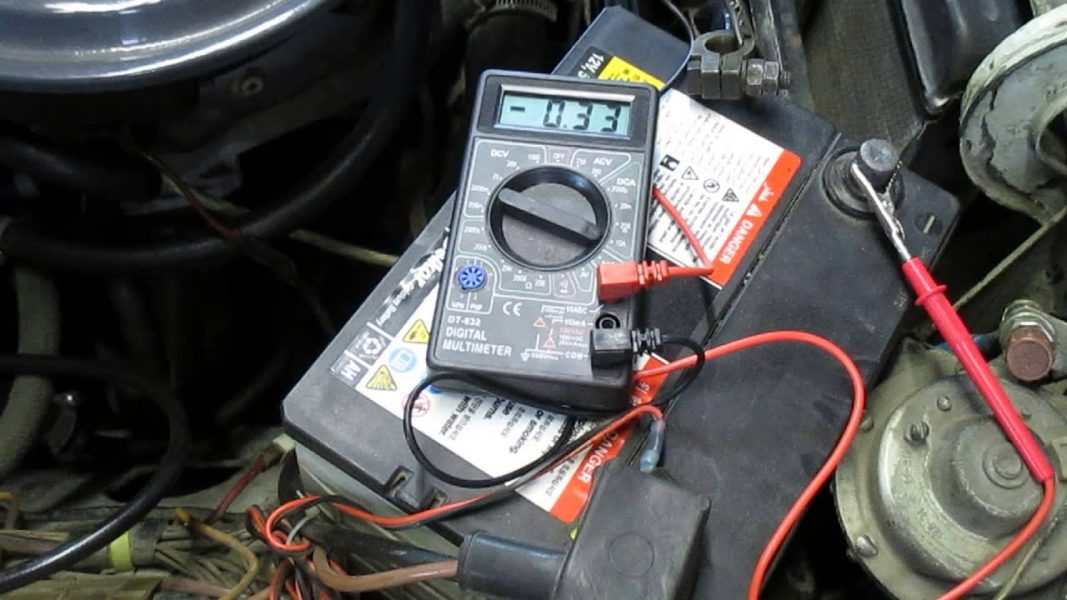
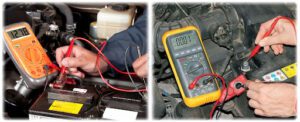
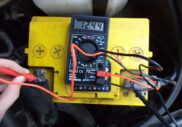
Checking the leakage current in the car with a multimeter is carried out in the DC ammeter mode. For this, the switch of the device is transferred to the zone designated by the letters DCA and set at the division "10A". The red (positive) probe is placed in the 10ADC socket, the black (negative) probe in the COM socket, which is usually located at the bottom. If the slots and divisions on your multimeter are marked differently, be sure to read the instructions before connecting it to the vehicle's on-board network.
After preparing the device, proceed directly to the performance of control and measuring work. To do this, on a car with a disconnected power supply, unscrew and remove the negative terminal of the battery, clean it and the contact of the battery in case of contamination or oxidation. The red probe of the multimeter is fixed in the cut of the terminal or any suitable point of the mass, ensuring its tight contact with the surface, and the black one is applied to the negative contact of the battery. The instrument will display the actual leakage current. If the display remains zero, the instrument can be set to 200m mode to determine normal (or slightly increased) leakage current.
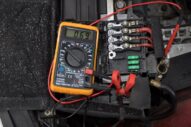
Search for faulty or incorrectly connected consumers
These works are necessary if the detected leakage current exceeds 0,1-0,2 amperes (100-200 mA). It is usually more convenient to identify the specific point at which it arose in the plus gap.
To do this, for all devices in turn, starting from the most "suspicious" in terms of connection or technical condition, the following work algorithm is performed:
- turning off the ignition;
- disconnecting the consumer from the plus line;
- cleaning and preparation of points of contact;
- connecting the ammeter to the open circuit in series;
- reading the instrument readings;
- if the readings are zero, the consumer is considered serviceable;
- if the readings are different from zero, but less than the total leak, they are recorded, and the search continues;
- if the readings are equal or nearly equal to the total leakage current, the search ends;
- in any case, after completion of the work, it is necessary to restore the integrity of the circuit and insulate the point of contact.
It happens that after checking all consumers, it was not possible to identify a leak, but general diagnostics still show its presence. In this case, connectors and branching of conductors may be the culprit. Try to clear them, restore the density of contact. If after this the leak cannot be eliminated, contact an experienced auto electrician who will check the integrity of all current-carrying lines with special equipment.
Video: how to detect a leakage current in a car

Questions and answers:
How to check leakage current with a multimeter? The multimeter sets the current measurement mode (10A). The negative terminal of the battery is disconnected. The red probe goes to this terminal, and the black probe goes to the negative contact of the battery.
How do you know what the battery is charging? After connecting the multimeter, consumers are connected in turn. The problem device will show itself when, after turning it off, the indicator on the multimeter returns to normal.
What is the permissible leakage current on the car? The permissible leakage current rate is 50-70 milliamperes. The maximum allowable value is 80 to 90 mA. If the leakage current is more than 80mA, the battery will discharge quickly even with the ignition off.