How to repair the taillights of a VAZ 2106 yourself
Content
A malfunctioning rear headlight on a car seriously increases the likelihood of a traffic accident, especially at night. Having found such a breakdown, it is better not to continue driving, but to try to fix it on the spot. Moreover, it is not so difficult.
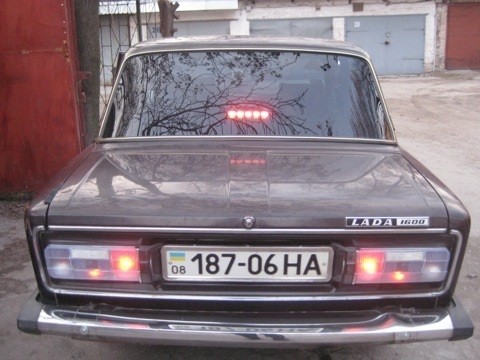
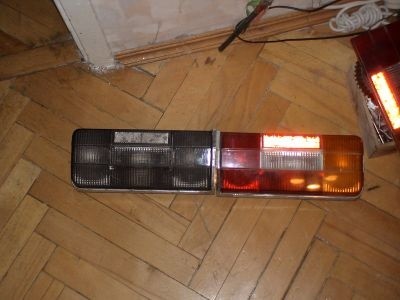
Rear lights VAZ 2106
Each of the two taillights of the "six" is a block consisting of several lighting devices that perform separate tasks.
Taillight functions
The rear lights are used for:
- designation of the dimensions of the car in the dark, as well as in conditions of limited visibility;
- indication of the direction of movement of the machine when turning, turning;
- warnings to drivers who are moving behind about braking;
- lighting the road surface when reversing;
- car license plate lights.
 Taillights perform several functions at once
Taillight design
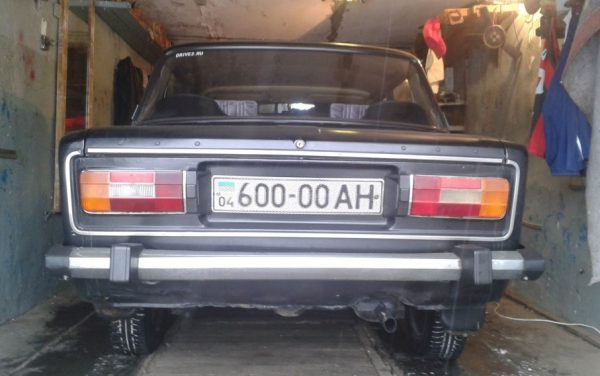
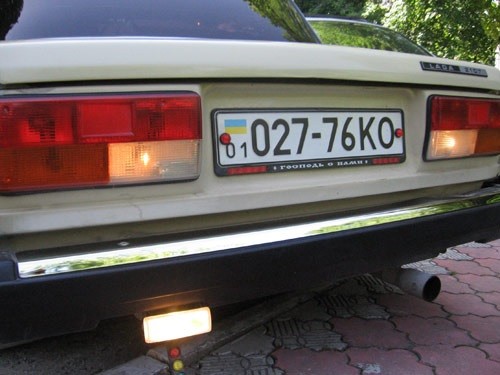
The VAZ 2106 car is equipped with two rear headlights. They are located on the back of the luggage compartment, just above the bumper.
Each headlight consists of:
- plastic case;
- dimensions lamp;
- turn direction indicator;
- stop signal;
- reversing lamp;
- license plate light.
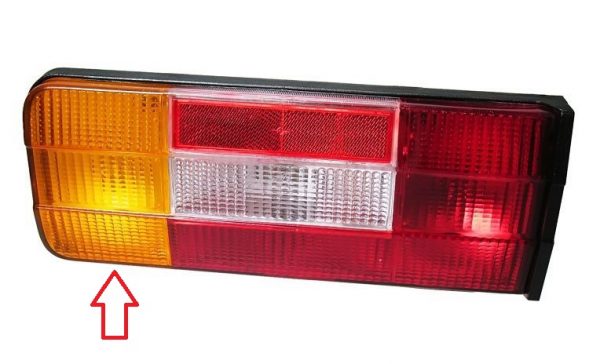
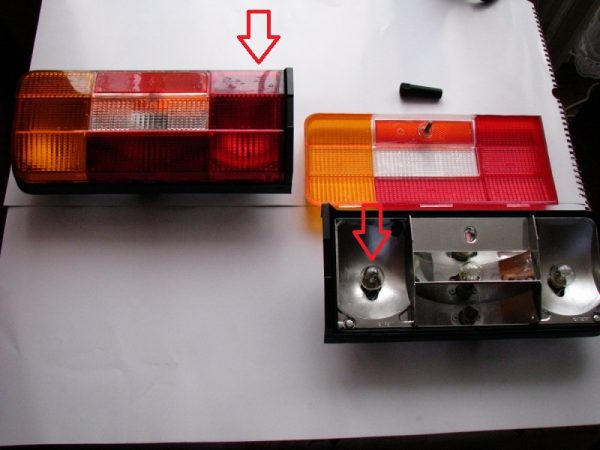
The headlight housing is divided into five sections. In each of them, except for the middle top, there is a lamp responsible for performing a particular function. The case is closed by a diffuser (cover) made of colored translucent plastic, and also divided into five parts:
- yellow (direction indicator);
- red (dimensions);
- white (reversing light);
- red (brake indicator);
- red (reflector).1 - direction indicator; 2 - size; 3 - reversing lamp; 4 - stop signal; 5 - number plate illumination
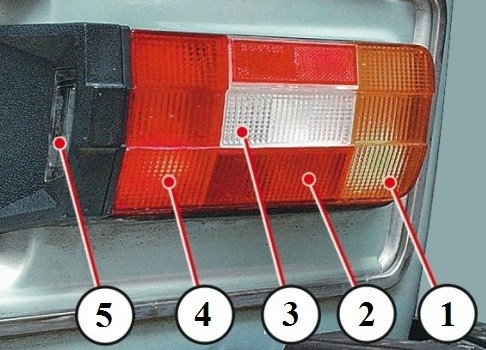
The license plate light is located in the inner ledge of the housing (black).
Malfunctions of the rear lights of the VAZ 2106 and how to fix them
It is more expedient to consider malfunctions of the rear lights of the "six", their causes and methods of dealing with them, not as a whole, but for each individual lighting device included in their design. The fact is that completely different electrical circuits, protection devices and switches are responsible for their performance.
Direction indicators
The “turn signal” section is located in the extreme (outer) part of the headlight. Visually, it is distinguished by its vertical arrangement and the yellow color of the plastic cover.
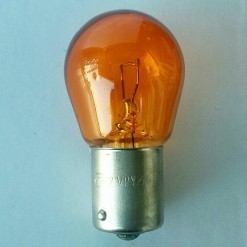
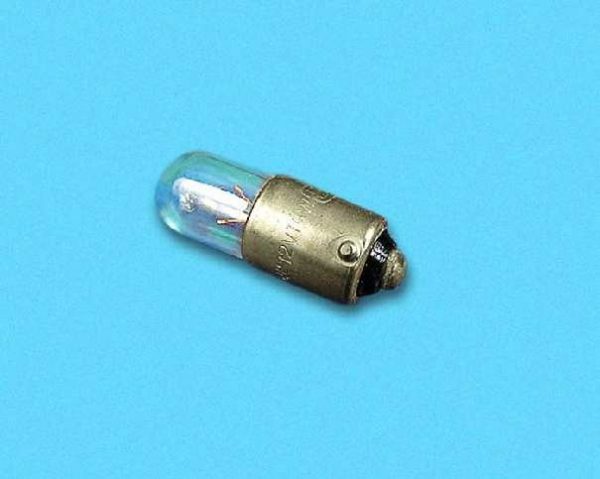
The illumination of the rear direction indicator is provided by a lamp of the A12–21–3 type with a yellow (orange) bulb.
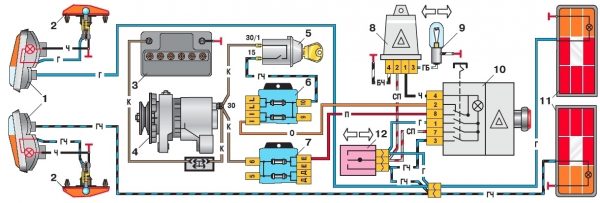
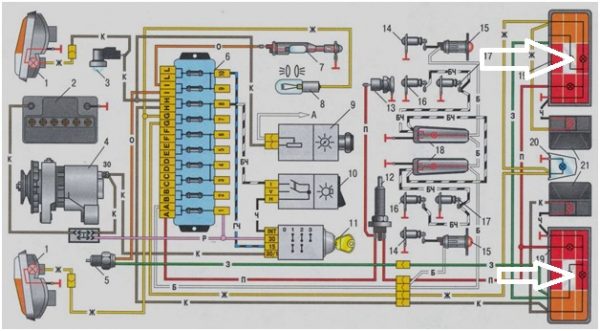
Power is supplied to its electrical circuit using the turn switch located on the steering column, or the alarm button. In order for the lamp to not just burn, but blink, a relay-breaker type 781.3777 is used. Protection of the electrical circuit is provided by fuses F-9 (when the direction indicator is turned on) and F-16 (when the alarm is on). Both protective devices are designed for a rated current of 8A.
Turn signal malfunctions and their symptoms
Faulty “turn signals” can have only three symptoms, which can be determined by the behavior of the corresponding lamp.
Table: signs of breakdown of the rear direction indicators and their corresponding malfunctions
| Sign | Malfunction |
| Lamp does not light at all | There is no contact in the lamp socket |
| No contact with vehicle ground | |
| Burnt out lamp | |
| Damaged wiring | |
| Blown fuse | |
| Turn signal relay failed | |
| Faulty turn switch | |
| The lamp is constantly on | Faulty turn relay |
| Lamp flashes but too fast |
Troubleshooting and repair
Usually they look for a breakdown, starting with the simplest, that is, first they make sure that the lamp is intact, in good condition and has reliable contact, and only then they proceed to check the fuse, relay and switch. But in some cases, the diagnosis must be carried out in the reverse order. The fact is that if the relay clicks are not heard when the turn is turned on, and the corresponding lamp does not turn on on the dashboard (at the bottom of the speedometer scale), the headlights have nothing to do with it. You need to start looking for a problem with a fuse, relay and switch. We will consider the direct algorithm, but we will check the entire circuit.
Of the tools and tools we need:
- key on 7;
- key on 8;
- head 24 with extension and ratchet;
- a screwdriver with a cross-shaped blade;
- flat blade screwdriver;
- multimeter;
- marker;
- anti-corrosion liquid type WD-40, or equivalent;
- sandpaper (fine).
The diagnostic procedure is as follows:
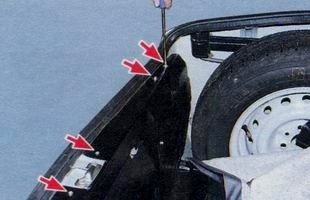
- Using a screwdriver, unscrew all five screws securing the luggage compartment upholstery.Upholstery fastened with five screws
- Remove the upholstery, remove it to the side.So that the upholstery does not interfere, it is better to remove it to the side.
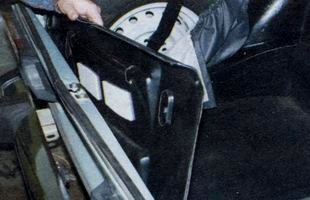
- Depending on which headlight we have is faulty (left or right), we move the side trim of the trunk aside.
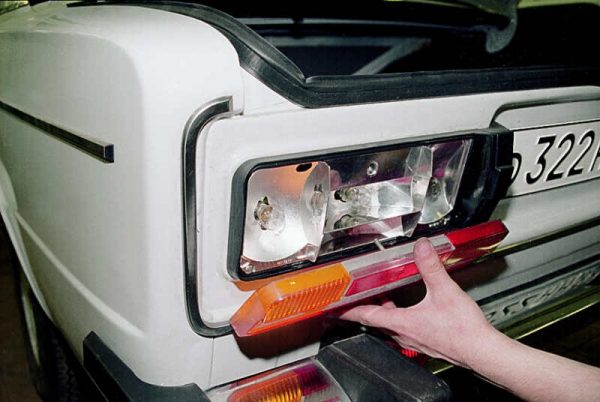
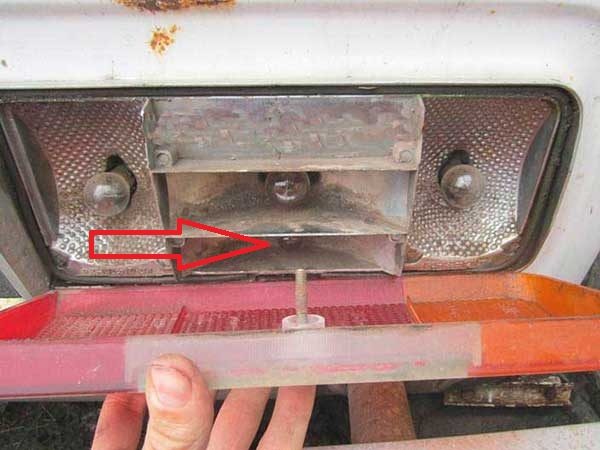
- Holding the diffuser with one hand, unscrew the plastic nut from the side of the trunk with your hand.To remove the diffuser, you need to unscrew the plastic nut from the side of the trunk
- We remove the diffuser.When disassembling the headlight, try not to drop the lens
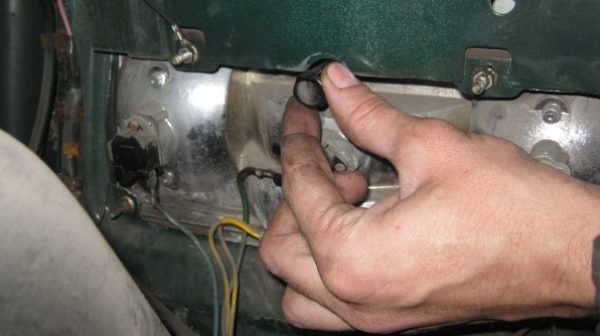
- Remove the turn signal bulb by turning it counterclockwise. We examine it for damage and burnout of the spiral.
- We check the lamp with a multimeter turned on in tester mode. We connect one probe to its side contact, and the second to the central one.
- We replace the lamp in case of its failure.To remove the lamp, turn it counterclockwise
- If the device showed that the lamp is operational, we process the contacts in its seat with an anti-corrosion liquid. If necessary, clean them with sandpaper.
- We insert the lamp into the socket, turn on the turn, see if the lamp has worked. If not, let's move on.
- We determine the state of contact of the negative wire with the mass of the machine. To do this, use an 8 key to unscrew the nut securing the wire terminal to the body. We examine. If traces of oxidation are detected, we remove them with an anti-corrosion liquid, clean them with an emery cloth, connect, securely tighten the nut."Turn signal" may not work due to lack of contact with the mass
- Check if the lamp is receiving voltage. To do this, we turn on the multimeter in the voltmeter mode with a measurement range of 0–20V. We turn on the rotation and connect the probes of the device, observing the polarity, to the corresponding contacts in the socket. Let's look at his testimony. If voltage pulses arrive, feel free to change the lamp, if not, go to the fuse.
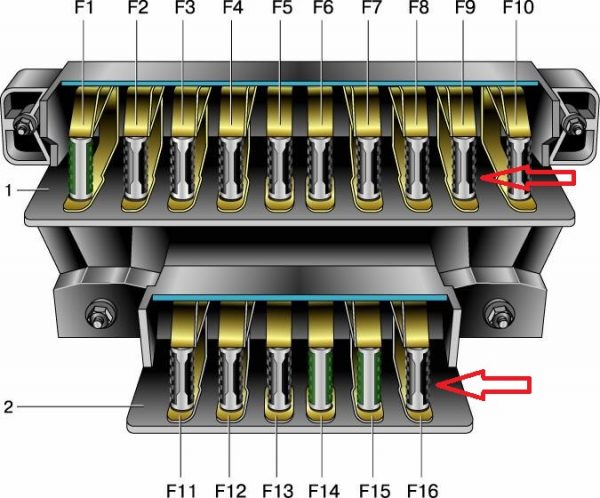
- Open the covers of the main and additional fuse boxes. They are located in the cabin under the dashboard to the left of the steering column. We find there an insert numbered F-9. We extract it and check it with a multimeter for “ringing”. Similarly, we diagnose the fuse F-16. In case of a malfunction, we change them to working ones, observing the rating of 8A.F-9 fuse is responsible for the operation of the "turn signals" when the turn is on, F-16 - when the alarm is on
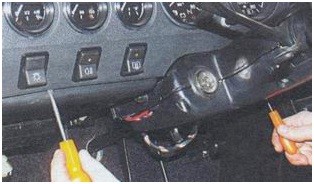
- If the fusible links are working, we are looking for a relay. And it is located behind the instrument cluster. Remove it by gently prying around the perimeter with a flat screwdriver.The panel will come off if you pry it off with a screwdriver.
- We unscrew the speedometer cable, move the instrument cluster towards ourselves.
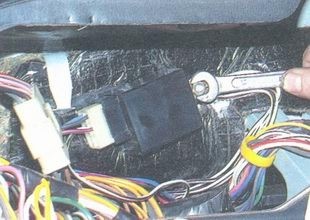
- Using a 10 wrench, unscrew the relay mounting nut. We remove the device.The relay is attached with a nut
- Since it is quite difficult to check the relay at home, we install a known-good device in its place. We check the operation of the circuit. If this does not help, we replace the steering column switch (serial part number 12.3709). Trying to repair it is a very thankless task, especially since there is no guarantee that after repair it will not fail the next day.
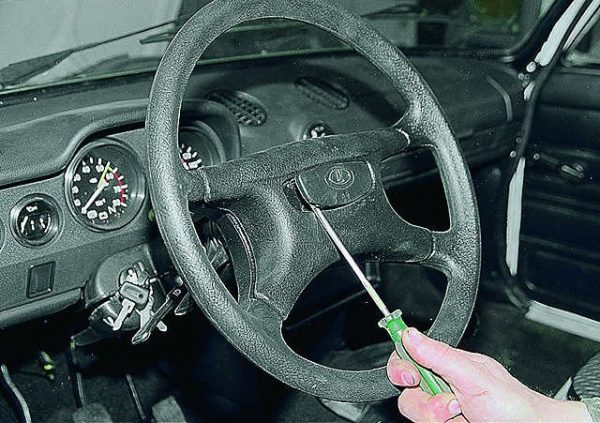
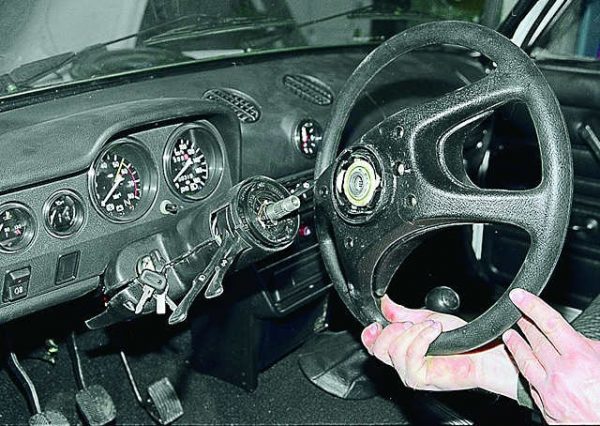
- Using a slotted screwdriver, pry off the trim on the horn switch. We take it off.To remove the lining, you need to pry it with a screwdriver.
- Holding the steering wheel, we unscrew the nut of its fastening on the shaft using the 24 head.To remove the steering wheel, you need to unscrew the nut with a head of 24
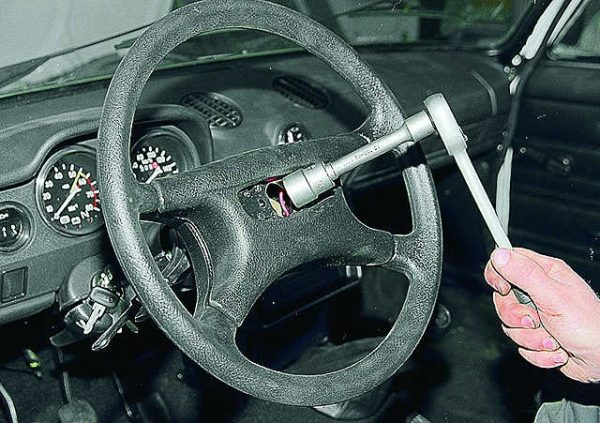
- With a marker we mark the location of the steering wheel relative to the shaft.
- Remove the steering wheel by pulling it towards you.To remove the steering wheel, you need to pull it towards you.
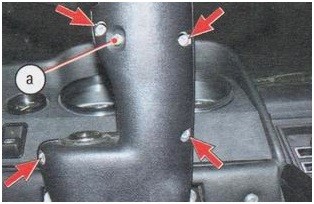
- Using a Phillips screwdriver, unscrew all four screws securing the steering shaft housing and the screw securing the housing to the switch housing.The halves of the casing are fastened together with four screws.
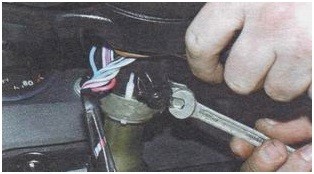
- With a key of 8, we loosen the bolt of the clamp fixing the steering column switch.The switch is fastened with a clamp and a nut
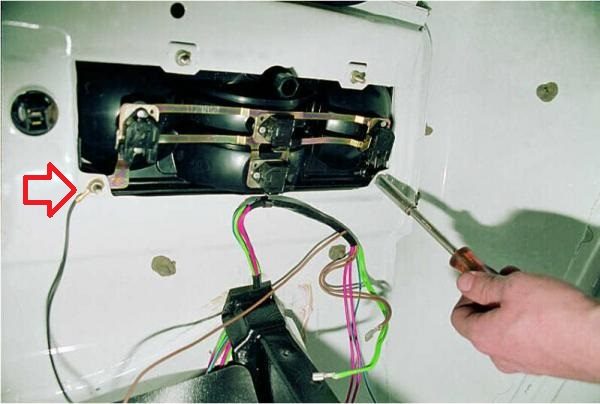
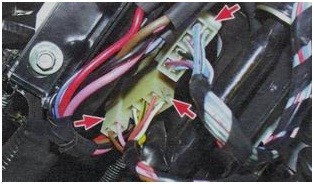
- Disconnect the three wire harness connectors.The switch is connected via three connectors
- Remove the switch by sliding it up the steering shaft.
- Installing a new steering column switch. We assemble in the reverse order.
Video: troubleshooting direction indicators

parking lights
The marker lamp is located in the center lower part of the taillight.

The light source in it is an A12-4 type lamp.
The electrical circuit of the side lights of the "six" does not provide for a relay. It is protected by fuses F-7 and F-8. At the same time, the first one protects the rear right and front left dimensions, the illumination of the dashboard and cigarette lighter, the trunk, as well as the license plate on the right side. The second ensures the safe operation of the rear left and front right dimensions, illumination of the engine compartment, license plate on the left, and the indicator lamp for the side lights on the dashboard. The rating of both fuses is 8A.
The inclusion of dimensions is made by a separate button located on the panel.
Side lighting malfunctions
There are fewer problems here, and it's easier to find them.
Table: malfunctions of the rear size indicators and their symptoms
| Sign | Malfunction |
| Lamp does not light at all | There is no contact in the lamp socket |
| Burnt out lamp | |
| Damaged wiring | |
| Blown fuse | |
| Faulty switch | |
| The lamp is on intermittently | Broken contact in the lamp socket |
| Contact disappears at the junction of the negative wire with the mass of the car |
Troubleshooting and repair
Considering that fuses of dimensions, in addition to them, protect other electrical circuits, one can judge their serviceability by the performance of other devices. For example, if the F-7 fuse blows, not only the rear right lamp will go out, but also the left front lamp. The backlight of the panel, cigarette lighter, license plate will not work. Corresponding symptoms accompany the blown fuse F-8. Putting these signs together, it is safe to say whether the fuse links are working or not. If they are faulty, we immediately change them to new ones, observing the nominal value. If all the listed devices work, but the marker lamp of one of the rear lights does not light up, you must:
- Get access to the lamp by following the steps provided in p.p. 1-5 of the previous instruction.
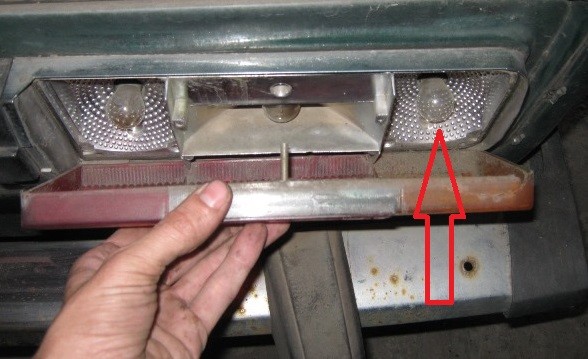
- Remove the desired lamp, inspect it.To remove the lamp from the “cartridge”, it must be turned to the left
- Check the bulb with a multimeter.
- Replace if necessary.
- Clean up contacts.
- Determine if voltage is applied to the socket contacts by connecting the tester probes to them and turning on the size switch.
- In the absence of voltage, “ring” the wiring with a tester. If a break is found, repair the wiring.
- If this does not help, replace the button for turning on the dimensions, for which pry off its body with a screwdriver, remove it from the panel, disconnect the wiring, connect a new button and install it on the console.
Reversing light
The reversing lamp is located exactly in the center of the headlamp. Its diffuser cell is made of white translucent plastic, because it applies not only to signal lighting, but also to outdoor lighting, and performs the function of a headlight.

The light source here is also an A12-4 type lamp. Its circuit is closed not with a button or switch, as in previous cases, but with a special switch installed on the gearbox.
The lamp is turned on directly, without a relay. The lamp is protected by an F-9 fuse with a rating of 8A.
Reversing lamp malfunctions
Breakdowns of the reversing lamp are also associated with the integrity of the wiring, the reliability of the contacts, the operability of the switch and the lamp itself.
Table 3: malfunctions of reversing lights and their symptoms
| Sign | Malfunction |
| Lamp does not light at all | No contact in lamp socket |
| Burnt out lamp | |
| Break in the wiring | |
| The fuse has blown | |
| Faulty switch | |
| The lamp is on intermittently | Bad contact in the lamp socket |
| Broken contact at the junction of the negative wire with the mass |
Troubleshooting and repair
To check the F-9 fuse for operability, it is not necessary to “ring” it with a tester. It is enough to turn on the right or left turn. If the rear "turn signals" work normally, the fuse is good. If they are off, change the fusible link.
Further verification is carried out in the following order:
- We disassemble the headlight in accordance with p.p. 1-5 of the first instruction.
- We remove the reversing lamp lamp from the socket, evaluate its condition, check it with a tester. In case of a malfunction, we change it to a working one.
- Using a multimeter turned on in voltmeter mode, we determine whether voltage is applied to the socket contacts with the engine running and reverse gear engaged. First put the car on the "handbrake" and squeeze the clutch. If there is voltage, we look for the cause in the wiring, and then go to the switch. If the switch is not working, both lights will not work, since it turns them on synchronously.
- We drive the car to the inspection hole.
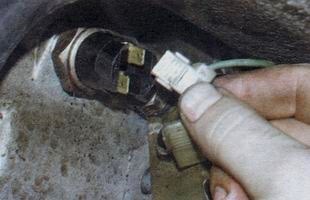
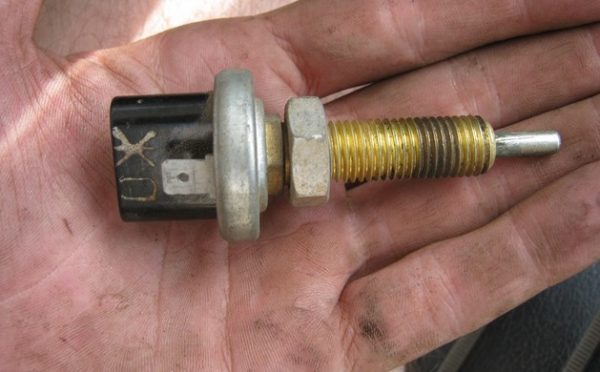
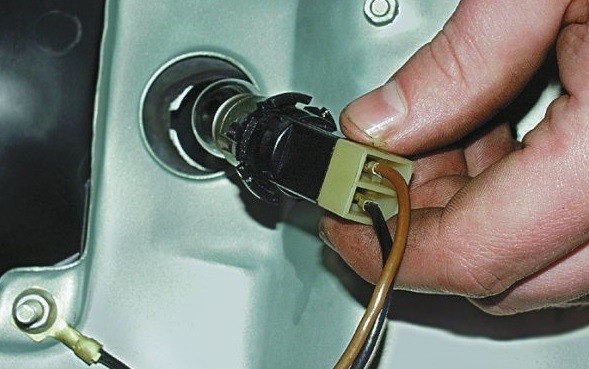
- We find a switch. It is located at the rear of the gearbox, next to the flexible coupling.The switch is located at the bottom rear of the gearbox.
- Disconnect the wires from it.There are two wires going to the switch.
- We close the wires bypassing the switch, not forgetting to insulate the connection.
- We start the engine, put the car on the parking brake, turn on the reverse gear and ask the assistant to see if the lights come on. If they work, change the switch.
- Using a 22 wrench, unscrew the switch. Don't worry about oil leaks, they won't leak.
- We install a new switch, connect wires to it.

Video: why the reversing lights do not work

Additional reversing light
Sometimes the standard reversing lights are not enough light to fully illuminate the space behind the car. This may be due to insufficient light characteristics of the lamps, contamination of the diffuser, or damage to it. Similar difficulties are also encountered by novice drivers who are not yet accustomed to the car and do not feel its dimensions. It is for such cases that an additional reversing light is designed. It is not provided by the design of the machine, so it is installed independently.
Such a lamp is connected by supplying a “plus” to it from the lamp contact of one of the main reverse indicators. The second wire from the lamp is attached to the mass of the machine.
Stop signal
The brake light section is located vertically on the extreme (inner) part of the headlamp. It is covered with a red diffuser.
The role of the backlight is played by a light bulb of type A12–4. The light circuit is protected by an F-1 fuse (rated 16A) and is turned on by a separate switch located on the pedal bracket. Often referred to as a "frog" by drivers, this switch is actuated by the brake pedal.
Stop lamp malfunctions
As for the breakdowns of the brake signaling device, they are similar to those found in reversing lights:
- broken wiring;
- broken contact in the lamp socket;
- burnout of the lamp coil;
- switch malfunction.
Circuit diagnostics and brake light repair
We start the circuit check with a fuse. Fusible insert F-1, in addition to the “stops”, is responsible for the circuits of the sound signal, cigarette lighter, interior lamp and clock. So, if these devices do not work, we change the fuse. In another case, we disassemble the headlight, check the contacts and the lamp. If necessary, we will replace it.
To check and replace the switch, you must:
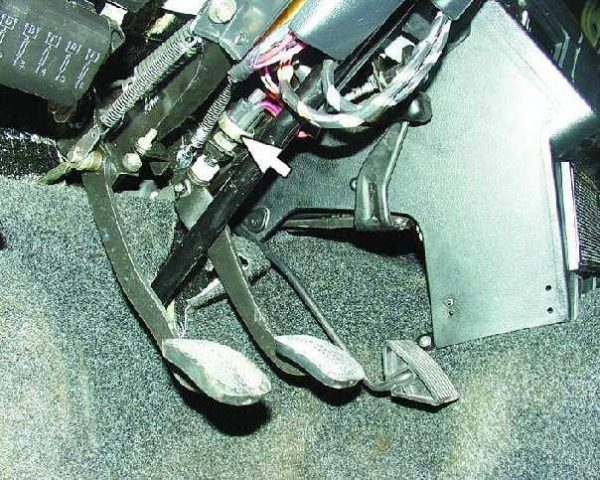
- We find a “frog” on the pedal bracket.The switch is mounted on the pedal bracket
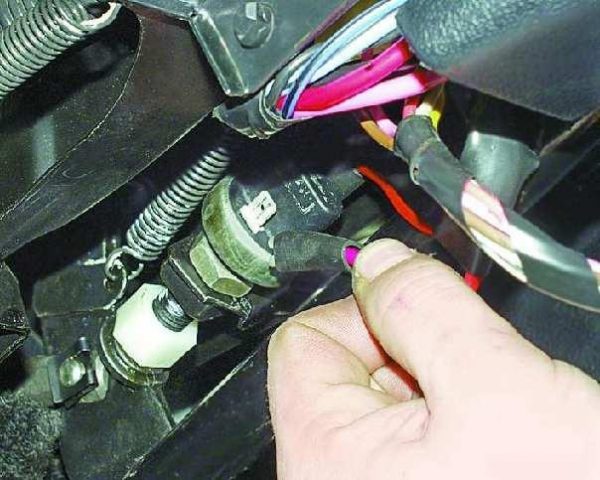
- Disconnect the wires from it and close them together.There are two wires connected to the switch.
- We turn on the ignition and look at the "feet". If they burn, we replace the switch.
- With a 19 open-end wrench, unscrew the switch buffer until it rests against the bracket.To remove the switch, it must be unscrewed with a key by 19
- With the same tool, unscrew the switch itself.
- We screw in a new "frog" in its place. We fix it by twisting the buffer.
- We connect the wires, check the operation of the circuit.

Video: brake light repair

Additional brake light
Some drivers equip their cars with additional brake indicators. Usually they are installed in the cabin on the rear shelf, next to the glass. Such improvements can be considered both as tuning and as a backup light, in case of problems with the main "feet".
Depending on the design, the lamp can be attached to the rear window with double-sided tape, or to the shelf with self-tapping screws. To connect the device, you do not need to install any relays, switches and fuses. It is enough to lead a “plus” from the corresponding contact of one of the main brake light lamps, and securely connect the second wire to ground. Thus, we will get a flashlight that will work synchronously with the main "stops", turning on when you press the gas pedal.
License plate light
The license plate light circuit is protected by two fuses. These are the same F-7 and F-8 fuse links that ensure the safe operation of the dimensions. So in case of failure of one of them, not only the number plate backlight will stop working, but also the corresponding size. Room lighting must work with the parking lights on.
As for the breakdowns of backlights and their repair, everything here is similar to the dimensions, except that you do not have to remove the reflector to replace the lamps. It is enough to move the upholstery and remove the lamp with the cartridge from the side of the luggage compartment.
Rear fog light
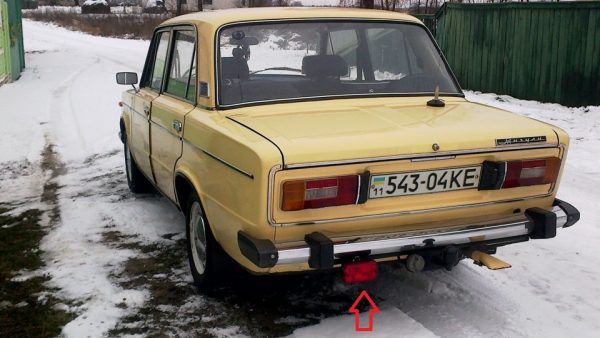
In addition to the taillights, the VAZ 2106 is also equipped with a rear fog lamp. It helps drivers in the rear of following vehicles determine the distance to the vehicle in front in conditions of poor visibility. It would seem that if there is such a lamp in the back, there should be fog lights in the front, but for some reason the “six” came from the factory without them. But, it's not about them.
The lamp is mounted on the left side of the rear bumper of the car with a stud or bolt. Standard devices usually have a bright red diffuser. A type A12–21–3 lamp is installed inside the device.
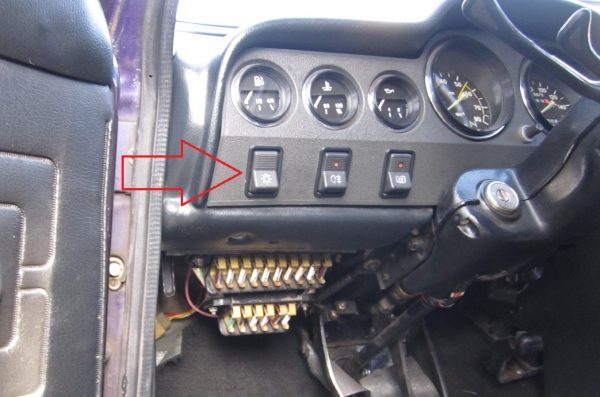
The rear fog light is turned on by means of a button on the instrument panel, located next to the switch for the dimensions and dipped beam. The lantern circuit is simple, without a relay, but with a fuse. Its functions are performed by an F-6 fuse with a rating of 8A, which additionally protects the lamp of the right low beam headlight.
Rear fog lamp malfunctions
The rear fog light fails for the following reasons:
- fuse blown;
- broken wiring;
- contact failure in the lamp socket;
- lamp burnout;
- switch failure.
It should be noted that the rear fog lamp, due to its location, is more susceptible to mechanical damage and the harmful effects of moisture than block headlights.
Troubleshooting
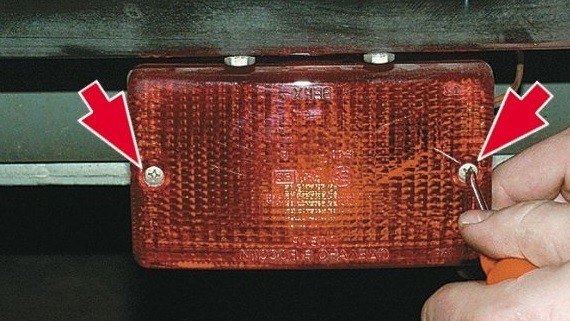
We start looking for a breakdown by checking the fuse. Turning on the ignition, dipped beam and rear fog lamp, look at the right headlight. On - the fuse is good. No - we disassemble the lantern. To do this, you just need to unscrew the two screws securing the diffuser with a Phillips screwdriver. If necessary, we clean the contacts and change the lamp.
If these measures did not help, turn on the button and measure the voltage at the lamp contacts. There is no voltage - we are replacing the rear fog lamp on button.
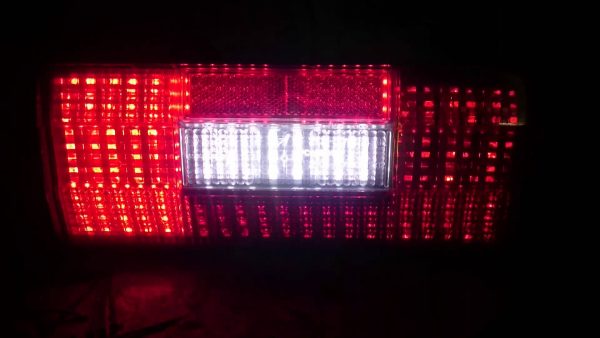
Taillight tuning
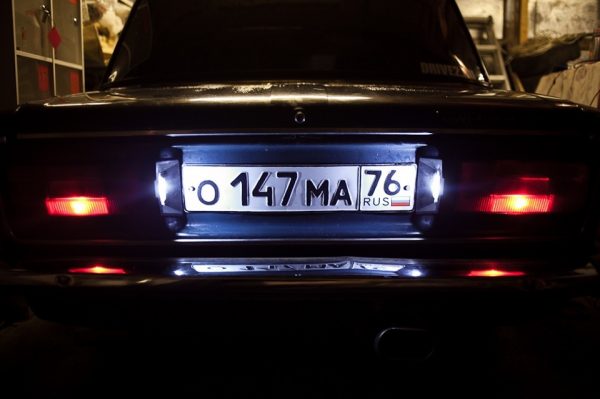
Very often on the roads there are "classic" VAZs with modified lighting fixtures. But if the tuning of the headlights is usually aimed at improving the standard light, then the modifications of the rear lights come down to giving them a more aesthetic appearance. In most cases, car owners simply install LED lamps in the lights and replace the diffuser with a more remarkable one. Such tuning in no way contradicts the design of the lighting and light signaling system.
But there are also drivers who, without thinking about the possible consequences, are trying to radically change them.
Dangerous types of taillight tuning include:
- toning;
- installation of a diffuser whose cell colors do not match the established ones;
- using too bright lamps.
Video: tuning the taillights of the VAZ 2106

Whether to tune the taillights, changing what was thought out and calculated by the designers - of course, you decide. And, having decided to take such a step, think about making the light signaling as clear as possible to drivers moving behind you.
As you can see, the taillights of the "six" are very simple devices. They do not require much attention, and in the event of a malfunction, they are easily repaired.

