How to remove a car emblem
Content
Car owners sometimes have to remove emblems from their cars for various reasons. The most popular reasons for removing a manufacturer's emblem from a car include adding a flattened bodywork common in modified cars, disguising a lower or higher class car, or making the car easier to clean.
In newer models of vehicles, the emblems are usually attached with glue, while in older models, the emblems are often attached with struts or bolts. Regardless of the type of logo you have, removing it is easy with a few simple steps.
Method 1 of 2: Use a hair dryer to remove the car emblem
Necessary materials
- Adhesive Remover
- Car polishing
- Car polisher (optional)
- Cotton towel
- Heat gun or hair dryer
- plastic spatula
Using a hair dryer or heat gun, you can easily remove the emblem from your new model car. With a heat gun or hair dryer, you can soften the adhesive and remove it with a spatula.
Once the emblem has been removed, the excess must be removed with an adhesive remover and a towel. And finally, after the emblem and any leftover residue is gone, you can polish your car to look shiny and like new where the emblem once was.
- Functions: Using a hair dryer may be safer when removing emblems. Unlike hair dryers, heat guns heat up very quickly and can easily damage your car's paint if left in one place for too long.
Step 1: Heat up the logo area. Holding a heat gun or hair dryer a few inches from the surface of the car, heat up the emblem area.
Be sure to move the hair dryer or hair dryer to different areas of the emblem to avoid overheating any one area.
- A warning: Do not leave hair dryer or hair dryer in one place for more than a few seconds. Excessive heat can damage your car's paint.
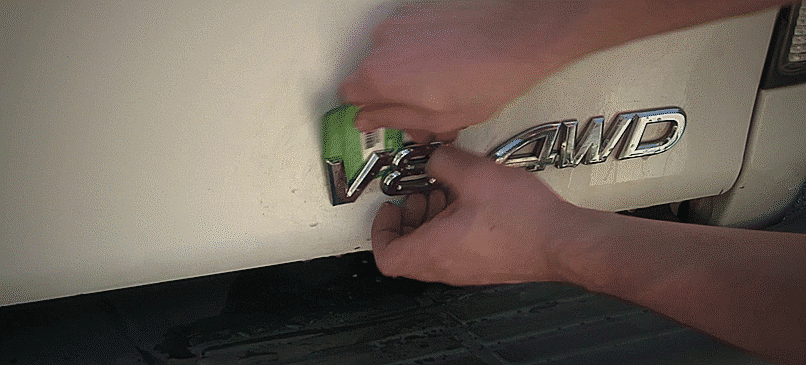
Step 2: Remove the emblem. Using a plastic spatula, separate the emblem from the surface of the car. Start at one corner of the emblem and work your way under the emblem until it is completely removed.
You may need to use a heat gun or hair dryer to loosen the adhesive.
- Functions: To avoid scratching the car's paint, place a towel between the trowel and the surface of the car.
Step 3: Allow Excess Glue to Cool. After removing the emblem, allow the remaining adhesive to cool.
You can check the surface temperature of the car and the adhesive by gently touching the surface with your hand. Once it's cool enough to handle comfortably, move on to the next step.
Step 4: Use your fingers to remove large clumps of adhesive from the surface of the car.. If small patches of adhesive remain, run your hand and fingers over the surface, applying firm pressure to make the adhesive peel off the vehicle more easily.
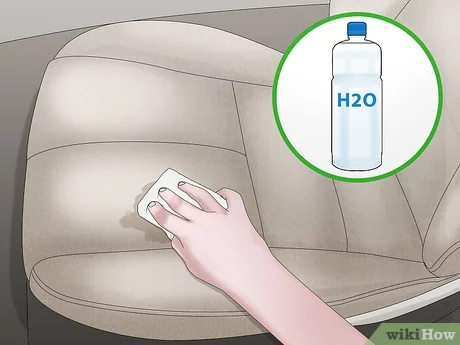
Step 5: Remove any excess glue. Apply adhesive remover to a cotton cloth and wipe off adhesive residue from the surface of the car.
Rub the adhesive remover vigorously over the surface until the adhesive is completely removed.
- Functions: Try using an adhesive remover on an inconspicuous area first to make sure it won't damage your car's paint.
Step 6: Add wax and polish where the emblem was.. Once all the glue is gone, apply wax and then buff the surface of the car where the emblem once was.
You can also use car polish to really give your car's paintwork a shine.
Waxing your car helps protect your car's paint and can polish off any imperfections present in your car's paintwork. A car polisher can take the hassle out of waxing your car by making the whole process easier.
- Functions: You may experience ghosting when removing emblems from older vehicles. Ghosting is when the image of the emblem remains slightly, creating a slight color difference from the paint that was originally around the emblem. If this happens, you might consider painting the area to match the rest of the car.
Method 2 of 2: Removing emblems from old car models
Necessary materials
- Car polishing
- Car polisher (optional)
- cotton fabric
- Nut driver
- Socket wrench (optional)
On older cars, the emblems are often attached with struts or bolts. While these types of emblems may seem more difficult to remove than sticky emblems, if you have the right tools, the process is relatively simple.
However, in addition to removing the emblems, you will likely need to fill in the holes left by the emblem removal and then paint the area to give your car a nice, sleek look.
- Functions: check which tools you need to remove the emblem. Some vehicle emblems are attached and easily removed.
Step 1. Locate the place where the racks are attached to the car with a nut or screw.. The pillars on your car emblems are on the opposite side from where they are located on the car body.
However, usually the front and rear emblems provide easier access because they are attached to the car's hood or trunk.
Step 2: Detach the emblem. Using a suitable tool, remove the nuts that secure the emblem.
Depending on the model and age of the vehicle, emblems may contain a combination of bolted-on emblem parts and adhesive-attached parts.
- FunctionsA: After removal, you should consider filling in the holes and painting the area to match the rest of the car.
Step 3: Clean and wax the surface. After the entire emblem is removed, thoroughly clean the area and apply car wax.
Use car polish to make the waxing process easier.
Removing a car emblem is not difficult if you use the right tools. If you are not comfortable doing the work yourself or in situations where you do not have the necessary tools, such as when the emblem is attached with poles, call an experienced mechanic for advice or even to do the work for you. .