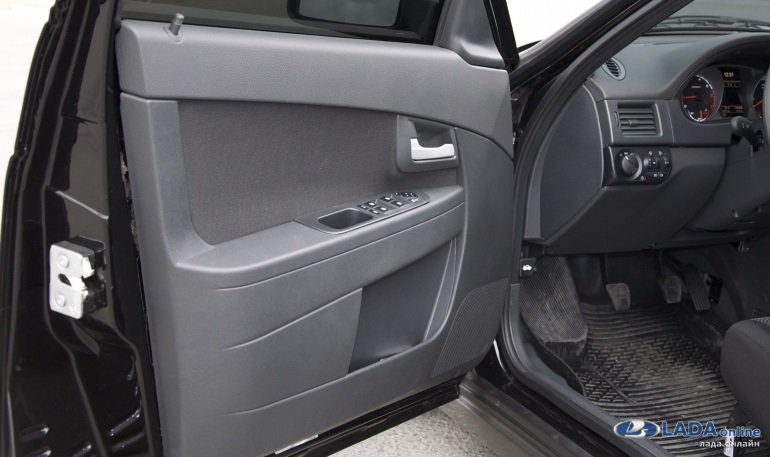
How to remove the door trim Lada Priora
Although in fact the VAZ 2110 and Lada Priora cars are in many ways similar, there are some points that are radically different in repair. And one of these moments is the removal of the front door trim. If on the top ten everything was done almost instantly, by unscrewing only 5 bolts, then on the Priore you will have to spend a little more time and effort. Although, in fact, there will be no difficulties in doing the work in this case. If you want to learn more about car interior repair, we advise you to use the instructions here
Of the tools that we need - there will be a Phillips and a flat screwdriver. Then we do everything with our own hands.
Video instructions for removing the door trim on a Lada Priora car
The video review was taken from a third-party YouTube channel, and not recorded by me personally, as is often the case, so I ask you not to find fault with the quality of the video.

As for the order and sequence of this repair, it is as follows:
- Opening the car door
- Unscrew and remove the central locking bolt from above
- Remove the trim "corner" from the inside, where the rear-view mirror is attached
- The trim of the door opening handle (lock control) must also be unscrewed - there is one bolt, and remove it by prying it with a thin screwdriver
- We unscrew the two self-tapping screws inside the armrest recess (door closing handles)
- Remove the door handle cover
- We unscrew the three bolts securing the door trim from the bottom
After all this has been done, we carefully pry the edge of the trim from the corner and slowly try to rip the trim off the door body, since it is fastened with plastic clips.
[colorbl style=”green-bl”]In order not to waste extra time during installation and to come up with ways to fix the upholstery, it is better to buy a set of plastic parts for the interior of the Lada Priora car in advance. Its price is not more than 250 rubles, but it will last you for the entire life of the machine.[/colorbl]
When the casing has been removed, all the necessary work that was conceived can be carried out. After the end, we install everything in the reverse order and connect everything in its place. If for any reason you had to change the trim for a new one, then its price in the store can be from 1000 rubles per piece.