How to tint the rear window
Content
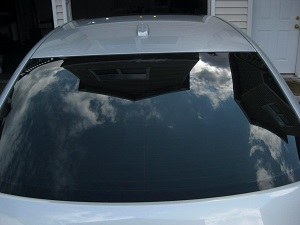
Tinting the rear window is a little more difficult than, say, the side windows, because the rear window is curved. Therefore, you will have to resort to shaping the tint film, that is, to give it the shape of the rear window. This can be achieved in different ways, but let's talk about how to tint the rear window in order.
What you need to tint the rear window
- spray bottle with soapy water;
- rubber spatula (distillation);
- sponge;
- knife;
- utility knife or blade;
- roulette;
- powder;
- skin;
- construction hair dryer.
How to tint the rear window
First you need to thoroughly wash, wipe and dry the glass. Then pour a little bit of powder and grind. Now you need to determine the size of the tinting, which will help the tape measure, and cut out the desired film. The next step will be molding - shaping the tinted glass.
Methods for shaping tint film
“wet” - wet (without removing the protective film), put the film on the rear window from the outside and smooth it out from the center to the edges, simultaneously heating the curved areas with a hairdryer. so, the film will bend and take the desired shape.
Dry is a much faster method used in Europe. The bottom line is that a piece of tinting is placed on the rear window with the cover facing outward, then the excess is cut off (you don't need to scratch the car). The folds are blown through with a hairdryer and smoothed out by forcing.
Then, without removing the tinting from the glass, you need to put a spotlight in the car interior, the beam of which will illuminate the rear window. This is necessary in order to cut tint more carefullytaking into account all shapes and curves.
The cut film must be removed in order to wash the side that was in contact with the glass, and gently wash off the baby powder. Glass can also be washed, as the film will again fall on it.
Having slightly moistened the film, you can begin to smooth it with short movements in different directions, starting from the center. so, it will be seen how well the film is molded. Doubtful places should be heated with a hairdryer and smoothed out. Now the film can be brought inside.
But before that, of course, you need to wash the rear window very carefully from the inside, in order to no grains of sand and dust left. If the glass is silk-screened, but high-quality adhesive tinting is planned for the rear glass, then it is worth carefully walking along the contour of the glass with sandpaper so that there are no ugly white stripes. After that, wash the rear window for the last time from the inside.
Now you need to remove the protective tinting film by wetting the adhesive surface with soapy water, which will neutralize the glue for a while. After wetting the glass from the inside, you should bring the film inside and carefully and slowly put it on the surface of the rear window. correctly positioning the tint, it needs to be lightly moistened with a spray bottle, and the folds can be dispersed starting from the center and along the sides, following the lines reminiscent of the British flag.
Do not forget about the bottom edge, which can be tucked in with a thin forcing. Then, finally, walk again from the center to the edges with dry, regular forcing.
Here's how to tint the rear window. You can do it yourself in your own garage, armed with the necessary tools and knowledge.