How to remove juice from a car
Content
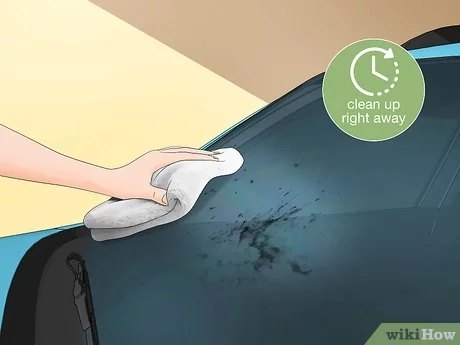
You may not have noticed the tree branch hanging overhead as you parked, but when you got back to your car, its paint was splattered with sap. Regardless of the type of wood sap that has gotten on your car, it's important to remove it quickly, as the longer it stays on your car, the harder it will be to remove and can eventually damage the paint.
While the juice won't damage a car's paintwork right away, time is of the essence. After a while, the juice can eat away at the varnish and lead to staining and discoloration of the paint. If the weather is hot, the sap can harden and turn black, making it difficult to remove.
Removing juice from a car can be labor intensive and time consuming. It can also scratch the paintwork if done incorrectly. In most cases, a car wash will not help. Fortunately, there are a number of methods to quickly and safely remove the juice.
Although this method may not work in all situations, it is worth starting with before trying more advanced options. This should be done as soon as possible after the juice has entered your vehicle. At the very least, this method will create a clean surface to work with if other methods are needed.
The car should be washed as soon as possible so that the juice does not have time to harden. The faster the juice is attacked, the less effort it will take to remove it. When it comes to juice, hot water is best.
Necessary materials
- microfiber cloth
- car soap
Step 1: wash the whole car. All car washes, regardless of juice, begin with a full rinse of the car.
Use a high pressure washer if you have one, otherwise a regular hose and high pressure nozzle will do the trick. Spray the juice as well as all other debris on the vehicle. Let it rinse thoroughly.
Step 2: Clean your car. Pry out the grease from the elbow, as well as a clean sponge, washcloth, or microfiber cloth.
Use hot soapy water to clean the entire car. The hotter the better when it comes to water temperature. The heat will help break down the juice. The area covered with juice should be rubbed very hard to remove the juice.
Step 3: Rinse Well. Rinse the soap (and hopefully the juice) from the car. If the juice is still there, rub it again and then rinse.
Step 4: Wax the car. If the juice is gone, dry the car completely and wax it to protect the paint and clearcoat.
If this method fails, it's time to move on to something more complex.
Method 2 of 3: Use commercial juice removal products
There are a number of products specifically designed to remove contaminants such as tar, tar and bugs. Head to your local auto parts store to pick it up; in most cases it is useful to seek advice from a specialist in the store. These products are designed to work effectively on debris without damaging the paint.
Turtle Wax Bug and Tar Remover and Goof Off are a couple of products highly recommended by detailing professionals.
Read the directions and warnings on the bottle carefully and follow the instructions exactly to prevent inadvertent paint damage. While the exact method of application varies by product, these guidelines should apply to most.
Necessary materials
- Commercial juice remover
- microfiber cloth
- Soap
- Wax
Step 1: Apply the remover to the resin. Apply the product to a clean rag, and then place the cloth over the juice stain. Let it soak in for at least 30 seconds.
Step 2: Wipe the Juice. Once the remover is absorbed into the juice, it should begin to soften.
It's time to break out of the elbow grease. Rub the juice stain in a circular motion until it is completely gone. Be careful not to smear the juice on the surface of the car.
Step 3: Use Your Nail. If necessary, scrape off any remaining juice with your fingernail. Be careful not to scratch the paint.
Step 4: Wash your car. If this method worked, give the car another quick wash and wax. This will remove any remaining juice residue and the wax will help protect the now clean surface of your car.
Method 3 of 3: Using Home Remedies to Remove Juice
If you don't have access to an auto parts store, there are products that most of us have in our homes that can be quite effective when it comes to dejuicing a car. Before applying any of these directly to the juice, it's a good idea to apply it to a hidden spot to make sure it won't damage the car's paint.
Step 1: Use Rubbing Alcohol. Apply rubbing alcohol to the cloth and let it soak into the juice. This should start to break down the juice. Rub the juice until it is completely gone. Do not leave rubbing alcohol on the car for too long as it can damage paint and varnish. Then wash the stain with soap and water to completely remove all traces of alcohol.
Step 2: Use WD-40. This lubricant can be used in combination with alcohol or alone. Apply WD-40 liberally to the juice stain and leave for a few minutes. This should start to break down the juice. Wipe off the juice and when it is completely gone, wash the stain with soap and water.
Step 3: Scrape the Juice. Apply alcohol or WD-40 to the juice to soften it, and then scrape the juice very gently with a razor blade. A firm hand and patience is what matters. Again, paint damage is possible when using this method.
Step 4: Use Goof Off or Goo Gone. Both of these products are designed to remove stubborn stains and dirt. Be sure to test the product on a hidden spot to make sure it won't damage the paint. Apply to a clean cloth and let it soak into the juice before rubbing. Once the juice is gone, clean the stain with soap and water to remove product residue.
Step 5: Use Hand Sanitizer. Since hand sanitizer is mostly alcohol, it should effectively remove tree sap. Follow the same procedures for medical alcohol. Remember, don't leave it in place for too long as this can damage the paint.
Step 6: Use Vegetable Oil. Vegetable oil is known to affect juice, especially if the juice stain is quite fresh. This product is non-toxic and will not damage car paint. Apply vegetable oil directly to the juice and leave for a few minutes. Wipe off the juice and wash the stain with soap and water.
Step 7: Use a razor blade. This method is only recommended as a last resort if other methods have failed. In most cases, this will only be used for juice that has sat for a long time and is quite hard. Razor blades can also be used to remove tree sap from glass, such as windows. There is a very real possibility of paint damage.
Regardless of which method is used, after removing the juice, the car must be washed and waxed. This will remove any residue from used products and the wax will help protect the paint and varnish on the car. If you're unsure which method is best for your situation, or want to learn more about the process, see a mechanic for quick and detailed advice.
