How to install LEDriving daytime running light module?
Content
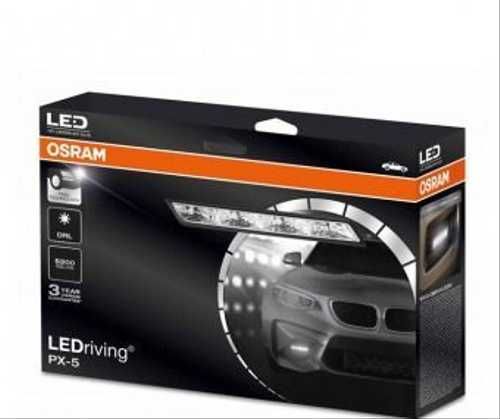
Osram LEDriving daytime running lights are interchangeable with low beam headlamps for good daylight visibility. Compared to halogens, they have an impressive durability, for which the manufacturer provides a several-year warranty. Since they consume much less energy, they not only save battery, but also fuel consumption. Learn how to properly install the LEDriving module and forget about frequent replacement of bulbs
Shortly speaking
From 7.02.2011 February 6, daytime running lights are mandatory on vehicles before they roll off the assembly line. If you have an older car and want to reduce the low beam halogen consumption, you can install the Osram LEDriving module. This will reduce energy and fuel consumption, reduce the load on the alternator and battery, and increase the replacement time for bulbs up to XNUMX years. Installation of this type of lighting consists in screwing special handles into the lower engine air intake and placing the lights in a masking grid. To efficiently route the module cables and connect them to the battery, remove obstructing parts such as the battery cover or windshield wiper covers.
Why use Osram LEDriving daytime running lights?
For more than a decade, Polish law has required drivers to drive with dipped headlights on for XNUMX hours a day. However, it allows the use of daytime running lights instead. good visibility condition no smog, no precipitation, no fog, no cloud or shade... This type of light is not intended to illuminate the road in front of the car, but to make your car more visible to others, so it is ideal when you do not need to use a strong beam of light.
It is possible to install the high beam LED module on cars that do not have it at the factory, because they rolled off the assembly line before February 7.02.2011, XNUMX, ie. before daytime running lights were installed on cars. The advantage of this solution - savings - compared to the use of halogen lamps that feed the dipped beam, withthey consume 80% less energy... And the less electricity passes through the bulbs, the longer their lifespan is. Therefore, LED lights, in accordance with the assurances of the manufacturer, they can serve you up to 6 years... Low energy consumption also means low generator and battery load and fuel savings.
Check out the benefits of the latest generation Philips Daylight: 8 good reasons to buy the Philips Daylight 9 daytime running light module

How to install Osram LEDriving daytime running light module?
Have you already purchased an LED high beam module? We will show you how to install it correctly. If you prepare well, the whole process will be smoother. Therefore, first prepare the necessary tools, such as a drill with a fine drill, a retractable furniture knife, a figure eight and a ten wrench, pliers and a screwdriver.
dimension
When everything is at hand, you need to determine exactly where you will install. Choose them carefully - by law, headlights must be installed at least 25 cm above the road (but not more than 150 cm above it), as well as leave a space of at least 60 cm between them... They should be pushed 40 cm away from the edge of the machine. After you have taken the necessary measurements, you will probably find that the lower engine air intake is the most convenient place to install. Make sure there is enough room in the back for cable routing..
Holes
To insert the LED holder into the grille covering the lower engine air intake, take off the mask, and then mark out the outlines of the lanterns in a carefully measured place and cut out unnecessary fragments of the meshes. Also remove the lower engine cover.
Place the test holders on the bumper and mark their end positions and the center of the lights on the bumper - preferably on a pre-glued piece of paper - and then trace them carefully and drill holes... Rip off the tape. Secure the brackets with the screws provided with the LED headlights. Place the rubber plugs on the headlights. Pass the cables through the bumper and secure the headlights to the holders. Pull on them to make sure they are firmly in place and snap the masking grid into place.
Connect the previously routed cables to the spoiler holder and to the cable duct leading to the engine located under the battery. Screw the lower engine cover back on.
Electrical installation
It's time for electrical installation. Start by disassembling several parts: the bonnet seal, the battery pack, the wiper compartment air filter holder, and the wiper cover. Also remove the battery cover, to which you attach the LED driver. Stick the tape on the cover and, in accordance with the instructions for the module, mark the places for the screws to fix it (you will also find them in the kit with the headlights) - that is, on the battery cover on the left side of the wheel. . Remove the cable conduit cover from the battery to the wiper. Insert the black light cables, previously routed through the bumper, into the open air duct. Now run the orange cable from the battery into the cab - if it's too long, secure the excess cable with a zip tie.
Replace the battery compartment, connect the light cables to the controller except for the blue cable - this one insulation and clamp required for the rest of the wiring... Connect the battery and route the orange cable through the conduit to the driver's side wiper. After attaching the cover to the channel, connect the battery.
It's almost done
Now it will go downhill. Plug it in the red wire of the LED module to the PLUS terminal, and the black wire to the MINUS terminal. Install the cabin filter holder in its place, remove the fuse box cover and lower dashboard covers - this will allow you to pass the orange wire under the hood through the hole next to the wipers.
Click on the light controller to loosen it and use the pliers. connect orange cable to magenta graywhich is responsible for controlling the light. After completing this step, secure the cables to their original location and proceed to reassemble all unscrewed and previously removed parts in order from the last removed to the first. Make sure the LED high beam module is working. If so, then it's time to take a well-deserved trip. Otherwise, study all the steps from the beginning and correct the error.
What should you look for when buying an LED high beam module?
And if you're just looking for an LED headlight module, choose a product with legally required certifications and approvals. Thanks to them, you can legally use daytime running lights on all roads in the European Union. You will also be sure that they have passed the required tests and are safe. Make sure the lampshade is embossed with the letters RL for daytime running lights and the E marking with the country number of the issuing country. It is worth choosing a module with a value of 800-900 lumens, because the more there are, the better the light will shine... But no matter which brand you choose, remember that Polish law allows light with a white and yellow tint. Blue tinted LEDs are still prohibited.
And if you have a choice, you can also consider installing the Philips DayLight module. The lights of this brand stand out modern design with 9 LEDs and compatible with Start & Stop, hybrid and electric vehicles. And there is nothing to hide - their main advantage is durability and elegant finish.
Do you want to be sure that a given high beam LED module is legal? Take a look at avtotachki.com and make a hassle-free purchase - all products in our offer meet the required standards.
Need more information on automotive lighting? Check out our other articles:
The best halogen bulbs for long road trips
Xenon and halogen lamps - what's the difference?
A ticket for a flashing. How NOT to use hazard lights?
www.unsplash.com