How to install the body kit
Content
Installing a body kit on a car is a pretty big undertaking. The body kit consists of front and rear bumpers, spoilers, side guards and paint. Factory parts will be removed and non-original parts will take their place. In many cases, vehicle modification will be required to install the kit.
With anything that will drastically change the look of a car, it's important to be patient and measure everything twice, otherwise the final product may come out inconsistent and cheap. Some kits are easy enough to install yourself, but for most, it's best to have a professional do it. Here's how to find a working kit and how to install it.
Part 1 of 4: Finding a body kit
Step 1: Find the right body kit. Get into the habit of frequently using your favorite search engine when searching for a body kit that fits your vehicle and budget. Take the time to review a few examples that showcase the look you want, and pay close attention to any company names that show up frequently, as they will be useful to refer to later.
You can create a photo folder for inspiration and reference, but some online apps like Pinterest can make the process easier and more varied.
Make a list of all the companies (or the top 10) that make kits that fit your car and that you like. For more obscure vehicles, there may only be one or two options. For cars like the VW Golf or Honda Civic, there are hundreds if not thousands of options.
For each option, look at as many customer reviews as you can. Look for places where customers mention how the kit fits, how difficult the installation is, and what problems may arise after installation. For example, sometimes a set of tires rubs the body or makes an unpleasant wind noise at high speed.
Step 2: Buy a kit. Buy the kit you end up choosing and keep the specific model and layout of your vehicle in mind throughout the ordering process. Actual sizes for some models may vary depending on the region in which they are sold.
When ordering online, call and speak with a member of staff. Ask any questions you have in mind before placing an order. They will be able to advise you on how to install it and whether the kit can be installed even by a non-professional.
Keep in mind what tools you will need to install the kit. Some take only screwdrivers and wrenches, and some require cutting and welding.
Step 3: Inspect the Kit. Before starting the installation process, inspect each part of the kit and make sure that it not only fits your car model, but that the parts are symmetrical.
Lay the parts on the ground next to their respective locations on the hull, the overall length and width will be easy to check if held next to the factory part.
If any parts are damaged or defective, replace them before continuing.
Part 2 of 4: Installing the body kit on your car
Required material
- degreaser
There are a wide variety of different body kits and different styles available to today's buyer, so each kit will have its own quirks and challenges. Some fit is required as kits are rarely perfect and after the car has been used for a while small bumps and scratches can cause the panels to become misaligned. Every machine and every kit is different, but there are a few almost universal steps.
Step 1: Preparing Kit Parts for Installation. If you don't paint the whole car after installing the kit, you need to paint parts of the kit before installing.
If you are going to paint kit parts, obtain your specific paint color code from the manufacturer. The paint on the new parts will look brand new, so wax the rest of the car and detail after installing the kit to make it look solid.
- FunctionsA: You can get advice on where to find the paint code for each part of your car online.
Step 2: Remove all factory parts to be replaced with stock parts.. Usually these are bumpers and side skirts/sills.
On some vehicles this will be very difficult and may require special tools. Learn the process for your specific model beforehand so you don't have to run to the store every couple of hours.
Step 3: Clean Exposed Surfaces. Clean all surfaces where new parts will be attached using a degreaser. This will prevent dirt and accumulated dirt from getting on the body kit.
Step 4: Laying out the body kit. Align the parts of the kit near where they will be installed to make sure the holes, screws, and other items line up correctly.
Step 5: Attach each part of the kit. Start attaching body kit parts starting at the front bumper if possible.
- Attention: In some kits, the side skirts must be put on first to avoid overlapping the bumpers, but install the front first and then move backwards so that the whole kit connects to the car.
Adjust the front end until it lines up with the headlights and grille. This may take some time of trial and error.
Install and adjust the side skirt to match the fenders and front bumper.
Align the rear bumper with the rear tail lights and side skirts.
Take a step back and evaluate the fit of it all. Decide whether to adjust the position of any shapes.
Step 5: Kits that use adhesive along with screws to secure parts have an extra step.
After the parts are installed and adjusted in the correct position, take a bold pencil and mark the outlines of the kit parts.
Apply adhesive strips and double-sided tape to the parts of the body kit, and then install them all. This time, make sure they are installed securely enough to prevent abuse from driving on the road.
- Attention: Make sure the parts are perfectly aligned after sticking the double-sided tape.
Part 3 of 4: Find a shop to fit the body kit
If the kit you choose is too complicated to install on your own (some popular kits from Rocket Bunny require fender trimming) or if your car is too hard to take apart at home, you need to find a trustworthy shop to install.
Step 1: Research Potential Stores. Search the Internet for stores that are known for both installing body kits and working on your brand of car.
Read customer reviews. Look specifically for those that mention price and lead time.
- AttentionA: A store that will do its best may be far from where you live, so schedule a car delivery if you choose to pick a nationwide location.
Try to find a store within a reasonable distance that has positive reviews. A good turnaround time and a final price offer is also important, but for some models the number of workshops that can make modifications can be so small that you may have to settle for good reviews. Give it a try and look at some of the existing work they have done to see the quality of their work.
Step 2: Take the car to the shop. Either return the car yourself or send it to the shop. Include all parts needed for the kit.
The deadline depends on the complexity of the body kit, the degree of modification and painting.
If you give the car with the body kit already painted, and the kit is simple, then the installation may take several days.
If the kit needs to be painted, but the car remains the same color, then the process will take a little longer. Expect it to take one or two weeks.
A very complex kit, or a particularly extensive set of modifications, can take months to complete. If the whole car needs to be painted, it will take significantly longer than if all the parts were painted the correct color from the start.
- Attention: This time reflects the time that has elapsed since work began on your vehicle. In busy stores, you may be queuing for several other customers.
Part 4 of 4: After installing the body kit
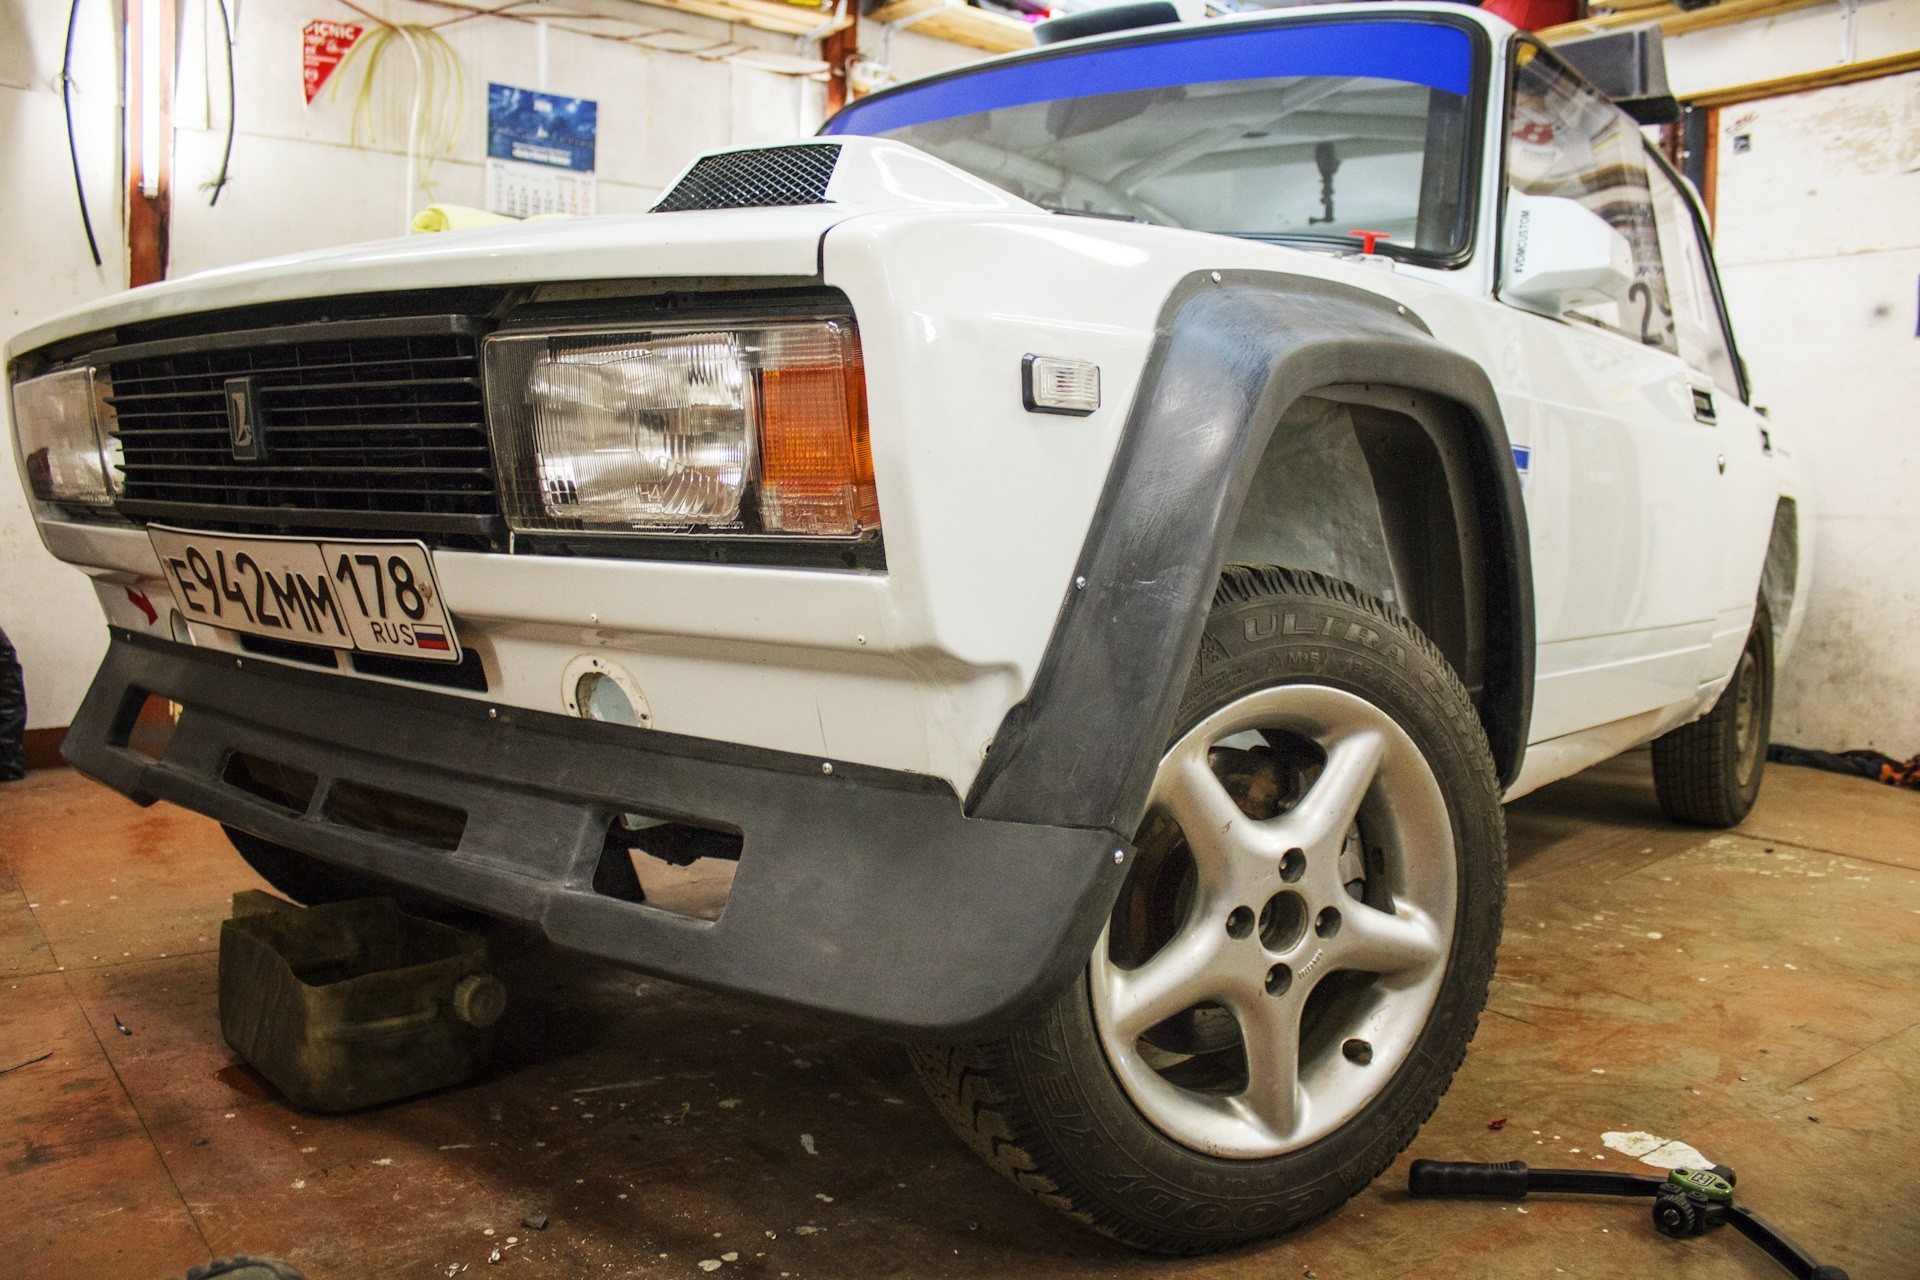
Step 1: Check alignment. Check the wheels and see how they fit the new body kit. You may need larger wheels to avoid the awkward looking gap.
You don't need too much wheel space or too much fender flare. Get a wheel and tire combination that adequately fills the fenders without touching them when the suspension flexes.
Step 2: Check your height. Make sure that the ride height is sufficient so that the bumpers and side skirts are not subjected to undue stress while driving. The suspension is usually lowered in conjunction with the body kit installed, just make sure you can get over speed bumps sometimes.
Air suspension will allow the driver to adjust the height of their car. So it can sit lower on smooth roads and higher on bumpy roads.
Drive the vehicle for a test drive and adjust the suspension if the wheels are in contact with the fender housings or if the suspension is uneven. It takes several attempts to dial it.
Make sure you're completely happy with your new body kit before you pay for it, as once you've paid and left, it will be harder to negotiate any changes. If you are installing the body kit yourself, take your time and follow each step as accurately as possible. The finished product will be worth the attention you now give to every detail.