How to Install an Aftermarket Air Intake
Trying to squeeze more performance out of your car can be a costly and serious undertaking. Some modifications may be simple, while others may require a complete engine disassembly or a complete suspension disassembly…
Trying to squeeze more performance out of your car can be a costly and serious undertaking. Some modifications may be simple, while others may require a complete engine disassembly or a complete suspension overhaul.
One of the easiest and most cost effective ways to get more horsepower out of your engine is to install an aftermarket air intake. Although there are many different air intakes available on the market, knowing what they do and how they are installed can help you purchase and install them yourself.
The air intake installed in your car by the manufacturer has been designed with a few things in mind. It is designed to supply air to the engine, but is also designed to be economical and reduce engine noise. The factory air intake will have a number of odd chambers and a seemingly inefficient design. It will also have small holes in the air filter housing that allow air to enter the intake port. All of these factors together make it quiet, but they also result in limited airflow to the engine.
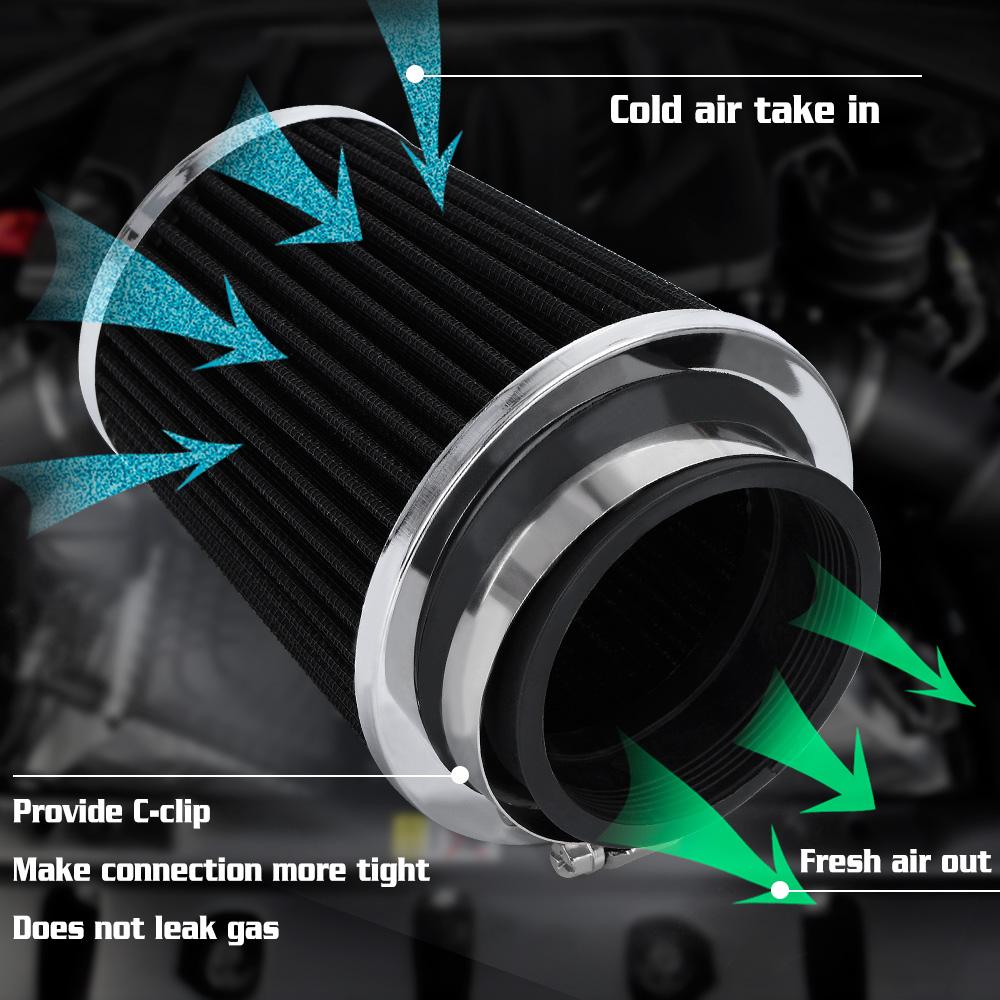
Aftermarket air intakes come in two different designs. When buying a new air intake, you will typically see it simply referred to as an air intake or cold air intake. Air intakes are designed to allow more air to reach the engine and do so more efficiently. Aftermarket intakes do this by enlarging the air filter housing, using a high capacity air filter element, and increasing the size of the air tube that runs from the air filter to the engine, and a more direct shot without noise chambers. The only thing different about the cold air intake is that it is designed to take in more cold air from other areas of the engine bay. This allows more air to enter the engine resulting in more power. Although power gains vary by vehicle, most manufacturers claim that their gains are around 10%.
Installing a secondary air intake to your vehicle will not only increase its power, but it can also increase fuel economy by improving engine efficiency. The only downside to installing a secondary air intake is the noise it creates, as the engine sucking in air will make an audible noise.
Part 1 of 1: Air intake installation
Necessary materials
- Adjustable pliers
- air intake kit
- Screwdrivers, phillips and flat
Step 1: Prepare your car. Park your vehicle on a level surface and apply the parking brake.
Then open the hood and let the engine cool down a bit.
Step 2: Remove the air filter cover. Using a suitable screwdriver, loosen the air filter housing cover bolts and lift the cover to the side.
Step 3: Remove the air filter element. Lift the air filter element up from the air filter housing.
Step 4: Loosen the air intake pipe clamp.. Depending on which type of clamp is installed, loosen the air intake pipe clamp on the air filter housing using a screwdriver or pliers.
Step 5 Disconnect all electrical connectors.. To disconnect the electrical connectors from the air intake, squeeze the connectors until the clip releases.
Step 6 Remove the mass air flow sensor, if applicable.. If your vehicle is equipped with a mass air flow sensor, now is the time to remove it from the air intake pipe.
Step 7: Remove the intake pipe. Loosen the air intake clamp on the engine so that the intake pipe can then be removed.
Step 8: Remove the Air Filter Housing. To remove the air filter housing, pull it straight up.
Some air filter housings are immediately removed from the mount, and some have bolts holding it in place that must be removed first.
Step 9: Install the New Air Filter Housing. Install the new air intake air filter housing using the hardware included in the kit.
Step 10: Install the New Air Pickup Tube. Connect the new air intake pipe to the engine and tighten the hose clamp there until snug.
Step 11: Install the air mass meter. Connect the air mass meter to the air intake pipe and tighten the clamp.
- A warning: The air mass meters are designed to be installed in one direction, otherwise the readings will be incorrect. Most of them will have an arrow indicating the direction of the airflow. Be sure to mount yours in the correct orientation.
Step 12: Finish Installing the Air Sampling Pipe. Connect the other end of the new air intake tube to the air filter housing and tighten the clamp.
Step 13 Replace All Electrical Connectors. Connect all the electrical connectors that were disconnected earlier to the new air intake system by pressing them in until you hear a click.
Step 14: Test drive the car. Once you have completed the installation, you will need to test the car by listening for any strange sounds and watching the engine light.
If it feels and sounds ok, you are free to drive and enjoy your car.
By following this step by step guide, you will be able to install an aftermarket air intake in your car by yourself at home. However, if you are not comfortable installing this yourself, contact a certified specialist, for example, from AvtoTachki, who will come and replace the air intake for you.
