How to troubleshoot a clutch that won't disengage completely
Content
A slipper clutch is a clutch that does not fully disengage, which can be caused by a broken clutch cable, a leak in the hydraulic system, or incompatible parts.
The purpose of a clutch in a car is to transfer torque, transfer power from the engine to the transmission, reduce drive vibration, and protect the transmission. The clutch is located between the engine and transmission of the vehicle.
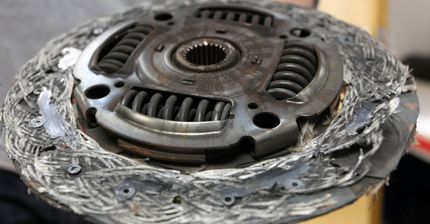
When the vehicle is under load, the clutch is engaged. The pressure plate, bolted to the flywheel, exerts a constant force on the driven plate by means of a diaphragm spring. When the clutch is disengaged (pedal depressed), the lever presses the release bearing against the center of the diaphragm spring, which relieves down pressure.
When the clutch is not fully disengaged, the clutch constantly slips and burns friction materials. In addition, the clutch release bearing will be constantly under pressure along with rotational turns causing excessive heat buildup. Eventually the friction material will burn out and the clutch release bearing will seize up and fail.
There are four areas to check for a clutch that doesn't fully disengage.
- Stretched or broken clutch cable
- Hydraulic leak in hydraulic clutch system
- Communication not adjusted
- Incompatible spare parts
Part 1 of 5: Diagnosing a Stretched or Broken Clutch Cable
Preparing your car for a clutch cable test
Necessary materials
- reptile
- flashlight
- socket
- Jack stands
- SAE/metric socket set
- SAE wrench set/metric
- Safety glasses
- Wheel chocks
Step 1: Park your vehicle on a level, firm surface.. Make sure the transmission is in park (for automatic transmission) or 1st gear (for manual transmission).
Step 2: Install wheel chocks around the rear wheels, which will remain on the ground. Apply the parking brake to block the rear wheels from moving.
Step 3: Raise the car. Using a jack recommended for the weight of the vehicle, raise it under the vehicle at the indicated jack points until the wheels are completely off the ground.
Step 4: Install the jack stands. The jack stands should be located under the jacking points. Then lower the car onto the jacks. For most modern cars, the jack stand attachment points are on a weld right under the doors along the bottom of the car.
Checking the condition of the clutch cable
Step 1: Put on your goggles, grab a flashlight and a creeper. Get under the car and check the condition of the clutch cable. Check if the cable is loose, or if the cable is broken or stretched.
Step 2: Check the cable support brackets for looseness. Make sure the cable is secure and the cable housing does not move.
Step 3: Look at the cable where it is attached to the clutch pedal. Make sure it is not worn or stretched.
Lowering the car after diagnosis
Step 1: Gather all the tools and vines and get them out of the way.
Step 2: Raise the car. Using a jack recommended for the weight of the vehicle, raise it under the vehicle at the indicated jack points until the wheels are completely off the ground.
Step 3: Remove the jack stands and keep them away from the vehicle.
Step 4: Lower the car so that all four wheels are on the ground. Pull out the jack and set it aside.
Step 5: Remove the wheel chocks from the rear wheels and set them aside.
If the problem needs attention now, repair a stretched or broken clutch cable.
Part 2 of 5: Diagnosing a Hydraulic Clutch Leak
Preparing the car for checking the hydraulic clutch system for leaks
Necessary materials
- reptile
- flashlight
- socket
- Jack stands
- Safety glasses
- Wheel chocks
Step 1: Park your vehicle on a level, firm surface.. Make sure the transmission is in park (for automatic transmission) or in first gear (for manual transmission).
Step 2: Install wheel chocks around the rear wheels, which will remain on the ground. Apply the parking brake to block the rear wheels from moving.
Step 3: Raise the car. Using a jack recommended for the weight of the vehicle, raise it under the vehicle at the indicated jack points until the wheels are completely off the ground.
Step 4: Install the jack stands. The jack stands should be located under the jacking points.
Then lower the car onto the jacks. For most modern cars, the jack stand attachment points are on a weld right under the doors along the bottom of the car.
Checking the condition of the clutch hydraulic system
Step 1: Put on safety goggles and take a flashlight. Open the hood in the engine compartment and locate the clutch master cylinder.
Check the condition of the clutch master cylinder and check for fluid leaks. Look at the back of the clutch master cylinder for oil.
Also, look at the hydraulic line and check for oil leaks. Check the line and make sure it is tight.
Step 2: Take the creeper and crawl under the car. Check the condition of the slave cylinder for leaks. Pull back on the rubber boots to see if the seal on the housing is damaged.
Make sure the bleed screw is tight. Check the line and make sure it is tight.
Lowering the car after diagnosis
Step 1: Gather all the tools and vines and get them out of the way.
Step 2: Raise the car. Using a jack recommended for the weight of the vehicle, raise it under the vehicle at the indicated jack points until the wheels are completely off the ground.
Step 3: Remove the jack stands and keep them away from the vehicle.
Step 4: Lower the car so that all four wheels are on the ground. Pull out the jack and set it aside.
Step 5: Remove the wheel chocks from the rear wheels and set them aside.
Have a certified mechanic check the hydraulic clutch system for leaks.
Part 3 of 5: Diagnosing an Unregulated Link
Preparing the Vehicle for Checking Clutch Lever Adjustments
Necessary materials
- reptile
- flashlight
- socket
- Jack stands
- needle nose pliers
- SAE wrench set/metric
- Safety glasses
- Wheel chocks
Step 1: Park your vehicle on a level, firm surface.. Make sure the transmission is in park (for automatic transmission) or in first gear (for manual transmission).
Step 2: Install wheel chocks around the rear wheels, which will remain on the ground. Apply the parking brake to block the rear wheels from moving.
Step 3: Raise the car. Using a jack recommended for the weight of the vehicle, raise it under the vehicle at the indicated jack points until the wheels are completely off the ground.
Step 4: Install the jack stands. The jack stands should be located under the jacking points. Then lower the car onto the jacks.
For most modern cars, the jack stand attachment points are on a weld right under the doors along the bottom of the car.
Checking clutch linkage adjustments
Step 1: Put on your goggles, grab a flashlight and a creeper. Get under the car and check the condition of the clutch linkage.
See if the clutch linkage is loose or adjusted. Check the clutch fork connections to make sure the clutch linkage is tight.
Step 2: Check the clutch on the clutch pedal. Make sure the pin and cotter pin are in place.
Check if the adjusting nut is tight.
Step 3: Check the return spring on the clutch pedal. Make sure the return spring is good and working properly.
Lowering the car after diagnosis
Step 1: Gather all the tools and vines and get them out of the way.
Step 2: Raise the car. Using a jack recommended for the weight of the vehicle, raise it under the vehicle at the indicated jack points until the wheels are completely off the ground.
Step 3: Remove the jack stands and keep them away from the vehicle.
Step 4: Lower the car so that all four wheels are on the ground. Pull out the jack and set it aside.
Step 5: Remove the wheel chocks from the rear wheels and set them aside.
If the linkage is out of adjustment, have a professional technician inspect it.
Part 4 of 5: Diagnosing parts that have been installed and are incompatible
- Attention: Some replacement parts are the same as factory parts, however, there may be a different bolt pattern or parts may work differently. If your replacement parts are not compatible, your clutch may be affected.
Preparing your vehicle for checking incompatible parts
Necessary materials
- reptile
- flashlight
- socket
- Jack stands
- needle nose pliers
- SAE wrench set/metric
- Safety glasses
- Wheel chocks
Step 1: Park your vehicle on a level, firm surface.. Make sure the transmission is in park (for automatic transmission) or in first gear (for manual transmission).
Step 2: Install wheel chocks around the rear wheels, which will remain on the ground. Apply the parking brake to block the rear wheels from moving.
Step 3: Raise the car. Using a jack recommended for the weight of the vehicle, raise it under the vehicle at the indicated jack points until the wheels are completely off the ground.
Step 4: Install the jack stands. The jack stands should be located under the jacking points. Then lower the car onto the jacks.
For most modern cars, the jack stand attachment points are on a weld right under the doors along the bottom of the car.
Checking for incompatible spare parts
Step 1: Inspect the entire clutch system. Look for any unusual parts that don't look factory installed. Pay attention to the location and nature of the part.
Step 2: Check parts for damage or unusual wear. Engage the clutch with the engine off and check if any part or parts are not working properly.
- AttentionA: If the clutch pedal has been replaced with an aftermarket pedal, you need to check the distance from the clutch pedal to the floor.
It is common for someone to install a non-standard clutch pedal and not have the proper clearance, which is a sign of the clutch not fully disengaging due to the pedal hitting the floor.
Lowering the car after diagnosis
Step 1: Gather all the tools and vines and get them out of the way.
Step 2: Raise the car. Using a jack recommended for the weight of the vehicle, raise it under the vehicle at the indicated jack points until the wheels are completely off the ground.
Step 3: Remove the jack stands and keep them away from the vehicle.
Step 4: Lower the car so that all four wheels are on the ground. Pull out the jack and set it aside.
Step 5: Remove the wheel chocks from the rear wheels and set them aside.
If you need further help diagnosing a problem, you should seek the assistance of a certified mechanic. Repairing a clutch that doesn't fully disengage can help improve vehicle handling and prevent damage to the clutch or transmission.