How to restore window tint
Content
Tinted car windows are a great way to improve your car's appearance, as well as protect your car from the sun and prying eyes of other drivers and would-be thieves. Window tinting is a fairly simple process. BUT…
Tinted car windows are a great way to improve your car's appearance, as well as protect your car from the sun and prying eyes of other drivers and would-be thieves.
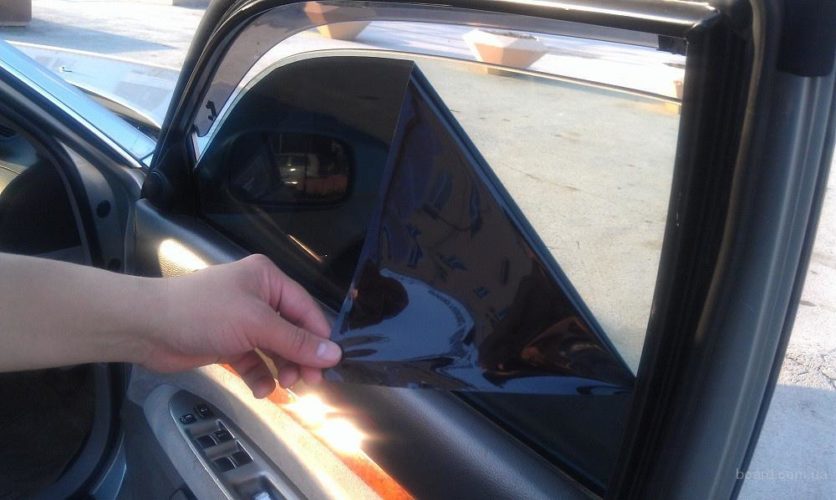
Window tinting is a fairly simple process. A transparent, very thin sheet of film is glued to the car windows. Toning comes in different thicknesses and degrees of tinting. Thickness varies from 0.001 to 0.004 inches and there are a number of different adhesives available for tinting windows.
Window tinting can be done by hand, but it requires serious attention to detail and patience. In most cases, it's best to see a professional, but unfortunately not every professional is qualified, which can result in an incomplete tint that needs to be corrected.
Window tinting can go bad if not applied correctly. It can peel or blister, which not only looks terrible, but prevents it from doing its job. If necessary, you can fix the unsuccessful tinting yourself.
- A warningA: There are state and city ordinances regarding tinting, so make sure you're not breaking any laws before applying or repairing window tint.
Follow these instructions to fix the most common window tinting problems.
Part 1 of 3. Fixing bad window tinting
Necessary materials
- Hairdryer
- Safety pin
- Sprayer
- straight edge
Step 1: Check the warrantyA: If you paid a professional for a tint and it's still under warranty, call them and ask them to repair or completely replace the tint.
Step 2: Decide on the repair. If you applied the tint yourself or it's out of warranty, decide if you want to repair it yourself or hire a professional.
Step 3: Wait for a sunny warm day. Tinting is easier to work with, and the glue is more pliable on a sunny day and at a temperature of at least 75 degrees.
Functions: Before starting work, let the machine stand for a couple of hours outdoors in the sun.
Functions: If you can't wait for a sunny day, a hair dryer will do too.
Step 3: Apply water to the window. Once the window is hot, use a spray bottle to apply a thin coat of water to the window tint. Cold water interacting with a hot window will soften the adhesive, making it easier to remove air bubbles.
Step 4: Remove Air Bubbles. There are several ways to remove air bubbles:
Use a credit card or other straight edge tool to push air bubbles towards the edge of the tint to release the air.
Pierce the air bubbles with a safety pin, making very small holes, being careful not to tear the tint. Pop every tint bubble.
The paint should close the tiny hole after the air escapes. Smooth out the tint with a ruler or credit card. Hold it at a 45 degree angle and use long strokes with medium pressure to flatten any remaining bubbles.
Attention: If the tint dries before you apply them all, reapply a small amount of water.
A warning: Be careful not to tear or tear the tint when you use a safety pin or smooth with a credit card.
Part 2 of 3: Fixing broken window tinting
Repairing a peeling tint is a little more difficult, as you will need to remove the peeling section and install a new tint section.
Step 1: Determine the area to remove. Carefully mark a square around the damaged and peeling tint. Make sure it includes the entire peel area.
Step 2: Trim the Peeling Area: Use a razor blade to trim the perimeter of the marked area.
Step 3: Raise the corner of the cut section. Carefully lift the corner of the cutout tint being careful not to rip or tear the intact tint on the window.
- AttentionA: Window tinting sheets are made up of two layers, so make sure your razor blade goes through both layers all the way to the glass.
Step 4: Apply water to the peeling area. Use a spray bottle to apply a thin mist of distilled water to the area to be removed. This will help lighten the tint.
Step 5: Remove the tint film. Remove the cut section using a razor blade to loosen any difficult areas.
Step 6: Clean the window. Clean the area where the tint was removed, making sure that any remaining glue or glue is removed from the window.
Step 7: Cut a Piece of the New Window Film. You must cut out a piece of new tint that is about 1 inch larger on all sides than the square.
Step 8: Wet the Window. Wet the window with distilled water from a spray bottle.
Step 9: Apply a new tint. Apply a new tint according to the manufacturer's instructions, pressing the film against the glass and removing any bubbles that form.
Step 10: Cut through the old and new tint. Use a ruler to guide your razor blade to cut through both the old and new tint where it overlaps with the edges of the square you cut out. Repeat this process on the other three sides.
Step 11: Remove the old tint. While holding the new tint in place, pull out the cut sections of the old tint and press the new tint into place; it must fit correctly.
- Functions: Use a ruler to remove the formed air bubbles.
Part 3 of 3: Removing damaged tint
If the damage is too severe and you decide it's best to completely remove the tint and start over, follow these instructions to completely remove the tint.
Step 1: Cover the window with a trash bag. Cut a black garbage bag to the size of the window you are cleaning, spray the outside of the window with water, and place the bag over the window; the water will make it stick to the window.
Step 2: Spray the inside of the window liberally with ammonia.. Let the car stand for about an hour in the sun.
- A warning: Since you are spraying ammonia on the inside of the window, make sure any part of the car, floors, seats, or rear window is covered with a towel or tarp.
Step 3: Remove window tint. Use a razor blade to start the edge of the shade. Carefully remove it and remove the tint from the entire window.
Functions: If the tint does not come off, reapply ammonia and wait another 30 minutes.
A warningA: Because window tinting has two layers, trying to just take it off will result in a mess, as the top layer usually comes off easily, and the second layer on the window peels off and takes hours to remove. Softening the adhesive will help both layers come off at the same time.
Step 4: Clean the window. After the tint is removed, wash the window thoroughly. Repeat the process for the rest of the windows.
Window tinting is a great addition to any vehicle, but getting it fixed requires patience and a steady hand. Often, window tinting can result in an undesirable look due to tearing, peeling, or blistering and needs repair, but when done right, adding window tinting is an improvement to your car. If you have any other general problems with your windows, AvtoTachki certified technicians can perform an inspection to diagnose the problem.