How to remove a CD stuck in a car player
Content
It's very easy to get frustrated with a stuck CD, especially if you've had to listen to the same song over and over every time you get in your car. Because of this disappointment, there may be an urge to try to fix the CD as soon as possible ...
It's very easy to get frustrated with a stuck CD, especially if you've had to listen to the same song over and over every time you get in your car. With such frustration, there may be an urge to try to hastily fix the CD player by hitting it or by inserting foreign objects into the disc slot.
Here are some tips on how to free that problematic CD and get your player back to normal use. As with any do-it-yourself repair, there is a potential risk of damage to the CD player. This article presents both invasive and non-invasive strategies to limit the risk of further damage to your car stereo.
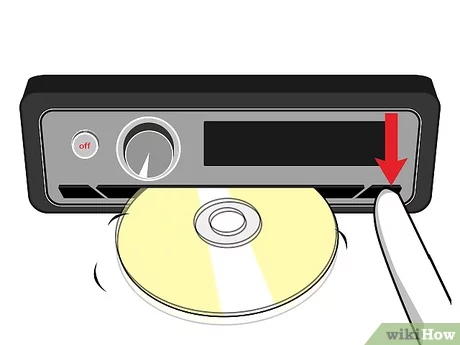
Method 1 of 6: Electrical Reset
Sometimes you can free a stuck CD by resetting the electrical system connected to the radio. Resetting the electrical system may involve disconnecting your vehicle's battery or replacing a fuse. We will first show you how to reset your electrical system by disconnecting the battery.
- FunctionsA: Before performing an electrical reset, you should write down any radio settings you have, as they may be deleted when power is removed from the radio.
Step 1: Turn off the engine. Make sure the vehicle is turned off before performing an electrical reset.
Be aware that the vehicle, even when turned off, can present a potential electrical hazard if not handled with care.
Step 2. Open the hood and find the battery.. With the hood open, locate the battery and locate the positive (red) and negative (black) terminals.
Step 3: Disconnect the negative battery terminal. You may need a wrench or pliers to disconnect the terminal.
When the wire is disconnected from the connector, leave it on a non-metallic, non-conductive part of the vehicle (such as the plastic connector cover).
- A warning: Battery handling can be dangerous. Make sure the positive terminal is covered so that your metal key (or any other metal) doesn't accidentally cause an accident.
Step 4: Let the car sit. You must allow the battery to remain disconnected for ten minutes. During this time, the car's computer will forget the presets and may want to release your CD.
Step 5 Connect the battery. Carefully replace the negative battery terminal and start the vehicle.
Try ejecting the CD in the usual way. If the CD player still refuses to eject the CD, try replacing the CD player fuse.
Method 2 of 6: Replacing the fuse
Step 1: Locate the fuse box. The fuse box should be under the dashboard on the driver's side.
To replace a fuse, find the appropriate fuse for your CD player. Typically, the fuse box has a front panel that shows the location of each individual fuse.
- FunctionsA: If you have trouble finding the right fuse or need help, an AvtoTachki certified mechanic will be happy to replace your fuse.
Step 2 Remove the correct fuse. You will need needle nose pliers or a fuse puller to remove the fuse.
Fuses are sometimes difficult to remove. By grasping the open tip of the fuse and pulling, the fuse should be released.
Step 3: Replace the old fuse with a new one.. You must ensure that the replacement fuse is rated for the same amperage as the old one.
For example, you should only replace a 10 amp fuse with another 10 amp fuse.
Once you've installed a new fuse, you can turn on the engine to see if that solved your problem.
Method 3 of 6: Using a Second CD
If forcibly ejecting and restarting your CD player didn't work, you may need to try more invasive methods to eject a stuck CD. Sometimes the CD won't eject because the CD eject mechanism doesn't have a secure grip. This may be especially true for older vehicles where a CD player has often been used. One way to help your CD player feel better in your hands is to use a second CD.
Step 1: Get the second CD. Find a second CD (preferably one you no longer need) to remove the jammed CD.
Step 2: Insert the second CD. Insert the second CD about 1 inch into the CD slot. At this point, the second CD should lie on top of the first.
By doubling the thickness, the release mechanism can better hold the original CD.
Step 3 Gently press the first CD.. Gently press the first CD into the second and press the eject button.
With any luck, the first CD will be ejected. If this is not the case, you may need to try another method.
Method 4 of 6: Using Tape
If you find that your CD is still stuck even after trying the above methods, you can try using tape. A tape attached to a thin object, such as a popsicle stick, can penetrate the CD player mechanism and eject a jammed CD.
- A warning: This method is not recommended for people with multi-disc changers. Inserting anything into the multi-disc changer may cause further damage to the mechanism.
Step 1: Wrap the popsicle stick with double-sided tape.. Make sure the tape is thin enough that you can fit the flash drive into the CD player.
Step 2: Insert the flash drive into the CD player. Insert the tape-wrapped stick about 1 inch into the CD player and press down.
Step 3. Gently pull the CD towards you.. The CD should be attached to the stick when you pull.
- AttentionA: Be careful when using this method. If you notice that the popsicle stick is starting to break, stop pulling as you risk damaging other components if the stick breaks off.
Method 5 of 6: Using pliers/tweezers
You can remove a jammed CD using more common tools such as tweezers or needle nose pliers. Tweezers or pliers may allow you to get better leverage and pulling power.
A jammed CD can be caused by a motor that is not running or is weak and does not have enough power to eject the CD from the player. The extra help of pliers or tweezers can create enough force to eject the CD.
Step 1 Insert the tweezers to grab the CD.. Gently insert the tweezers to grab the CD.
- FunctionsA: Be careful when inserting anything other than a CD into the CD player. It may be helpful to use a flashlight so you can look inside the player and make sure the CD is being pushed deeper into the mechanism.
Step 2: Click the eject button. While pressing the eject button, pull out the CD with pliers or tweezers.
Pull gently at first, then, if necessary, firmly. If you notice any unusual noises while trying this method, stop and try another method.
Method 6 of 6: Enable the latch
Some aftermarket CD players are equipped with a hole or slot that, when pressed, releases the CD halfway so that it can be picked up and pulled out. To press the button, you usually need to bend the paperclip.
Step 1: Determine if the car has a latch. Read your owner's manual to see if your CD player has a latch. It may also contain more detailed instructions on how to free a stuck CD.
Step 2: Bend the paperclip straight. Find a paperclip and bend it so that it's a few inches straight.
Step 3: Engage the latch with a paperclip. Locate the hole for the latch and insert a paperclip into the hole.
Once the latch is engaged, the CD should pop up partially so that it can be pulled out.
Multiple CD changers can be more difficult to work with due to their design. Some tips in the article may not work on multiple CD changers, especially if you are trying to eject an invisible CD. However, an electrical reset can be effective and you can try to fix it yourself. Otherwise, you should contact a mechanic and repair the damage to your CD changer.
Working with electricity and sticking foreign objects into your vehicle can be potentially dangerous, so be sure to take the necessary precautions before attempting to remedy the situation. If none of the above fixes work, you may need to have your CD player repaired by a mechanic. AvtoTachki certified mechanics will be able to inspect your CD player and make any necessary repairs.