How to replace the driveshaft center bearing
Content
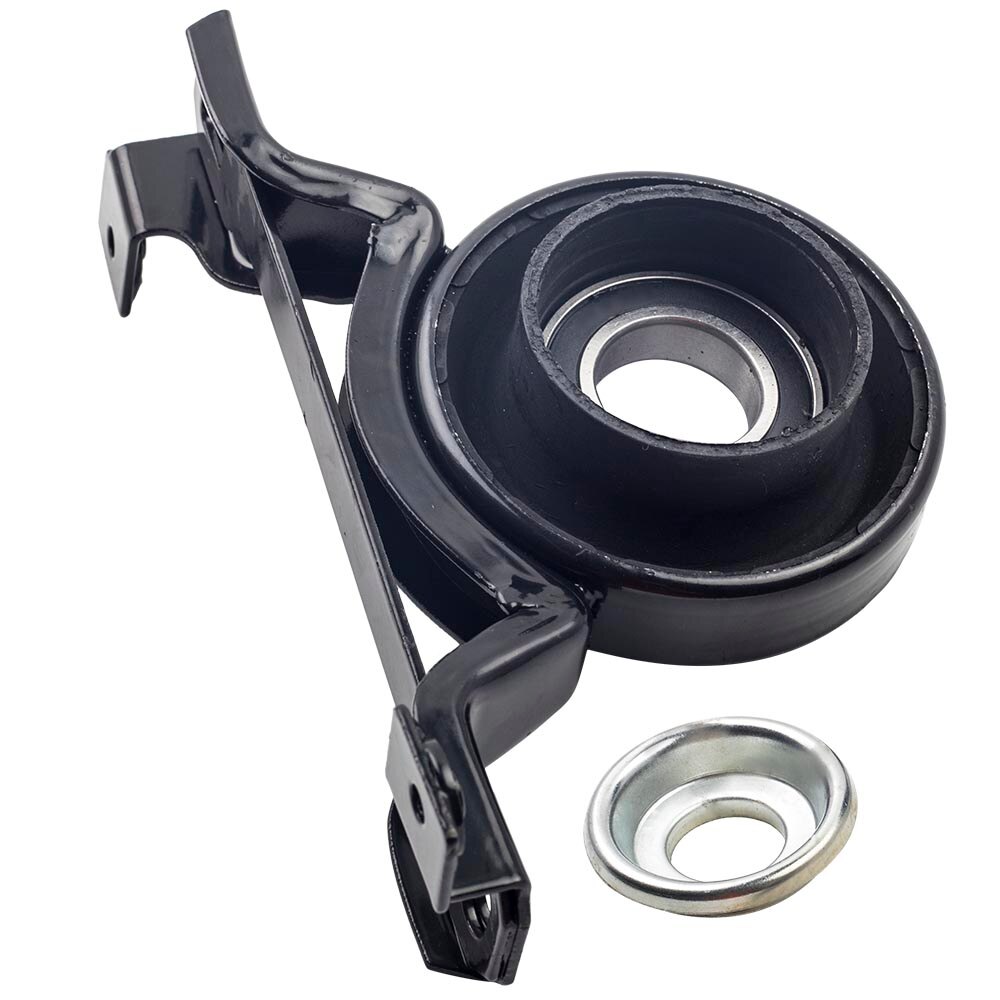
The central support bearing of the cardan shaft has a simple design and principle of operation. Replacing it can be difficult due to the complex design of the driveshaft.
A RWD or AWD driveshaft is a carefully assembled, precisely balanced component that transfers power from the transmission to the rear center gears and then to each rear tire and wheel. Connecting the two sections of the driveshaft is a central thrust bearing, which is a metal "U" shaped bracket with a hard rubber bearing inside. The bearing is designed to hold both parts of the driveshaft in a solid state in order to reduce the harmonic vibration when the car accelerates.
Although its design and function are incredibly simplified, replacing the driveshaft center bearing is not one of the easiest jobs. The main reason many homemade mechanics struggle with replacing the driveshaft center mount is due to the parts involved in reassembling the driveshaft.
- Attention: Since all vehicles are unique, it is important to understand that the recommendations and instructions below are general instructions. Be sure to read your vehicle manufacturer's service manual for specific instructions before proceeding.
Part 1 of 5: Determining Symptoms of a Malfunctioning Drive Shaft Center Bearing
The drive shaft is a precision piece that is perfectly balanced before installation at the factory. It is also very heavy equipment. It is not recommended to perform this work on your own without proper tools, experience and auxiliary equipment. If you're not 100% sure about replacing the driveshaft center bearing or don't have the recommended tools or assistance, have an ASE certified mechanic do the job for you.
A worn or failed center support bearing causes several symptoms that can alert the driver to a potential problem and need to be replaced. Below are some of these warning signs to look out for before deciding to replace the driveshaft center bearing.
Step 1: Check for dull sounds when accelerating or decelerating.. The most common symptom is a noticeable "clunking" sound from under the car's floorboards.
You will often hear this when accelerating, shifting gears, or while braking. The reason this sound occurs is because the inner bearing is worn out, causing the two attached driveshafts to become loose during acceleration and deceleration.
Step 2. Watch out for jitter as you accelerate.. Another warning signal is when you feel the floor, accelerator or brake pedal shaking when accelerating or braking.
A failed bearing cannot support the driveshaft, and as a result, the driveshaft flexes, causing the vibration and lock-up feeling that can be felt throughout the car when it is broken.
Part 2 of 5. Physical inspection of the driveshaft center bearing.
Once you have correctly diagnosed the problem and are confident that the cause is a worn center support bearing, the next step is to physically inspect the part. This is an important step that many do-it-yourself mechanics and even new ASE certified mechanics skip. Before proceeding, ask yourself a simple question: "How can I be 100% sure that the problem I'm trying to fix is not manually checking the part?" With an internal engine component, this is very difficult to do without disassembling the motor. However, the center support bearing is located under the vehicle and is easy to inspect.
Necessary materials
- Eye protection
- flashlight
- Gloves
- Chalk or marker
- Roller or slider if the vehicle is not on a lift
Step 1: Put on gloves and goggles.. You don't want to start grabbing or handling metal objects without hand protection.
The top of the center support bearing can be sharp and cause serious cuts to hands, knuckles and fingers. In addition, there will be a huge amount of dirt, grime and debris under your car. Since you will be looking up, it is likely that this debris will get into your eyes. While it is assumed that blood, sweat and tears are needed to repair most vehicles, reduce the potential for blood and tears and think safety first.
Step 2: Roll under the vehicle to where the center support bearing is located.. Once you have the proper safety equipment in place, you need to make sure the vehicle is securely secured to the lift.
Step 3: Locate the front and rear driveshafts.. Find out where they are located on your vehicle.
Step 4: Locate the center nozzle where both drive shafts meet.. This is the center bearing housing.
Step 5: Grasp the front driveshaft and try to "shake" it near the center support bearing.. If the drive shaft is shaking or seems to be loose inside the bearing, the center support bearing needs to be replaced.
If the driveshaft is firmly seated in the bearing, you have a different problem. Perform the same physical inspection with the rear driveshaft and check for a loose bearing.
Step 6: Mark the alignment of the front and rear driveshafts.. The two drive shafts that are attached to the center support bearings are also attached to opposite sides of the vehicle.
The front driveshaft is attached to the output shaft coming out of the transmission, and the rear driveshaft is attached to the yoke coming out of the rear axle differential.
- A warning: As noted above, the driveshaft is carefully balanced and must be removed to replace the center support bearing. Failure to attach the front and rear driveshafts exactly where they came from will cause the driveshaft to be out of balance, which will vibrate and can seriously damage the transmission or rear gears.
Step 7: Locate where the front driveshaft attaches to the transmission.. Using chalk or a marker, draw a solid line directly below the transmission output shaft and align this line with the same line drawn on the front of the driveshaft.
Drive shafts that are connected to a splined shaft on the gearbox can only be installed in one direction, but it is still recommended to mark both ends for consistency.
Step 8: Make the same control marks. Find where the rear driveshaft attaches to the rear fork and make the same marks as in the image above.
Part 3 of 5: Installing the Correct Parts and Preparing for a Replacement
Once you have correctly determined that the center support bearing is damaged and needs to be replaced, you need to prepare for replacement. The first thing you should do is stock up on the correct spare parts, tools, and materials that you will need to do this job safely and correctly.
Necessary materials
- Jack and Jack stand
- WD-40 or other penetrating oil
- work light
Step 1: Get your car ready for work. Use a jack to raise the vehicle to a height that allows easy access to the driveshaft when using tools.
Jack up one wheel at a time and place jack stands under solid supports for support. Once the car is secured, make sure you have enough light to see the bottom of the car. A good idea would be a work light attached to the front or rear axle.
Step 2: Lubricate Rusted Bolts. While you are under the car, take a can of WD-40 and spray a generous amount of penetrating fluid onto each driveshaft mounting bolt (front and rear).
Let the penetrating oil soak in for 10 minutes before removing it and moving on to the next step.
Part 4 of 5: Replacing the Center Support Bearing
Necessary materials
- Brass central faucet
- Combination wrench and extension set
- grease
- Replacing the center support bearing
- Interchangeable clamp
- Hammer with rubber or plastic tip
- Socket wrench set
work light
Attention: Check with the manufacturer for the recommended bearing grease for your vehicle.
Attention: To replace the center support bearing, purchase the exact part recommended by the vehicle manufacturer (replace the entire housing only, including the outer housing, inner bearing, and inner plastic bearings).
A warning: Do not attempt to replace only the inner bearing.
FunctionsA: There are many people who believe that it is possible to remove the center support bearing and reinstall it using a press or other methods. In most cases, this method does not work because the bearing is not properly attached or secured. To avoid this problem, find a local machine shop that can properly remove and install the center support bearing.
Step 1: Remove the front driveshaft. The front driveshaft is attached to the gearbox output shaft and connected with four bolts.
On some rear wheel drive vehicles, the bearing block bolts are threaded into nuts that are firmly fixed or welded to the frame. On some vehicles, two-piece nuts and bolts are used to attach the rear of the front driveshaft to the center bearing.
Step 2: Remove the bolts. To do this, take a socket or socket wrench of a suitable size.
Step 3: Remove the front driveshaft.. The front driveshaft will be firmly fixed inside the output shaft supports.
To remove the driveshaft, you will need a hammer with a rubber or plastic tip. There is a solid weld mark on the front of the driveshaft that is best hit with a hammer to loosen the driveshaft. Using a hammer and with your other hand, while supporting the propeller shaft from below, hit the weld mark hard. Repeat until the drive shaft is loose and can be removed from the front.
Step 4: Remove the bolts securing the front drive shaft to the bearing seat. Once the bolts are removed, the front driveshaft will be disconnected from the center support bearing.
Step 5: Place the front driveshaft in a safe place.. This will prevent damage or loss.
Step 6: Remove the Rear Driveshaft. The rear driveshaft is attached to the rear fork.
Step 7: Remove the Rear Driveshaft. First, remove the bolts that hold the two components together; then carefully remove the driveshaft from the yoke using the same method as the front driveshaft.
Step 8: Remove the center clamp that secures the rear driveshaft to the center support bracket. This clip is removed with a straight blade screwdriver.
Carefully unscrew it and slide it behind the rubber boot for future use.
- A warning: If the clamp is completely removed, it will be very difficult to replace it correctly; That's why it's recommended above to buy a new replacement yoke that can be reinstalled to attach the rear driveshaft to the center thrust bearing.
Step 9: Remove the case. After you have removed the clamp, slide the boot off the center support bearing.
Step 10: Remove the support center of the bearing housing. Once you've removed the rear drive shaft, you'll be ready to remove the center housing.
There are two bolts on the top of the case that you need to remove. Once both bolts are removed, you should be able to easily slide the front driveshaft and rear input shaft off the center bearings.
Step 11: Remove the old bearing. The best way to complete this step is to have a professional mechanic shop remove and install the new bearing professionally.
They have access to better tools that allow them to do this job more easily than most do-it-yourself mechanics. Listed below are the steps you need to follow if you don't have access to a machine shop or decide to do this step yourself.
Step 12: Remove the bolts. Remove the ones connecting the front driveshaft to the rear driveshaft.
Step 13: Attach the front of the driveshaft.. Secure it in a bench vise.
Step 14: Unscrew the center nut. This is the nut that will hold the connecting plate to the shaft where the center bearing is located.
Step 15: Knock the worn center support bearing off the driveshaft.. Use a hammer and a brass punch.
Step 16: Clean the Ends of the Drive Shaft. After removing the center support bearing, clean all ends of each drive shaft with solvent and prepare to install the new bearing.
- A warning: Incorrect installation of the center support bearing can cause serious damage to the transmission, rear gears and axles. If in doubt, have your local ASE certified mechanic or mechanical shop have the rear center bearing professionally installed.
Step 17: Install New Bearing. This is the most important part of this work. Again, if you're not 100 percent sure, take it to a professional mechanical shop to install a new bearing. This can save you a huge amount of stress and money.
Step 18: Apply Lube. Apply a light coat of recommended grease to the bearing shaft to ensure proper lubrication and ease of bearing sliding.
Step 19: Slide the bearing onto the shaft as straight as possible.. Use a rubber or plastic tipped hammer to install the bearing onto the drive shaft.
Step 20: Check bearing installation. Make sure the bearing rotates easily on the drive shaft without any vibration or movement.
Step 21: Reinstall the center support bearing and drive shaft.. This is the easiest part of the job, as all you have to do is reinstall each partition in the reverse order you followed during installation.
First, reattach the center support bearing to the frame.
Second, slide the rear driveshaft into the splines, put the dust boot over the splines, and reattach the yoke.
Third, reattach the rear driveshaft to the fork; make sure the marks on the rear driveshaft and yoke are aligned before installing the bolts. Tighten all bolts to get manufacturer's recommended tightening pressure settings. Make sure all bolts and nuts are tight before proceeding.
Fourth, reattach the front of the driveshaft to the transmission output shaft, again checking the alignment marks you made earlier. Tighten all bolts so manufacturers recommend torque pressure settings. Make sure all bolts and nuts are tight before proceeding.
Fifth, grasp the front driveshaft where it attaches to the center support bearing and make sure it is secure. Do the same check with the rear driveshaft.
Step 22: Remove all tools, used parts and materials from under the car.. This includes jacks from each wheel; put the car back on the ground.
Part 5 of 5: Test drive the car
Once you've successfully replaced the center drive bearing, you'll want to test drive the car to make sure the original issue is fixed. The best way to complete this test drive is to plan your route first. Make sure you are driving on a straight road with as few bumps as possible. You can make turns, just try to avoid winding roads first.
Step 1: Start the car. Let it warm up to operating temperature.
Step 2: Drive slowly onto the road. Step on the gas pedal to pick up speed.
Step 3: Watch for Old Symptoms. Be sure to accelerate to a speed that will place the vehicle in the same scenario in which the initial symptoms were noticed.
If you correctly diagnosed and replaced the center support bearing, you should be fine. However, if you have completed each step of the above process and you are still experiencing the same symptoms as originally, it would be best to contact one of our experienced mechanics from AvtoTachki to help you diagnose the problem and carry out the appropriate repairs.