How to replace the trunk lock cylinder
Content
The trunk of the car is locked with a trunk lock, which works through the trunk lock cylinder. Replacing a failed cylinder is essential to the safety of your vehicle.
Your vehicle's trunk lock cylinder is responsible for actuating the latch mechanism that opens the trunk when the key is turned. A faulty lock cylinder can be a safety issue for you and your vehicle.
Follow the instructions below to learn how to replace this part yourself. This guide applies to vehicles equipped with a roof rack, but can also be used for other vehicles with a rear sunroof such as a van or SUV. The concept will be very similar to replacing the cylinders of many other door locks.
Part 1 of 2: Removing the old trunk lock cylinder
Necessary materials
- Ring or socket wrench
- flashlight
- flat screwdriver
- Gloves
- needle nose pliers
- Trunk lock cylinder replacement
- Scrap removal tool
Step 1: Open the trunk and remove the trunk lining.. Use the trunk release lever, which is usually located on the floorboard on the driver's side of the car, to open the tailgate.
Using a trim removal tool, pry out each plastic retaining rivet to release the trunk liner. Removing the trim will give you access to the back of the tailgate and you will be able to locate the trunk lock cylinder.
Step 2: Remove all drive rods. You may need a flashlight to see the mechanism, but you should find one or more actuation rods attached to the lock cylinder mechanism.
To remove the rod(s), pull the rod straight out of the plastic retainer. To do this, you may need a flathead screwdriver or needle nose pliers.
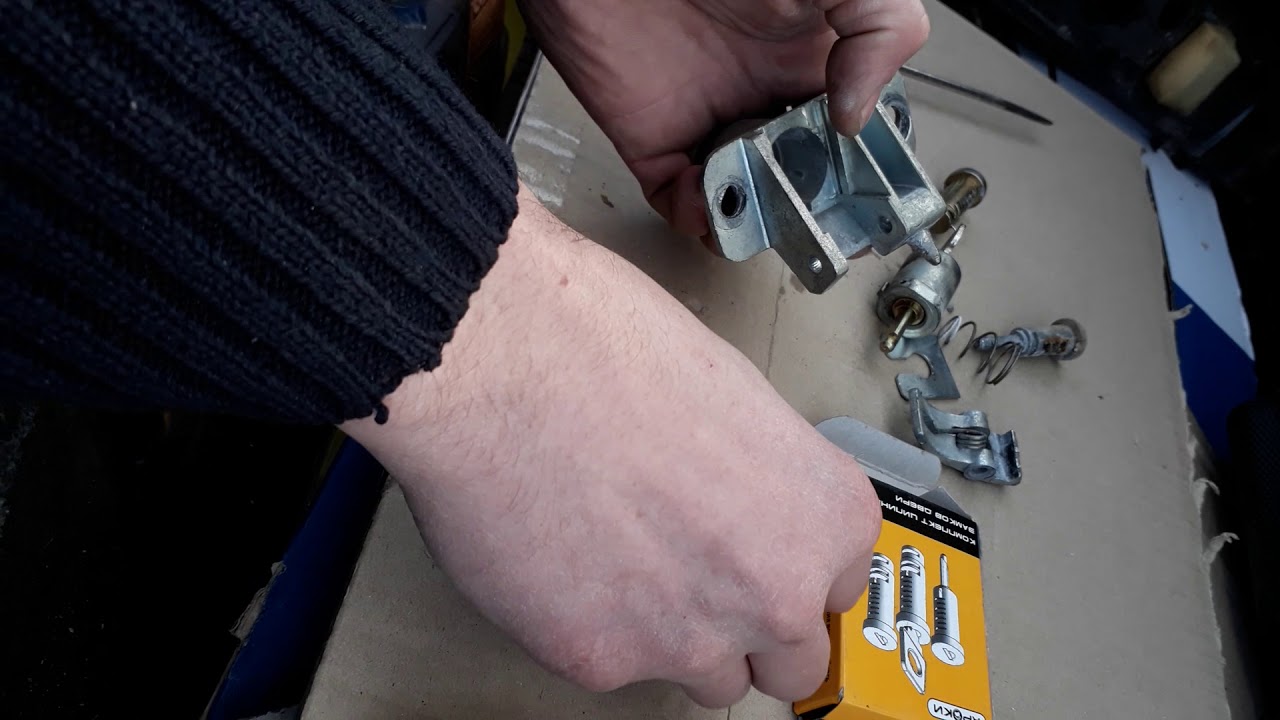
Step 3: Unscrew or detach the lock cylinder.. Once the actuating rod(s) are removed, either unscrew the lock cylinder housing from the tailgate or remove the retaining clip, whichever applies to your vehicle.
- FunctionsNote: If you have a bolt-on lock cylinder, you may need a socket wrench to loosen and then tighten this bolt. If you have a lock cylinder type that locks with a locking clip, you will need to use gloves and needle nose pliers.
Step 4: Remove the trunk lock cylinder. After removing the locking bolt or clip, the lock cylinder should move freely. The lock cylinder is usually removed by light pressure from the inside. You may need to rotate the cylinder as you remove it to clear the mounting hole.
Part 2 of 2: Installing a New Trunk Lock Cylinder
Step 1: Install the new lock cylinder. Insert the new lock cylinder into the opening in the tailgate, turning as necessary to ensure it is seated correctly. Once the lock is correctly positioned, use a socket wrench or needle nose pliers to reinstall the lock bolt or clip.
Replacing the stop bolt is pretty straightforward; just hand tighten the bolt. If you have a locking clip, you will most likely need gloves and needle-nose pliers to align it and push it into position without cutting yourself or injuring your joint.
- Attention: The retaining brace is exactly the same type used to secure the brake and clutch lines, so if you've ever dealt with brakes or clutches, they will look familiar. The installation method is exactly the same.
Step 2: Reattach the actuator stem(s). Install the drive rod or rods into the clip on the lock cylinder.
It is possible that the new cylinder will be missing the plastic clip holding the rod in the correct position on the cylinder. If this is the case, use needle nose pliers to carefully remove the old clip from the broken lock cylinder and install the clip onto the new cylinder.
Align the rod with the hole and press firmly until the rod sits in place.
Step 3: Test the new mechanism. Before installing the trunk lining, test your work by inserting the key into the new trunk lock cylinder and turning it. You should see it click into place on the trunk latch itself. Close the trunk and try again to make sure the trunk opens.
Step 4: Reinstall the trunk lining. Align the holes in the trunk lining with the holes in the tailgate and install the plastic retaining rivets in place. The retaining rivets are reattached with only strong pressure, pressing straight into the corresponding hole in the tailgate.
After installing the trunk lining, the work is completed.
By following the instructions in this guide, you can replace a failed trunk lock cylinder yourself with just a few tools and a short amount of time. However, if you are not 100% comfortable doing this work yourself, you can always invite one of AvtoTachki certified specialists to your home or office at any time convenient for you to replace the trunk lock cylinder.