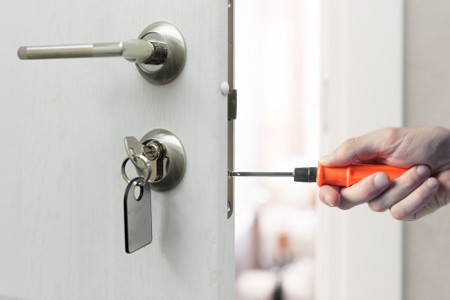
How to replace the tailgate lock cylinder
The tailgate lock cylinder unlocks the block holding the tailgate handle. Failure symptoms include a lock that rotates endlessly or does not rotate at all.
The tailgate lock cylinder is the actual device that takes the correct key and allows the cylinder to unlock the block inside that locks the tailgate handle. Signs of a broken tailgate lock cylinder include the lock not turning, an object stuck inside it, or the lock turning endlessly with the key inserted.
Part 1 of 1: Replacing the Tailgate Lock Cylinder
Necessary materials
- Pliers
- Replacement Tailgate Lock Cylinder (Use your vehicle's VIN to get a cylinder that fits the same key as the lock cylinder you are replacing)
- Socket set and ratchet (depending on make and model)
Torx screwdrivers
Attention: Pay attention to the spare cylinder key you buy. You can find a cylinder that will match your key if you buy a cylinder based on your VIN. Otherwise, you will have to use a separate key for the back door.
Step 1: Remove the access panel. Lower the tailgate and locate the access panel on the inside of the door. The screws holding the access panel are located around the tailgate handle.
- AttentionA: The exact size and number of screws varies by manufacturer and model.
Remove the star screws holding the panel in place. The panel will rise.
- AttentionNote: Some models require you to remove the tailgate handle to gain access to the lock cylinder. While removing the handle seems like an extra step, it's much easier to replace the cylinder on a workbench where you have the ability to easily manipulate the cylinder. The handle will release from the outside of the gate once the retaining screws and tie rods are removed from inside the access panel.
Step 2: Find and remove the old cylinder. The lock cylinder is held in the handle body or fixed with a clip behind the panel. To release the cylinder, pull out the locking clip with pliers and the block should slide out freely.
- Attention: Be sure to remove all old gaskets along with the cylinder.
Pay attention to the order in which the cylinder shims, gaskets or washers are removed. You want to make sure they come back in the same order. The replacement will most likely come with instructions or a diagram of how it should be installed.
If the cylinder is in a handle housing assembly, the entire handle assembly must be removed before you can remove the cylinder from it.
- Attention: If you are working on an electrically operated locking mechanism, you should refer to another article on the maintenance of electronic actuators.
Step 3: Install the new lock cylinder. Insert a new lock cylinder and return the retaining bracket to secure the cylinder.
Make sure all washers and gaskets are installed in the correct order.
When installing the cylinder to the handle body assembly, reinstall the assembly to the tailgate and secure the handle fixing bolts and linkages.
Step 4: Check the lock cylinder. By installing and securing the lock cylinder (and installing the handle, if applicable), you can test the operation of the cylinder.
Insert key and turn. Check the handle to make sure it is locked and then make sure the handle can be unlocked.
If the lock does not work properly, remove the cylinder again and make sure that all necessary washers and gaskets are in place.
Stubborn and faulty locks can cause a lot of problems. You can change them in a short time and with relative ease. Not up to the task? Sign up to replace the trunk lock cylinder with a certified AvtoTachki specialist who will help you at home or in the office.