How to replace the ambient temperature sensor
The ambient temperature sensor monitors the temperature inside and outside the vehicle. This sensor allows the air conditioner to maintain a comfortable temperature in the cabin.
Vehicles with automatic air conditioning and driver displays with outside temperature information require a sensor to collect this information. Both systems rely on this sensor to power switches and controls that the computer uses to automate the automatic air conditioning system, as well as to provide digital readings on the outdoor temperature display.
If any of these systems are faulty, you may need to replace that sensor. There are several symptoms of a malfunctioning ambient air temperature sensor. If your vehicle is experiencing any of these, use the following process to resolve the issue.
Part 1 of 2: Remove the old ambient temperature sensor
Necessary materials
- Gloves (optional)
- Assortment of pliers
- Replacing the ambient air temperature sensor
- Protective glasses
- Socket set
Step 1: Disconnect the battery. Disconnect the ground from the battery.
Disconnecting battery power when working on any type of vehicle electrical system is critical to safety.
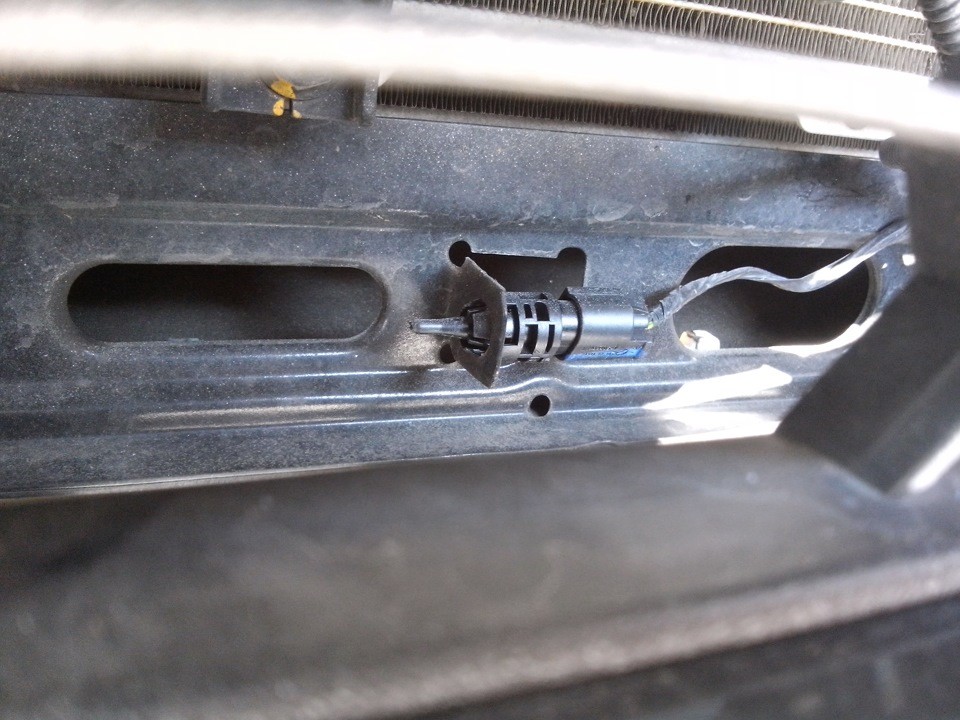
Step 2: Find the sensor. You can find the ambient air temperature sensor at the front of the engine bay.
This sensor is usually located behind the grill but in front of the radiator and radiator support. This is the best location for the sensor as it is away from the heat sources of the engine and can accurately read the ambient temperature; is the temperature of the air entering the intake manifold at the front of the engine.
Usually, car manufacturers try to make these sensors affordable, but at the same time secure. You may need to remove some or all of the front grille to gain access to this sensor.
Step 3: Disconnect the sensor. You can usually unplug these temperature sensors from their wiring first and then unscrew or disconnect them.
The wiring is wound into a "terminal" or plastic clip, which makes it easy to disconnect the wires without doing serious electrical work.
Disconnect these wires and set them aside. Some of them are attached with an additional screw due to the fact that the sensor itself is not attached to any part of the car. You may also need to install a bracket to hold the sensor in place.
Step 4 Remove the sensor. You will then be able to pull, unscrew or detach the sensor or unscrew it from the bracket.
After removal, inspect the sensor for serious damage.
The ambient air temperature sensors are located in a relatively sensitive area at the front of the vehicle. Any damage to the front bumper or grille can cause problems with this sensor. Anything that enters the grille while driving can end up in this sensor if it is not properly protected.
If the ambient temperature sensor has failed due to problems with the surrounding components, these problems must be resolved before spending money and time to replace it with a new one. If left unresolved, these issues can also cause your new sensor to fail.
Part 2 of 2: Install the new sensor
Step 1: Insert the new sensor. Insert the new sensor in the same way as you removed the previous sensor.
Insert, screw, clip or screw on the new sensor and it should fit exactly like the previous one.
Please be aware that some new replacement parts have a slightly different design and may not look exactly the same. However, they should snap into place and connect in exactly the same way as the old sensor.
Step 2: Connect the wiring terminals. Insert the existing wire terminal into the new sensor.
The new sensor should accept the existing wires just like the old part.
- Attention: Never force a terminal into its mating part. They can be stubborn, but it can take a lot of time and money to break them and remount a new terminal. They should snap into place and stay in place. Inspect the terminals while handling them to make sure they are in good condition.
Step 3: Reinstall All Parts Removed for Access. After you connect the sensor, you can reattach any part of the grille or radiator cap that you removed to access the sensor.
Step 4: Connect the negative battery terminal.. Connect the negative terminal of the battery. At this point, you are ready to let your car's computer adjust to the new sensor.
Step 5: Test Drive Your Vehicle. It will take some time for the sensor and computer to communicate.
Once they have established communication with each other, your car's displays should read correctly.
Allow the vehicle to warm up and then set the temperature to be lower or higher than the ambient temperature outside. If you wish, drive the car while you check the automatic temperature controls. You can also perform this test in parking mode.
Car manufacturers are trying to use the same sensors to perform different functions. The ambient air temperature sensor can affect the operation of your automatic air conditioning and heating systems in different ways. This can also affect the readings on the outside temperature displays of the drivers.
You can easily and economically replace the ambient temperature sensors yourself. If you are not comfortable doing this process yourself, contact a certified AvtoTachki technician to replace the ambient temperature sensor in a location that best suits your needs.