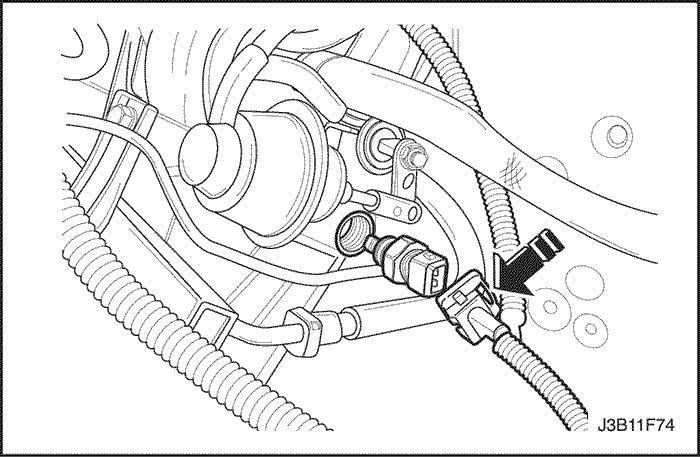
How to replace the air cleaner temperature sensor
The air cleaner temperature sensor allows the computer to adjust engine timing and air/fuel ratio. Rough idling or "engine stall" are signs of a problem.
The performance of an engine depends in part on the computer's ability to adjust the vehicle to its needs and cope with the environment. The temperature of the air entering the engine is one of the factors affecting engine performance.
The air cleaner temperature sensor collects information about the air entering the engine and sends it to the computer so it can adjust engine timing and fuel/air ratio. If the air cleaner temperature sensor detects cold air, the ECU will add more fuel. If the sensor reading is hot, the computer will bleed less gas.
On older carbureted engines, the air cleaner temperature sensor is usually located in a larger round housing between the air intake and the throttle body. The air filter and air cleaner temperature sensor are inside the case.
If the air cleaner temperature sensor is faulty, you can expect a variety of problems with your vehicle, including rough idle, a lean or rich fuel/air mixture, and an "engine stall" feeling. If you suspect that the air cleaner temperature sensor is defective, you can replace it yourself, as the sensor is not very expensive. A new air cleaner temperature sensor can dramatically change how your car handles.
Part 1 of 2: Remove the old sensor
Necessary materials
- Gloves (optional)
- Assortment of pliers
- Replacing the temperature sensor
- Protective glasses
- Socket set
Set of wrenches
A warning: Always provide adequate eye protection when working on the vehicle. Dirt and engine debris can easily be airborne and get into your eyes.
Step 1: Disconnect the ground from the battery.. Locate the negative battery terminal or the black cable connected to your vehicle's battery. The wire will be held onto the terminal by a retaining bolt or a bolt attached to the negative most wire of the battery cable.
Using a 10mm socket, remove this bolt and set the wire aside so it doesn't touch the metal. Disconnecting battery power when working on any type of vehicle electrical system is critical to your safety.
Step 2: Get Access to the Air Filter. The air cleaner temperature sensor is usually connected and secured inside the air cleaner housing. Remove the nut, usually a wing nut, that secures the cover to the housing. You can use your hands or clamp the nut with pliers and remove it.
Remove the housing cover and set aside. Remove the air filter; he should be free to go.
Step 3: Locate the air cleaner sensor.. Once you have removed the air cleaner, you should be able to locate the sensor. Usually the sensor is located at the bottom of the housing, closer to the center of the circle. The sensor must be free to take accurate readings.
Step 4: Disconnect the sensor. Typically, these types of temperature sensors can be unplugged from the wiring first and then unscrewed or disconnected. The wiring will run to a "terminal" or plastic clip so you can easily disconnect the wires without doing any major electrical work. Disconnect these wires and set them aside.
- Functions: Some older sensors are simpler and only need to be removed. Because the sensor and its components communicate internally, you won't need to disconnect any wiring.
Step 5 Remove the sensor. Now you can pull out, turn out or disconnect the sensor.
After removal, inspect the sensor for serious damage. Because of its location, the sensor must be relatively clean and dry. If your sensor has failed due to issues with the components surrounding the sensor, you need to resolve those issues first, otherwise these issues will cause the new sensor to fail as well.
Part 2 of 2. Install a new air cleaner temperature sensor.
Step 1: Insert the new sensor. Insert the new sensor in the same way as you removed the previous sensor. Screw or fix the new sensor. It should fit exactly the same as the other one. Please be aware that some new replacement parts have a slightly different design and may not look exactly the same. However, they must fit and connect like the old sensors.
Step 2: Connect the wiring terminals. Insert the existing wiring into the new sensor. The new sensor should accept the existing wires just like the old part.
- Attention: Never force a terminal into its mating part. Wiring terminals can be stubborn, but breaking them and having to reconnect a new terminal can be time consuming and costly. The terminal should click into place and stay in place. Inspect the terminals while handling them to ensure they are in good condition.
Step 3: Assemble the air filter and body assembly.. After connecting the sensor, you can insert the air filter again.
Attach the top of the filter housing and tighten the lock nut.
Step 4: Connect the negative battery terminal.. Reconnect the negative battery terminal. You are now ready to test the new sensors.
Step 5: Test Drive Your Vehicle. Start the engine and let it warm up. Let it idle and listen for improvements in idle time and speed. If it sounds good enough to drive, take it for a test drive and listen for rough idle or signs of air filter temperature sensor failure.
Your car's computer looks for certain signals from its sensors and components that indicate they are working properly. Sensors that fail to send a signal or send false signals to your vehicle will cause drivability and performance problems.
If you are not comfortable doing this process yourself, contact a certified AvtoTachki technician to replace the temperature sensor.

