How to replace the fuel filler neck
Content
The fuel filler neck fails if there is external damage to the neck or if the error code indicates the presence of fumes.
The fuel filler neck on passenger cars is a one-piece piece of molded steel pipe that connects the fuel tank inlet to the fuel filling rubber hose on the gas tank. The fuel filler neck is connected to the body inlet with steel screws and installed inside a rubber hose attached to the car's fuel tank.
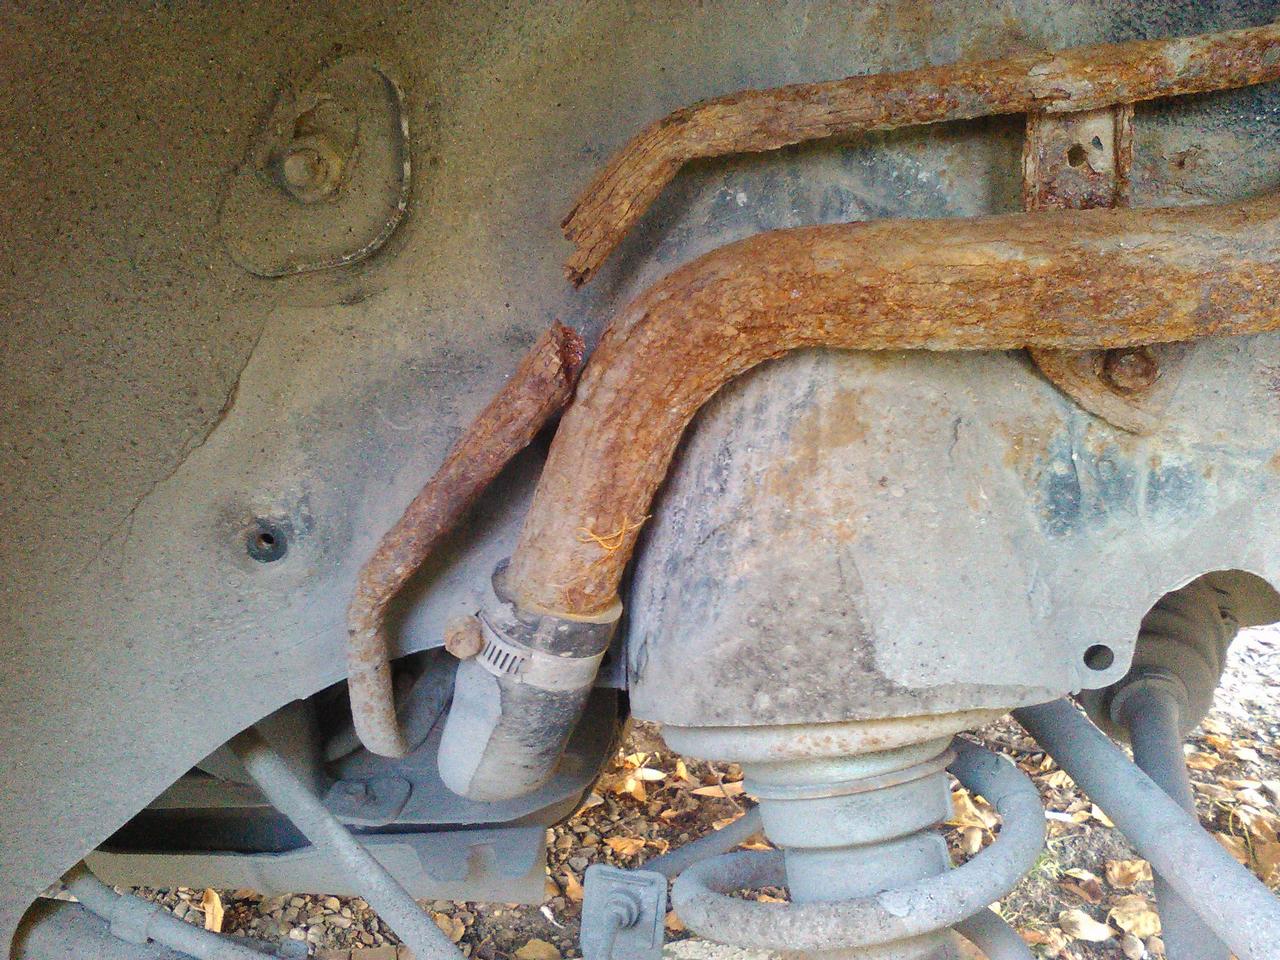
There is a steel collar around the rubber hose to seal the fuel filler neck to prevent fuel leakage. There is a one-way valve inside the fuel filler neck that prevents objects such as a siphon hose from entering the fuel tank. Over time, the filler neck will rust, leading to leaks. In addition, the rubber hose cracks, causing fuel to leak.
Fuel fillers on older vehicles may have a short neck and a metal tube in the fuel tank. The fuel tank necks of this type are connected by a long rubber hose with two clamps. Replacement fuel fillers are available from auto parts stores and your dealer.
A fuel leak in a car can be very dangerous. Liquid fuels do not burn, but fuel vapors are highly flammable. If there is a leak at the fuel filler neck, there is a risk of fuel vapor igniting when rocks are thrown into the wheel arch or under the vehicle, causing a spark.
Attention: It is recommended to purchase the fuel filler neck from the dealer as it is an original equipment or OEM. Aftermarket fuel filler necks may not fit your vehicle or may not be installed correctly.
A warning: Do not smoke near the car if you smell fuel. You smell fumes that are very flammable.
Part 1 of 5: Checking the Condition of the Fuel Tank Filler
Step 1: Locate the fuel filler neck.. Visually inspect the fuel filler neck for external damage.
Check if all mounting screws are inside the fuel tank door area. Make sure the rubber hose and clamp are visible and not damaged.
- Attention: On some vehicles, you may not be able to check the rubber hose and clamp under the vehicle. There may be a cap protecting the fuel hose from debris that needs to be removed for inspection.
Step 2: Determine if there are vapor leaks from the fuel filler neck.. If vapors leak out of the fuel filler neck, the engine management system detects this.
Sensors sniff out fumes and turn on the engine light when fumes are present. Some common engine light codes associated with fuel vapor near the fuel filler neck are as follows:
P0093, P0094, P0442, P0455
Part 2 of 5: Replacing the gas tank filler
Necessary materials
- Hex key set
- socket wrenches
- Switch
- combustible gas detector
- Drip tray
- Flash
- flat screwdriver
- Jack
- Fuel resistant gloves
- Fuel transfer tank with pump
- Jack stands
- Pliers with needles
- Protective clothing
- Ratchet with metric and standard sockets
- Wrench
- Torque bit set
- transmission jack
- Safety glasses
- Wheel chocks
Step 1: Park your vehicle on a level, firm surface.. Make sure the transmission is in park (for automatic transmission) or 1st gear (for manual transmission).
Step 2: Install wheel chocks around tires.. In this case, the wheel chocks will be located around the front wheels, since the rear of the car will be raised.
Apply the parking brake to block the rear wheels from moving.
Step 3: Install a nine volt battery in the cigarette lighter.. This will keep your computer running and save the current settings in the car.
If you don't have a nine-volt battery, no big deal.
Step 4: Open the car hood to disconnect the battery.. Remove the ground cable from the negative battery terminal by turning off power to the fuel pump or transmitter.
Step 5: Raise the car. Jack up the vehicle at the indicated points until the wheels are completely off the ground.
Step 6: Install Jacks. The jack stands should be located under the jacking points; lower the car on the jacks.
For most modern cars, the jack stand attachment points are on a weld right under the doors along the bottom of the car.
- Attention: It is best to follow the owner's manual of the vehicle to determine the correct location for the jack.
Step 7: Open the fuel tank door to access the filler neck.. Remove the mounting screws or bolts attached to the cutout.
Step 8: Remove the fuel cap cable from the fuel filler neck and set aside..
Step 9: Find the fuel tank. Go under the car and find the fuel tank.
Step 10: Lower the fuel tank. Take a transmission jack or similar jack and place it under the fuel tank.
Loosen and remove the fuel tank straps and lower the fuel tank slightly.
Step 11: Disconnect the wiring harness from the connector. Reach on top of the fuel tank and feel for the seatbelt attached to the tank.
This is a harness for the fuel pump or transmitter on older vehicles.
Step 12: Lower the fuel tank even lower to get to the vent hose attached to the fuel tank.. Remove the clamp and small vent hose to provide more clearance.
- Attention: On 1996 and newer vehicles, a fuel return charcoal filter is attached to the vent hose to collect fuel vapors for emissions.
Step 13: Remove the fuel filler neck. Remove the clamp from the rubber hose securing the fuel filler neck and rotate the fuel filler neck by pulling it out of the rubber hose.
Pull the fuel filler neck out of the area and remove it from the vehicle.
- Attention: If you need to remove the fuel tank for cleaning, make sure all fuel is drained from the tank before moving the fuel tank. When removing the filler neck, it is best to have the car with 1/4 tank of fuel or less.
Step 14 Inspect the rubber hose for cracks.. If there are cracks, the rubber hose must be replaced.
Step 15: Clean the fuel pump harness and connector or transfer unit on the fuel tank. Use an electric cleaner and a lint-free cloth to remove moisture and debris.
While the fuel tank is lowered, it is recommended to remove and replace the one-way breather on the tank. If the breather on the fuel tank is faulty, you will need to use a pump to check the condition of the valves. If the valve fails, the fuel tank must be replaced.
The breather valve on the fuel tank allows fuel vapor to escape into the canister, but prevents water or debris from entering the tank.
- Attention: When replacing the fuel filler neck on a truck, remove the spare wheel to gain access to the fuel filler neck. On some trucks, you can replace the fuel filler without removing the fuel tank.
Step 16: Wipe the rubber hose on the fuel tank with a lint-free cloth.. Install a new clamp on the rubber hose.
Take the new fuel filler neck and screw it into the rubber hose. Reinstall the clamp and tighten the slack. Allow the fuel filler neck to rotate, but do not allow the collar to move.
Step 17: Lift the fuel tank up to the vent hose.. Secure the ventilation hose with a new clamp.
Tighten the clamp until the hose is twisted and turns 1/8 turn.
- A warning: Make sure you don't use old clips. They will not hold tight and will cause steam to leak.
Step 18: Raise the fuel tank. Do this all the way to align the fuel filler neck with the cutout and align the fuel filler neck mounting holes.
Step 19: Lower the Fuel Tank and Tighten the Clamp. Make sure the fuel filler neck does not move.
Step 20: Raise the fuel tank to the wiring harness.. Connect the fuel pump or transmitter harness to the fuel tank connector.
Step 21: Attach the fuel tank straps and tighten them all the way.. Tighten the mounting nuts to the specifications on the fuel tank.
If you don't know the torque value, you can tighten the nuts an additional 1/8 turn with blue loctite.
Step 22: Align the fuel filler neck with the cutout in the fuel door area.. Install the mounting screws or bolts in the neck and tighten it.
Connect the fuel cap cable to the filler neck and screw the fuel cap until it clicks into place.
Part 3 of 5: Leak Check
Step 1: Get an overflow tank or portable fuel canister.. Remove the fuel tank cap and drain the fuel into the fuel filler neck, filling the tank.
Avoid pouring fuel onto the ground or into the filler area.
Step 2: Check for leaks. Wait 15 minutes away from the vehicle and after 15 minutes return to the vehicle and check for leaks.
Look under the car for drops of fuel and smell the fumes. You can use a combustible gas detector to check for vapor leaks that you cannot smell.
If there are no leaks, you can continue. However, if you find a leak, check the connections to make sure they are tight. If you had to make adjustments, be sure to check for leaks again before proceeding.
- Attention: If there is any fumes leakage, while the vehicle is moving, the fumes sensor will detect the leakage and display the engine indicator.
Part 4 of 5: Get the vehicle back in working order
Step 1: Open the car hood. Reconnect the ground cable to the negative battery post.
If necessary, remove the nine-volt fuse from the cigarette lighter.
Step 2: Tighten the battery clamp. Make sure the connection is good.
- AttentionA: If you didn't have a XNUMX-volt power saver, you'll have to reset all of your car's settings, such as the radio, power seats, and power mirrors.
Step 3: Raise the car. Using a jack recommended for the weight of the vehicle, raise it under the vehicle at the indicated jack points until the wheels are completely off the ground.
Step 4: Remove the jack stands and keep them away from the vehicle..
Step 5: Lower the car so that all four wheels are on the ground. Pull out the jack and set it aside.
Step 6: Remove the wheel chocks from the rear wheels and set them aside.
Part 5 of 5: Test drive the car
Step 1: Drive the car around the block. During the test, overcome various bumps, allowing the fuel to splash inside the fuel tank.
Step 2: Watch the fuel level on the dashboard and check for the engine light to come on..
If the engine light comes on after replacing the fuel filler neck, additional fuel system diagnostics may be required or there may be an electrical problem in the fuel system. If the problem persists, you should seek the help of one of AvtoTachki's certified mechanics who can inspect the fuel filler neck and diagnose the problem.

