How to change the oil
Changing the oil is an important maintenance procedure. Prevent serious engine damage with regular replacements.
One of the most important preventive maintenance services you can perform on your vehicle is an oil change, yet many vehicles suffer from serious engine failures due to a lack of timely oil change services. It's good to be aware of this service, even if you decide to leave it to a professional shop like Jiffy Lube or an experienced mobile mechanic.
Part 1 of 2: Gathering supplies
Necessary materials
- Ring wrench (or socket or ratchet)
- Disposable gloves
- Empty cardboard box
- flashlight
- trumpet
- Hydraulic jack and jack stands (if necessary)
- grease
- Oil drain pan
- The oil filter
- Oil filter wrench
- Rags or paper towels
Changing the oil may seem like a simple task, but it's important to follow each step carefully. The whole process, including the purchase of consumables, takes about 2 hours.
Step 1: Study the location and size of the oil drain and filter.. Go online and research the location and size of the oil drain plug and oil filter for your vehicle make and model so you know if you need to lift your vehicle to gain access. ALLDATA is a great knowledge center with repair manuals from most manufacturers. Some filters are changed from above (engine compartment), and some from below. Jacks are dangerous if used incorrectly, so be sure to learn how to use them correctly or have a professional mechanic do it.
Step 2: Get the Right Oil. Make sure you are getting the exact type of oil recommended by the manufacturer. Many modern vehicles use synthetic oils such as Castrol EDGE to meet stringent fuel economy standards and improve engine lubrication.
Part 2 of 2: Oil change
Necessary materials
- All supplies collected in part 1
- Old clothes
Step 1: Get ready to get dirty: Wear old clothes as you will get a little dirty.
Step 2: Warm up the car. Start the car and let it warm up to near operating temperature. Do not attempt to change the oil after a long drive because the oil and filter will be too hot.
Running the car for 4 minutes should be enough. The goal here is to heat up the oil so that it drains more easily. When the oil is at operating temperature, it will keep dirty particles and debris suspended inside the oil, so they will be drained into the oil rather than left on the cylinder walls in the oil pan.
Step 3. Park in a safe place.. Park in a safe place, such as a driveway or garage. Stop the car, make sure it is parked, roll down the window, open the hood and apply the emergency brake very hard.
Step 4: Prepare your workspace. Place consumables within arm's reach of your work area.
Step 5: Find the oil cap. Open the hood and locate the filler cap. The cap may even have the recommended oil viscosity for your engine (eg 5w20 or 5w30).
Step 6: Insert the funnel. Remove the filler cap and insert a funnel into the oil fill hole.
Step 7: Prepare to drain the oil. Take a wrench and an oil drain pan and place the cardboard box under the front of the car.
Step 8: Loosen the drain plug. Remove the oil drain plug located at the bottom of the oil pan. It will take some force to loosen the drain plug, but it should not be too tight. A longer wrench will also make it easier to loosen and tighten.
Step 9: Remove the plug and let the oil drain. After you have unscrewed the drain plug, place a drain pan under the oil drain plug before completely removing the plug. When you loosen the oil drain plug and oil starts to drip, make sure you hold the plug as you unscrew it so it doesn't fall into the oil drain pan (you'll have to reach there if this happens). later and catch it). Once all the oil has been drained, it will reduce to a slow drop. Don't wait for the dripping to stop because it can take several days - slow dripping is normal.
Step 10: Inspect the gasket. Wipe the oil drain plug and mating surface with a rag and inspect the oil drain plug gasket. This is a rubber or metal sealing washer at the base of the drain plug.
Step 11: Replace gasket. It's always a good idea to change the oil seal. Be sure to discard the old oil gasket as a double gasket will cause oil to leak.
Step 12: Remove the oil filter. Locate the oil filter and move the drain pan under that location. Remove the oil filter. The oil will most likely leak out first and not get into the sump and you will have to adjust the position of the sump. (At this point, it may be helpful to put on fresh rubber gloves to better hold the oil filter.) If you cannot unscrew the filter by hand, use an oil filter wrench. There will be oil in the filter, so be prepared. The oil filter never empties completely, so just put it back in the box.
Step 13: Install a new oil filter. Before installing a new oil filter, dip your finger into the new oil and then run your finger over the oil filter rubber gasket. This will help create a good seal.
Now take a clean rag and wipe the surface where the filter gasket will live in the engine. Make sure the gasket of the old oil filter is not stuck to the engine when removing the filter (if you accidentally install a new filter with double gaskets, oil will leak). It is important that the mating surface of the filter and engine is free of old oil and dirt.
Screw on the new oil filter, making sure it goes straight and smooth, being careful not to twist the threads. When it is snug, tighten it another quarter turn (remember not to overtighten as you or someone else will have to remove it at your next oil change).
- Attention: These instructions refer to the spin-on oil filter. If your vehicle uses a cartridge type oil filter that is inside a plastic or metal housing with a screw cap, follow the manufacturer's specifications for the oil filter housing cap torque value. Overtightening can easily damage the filter housing.
Step 14: Double Check Your Work. Make sure the oil drain plug and oil filter are installed and tightened sufficiently.
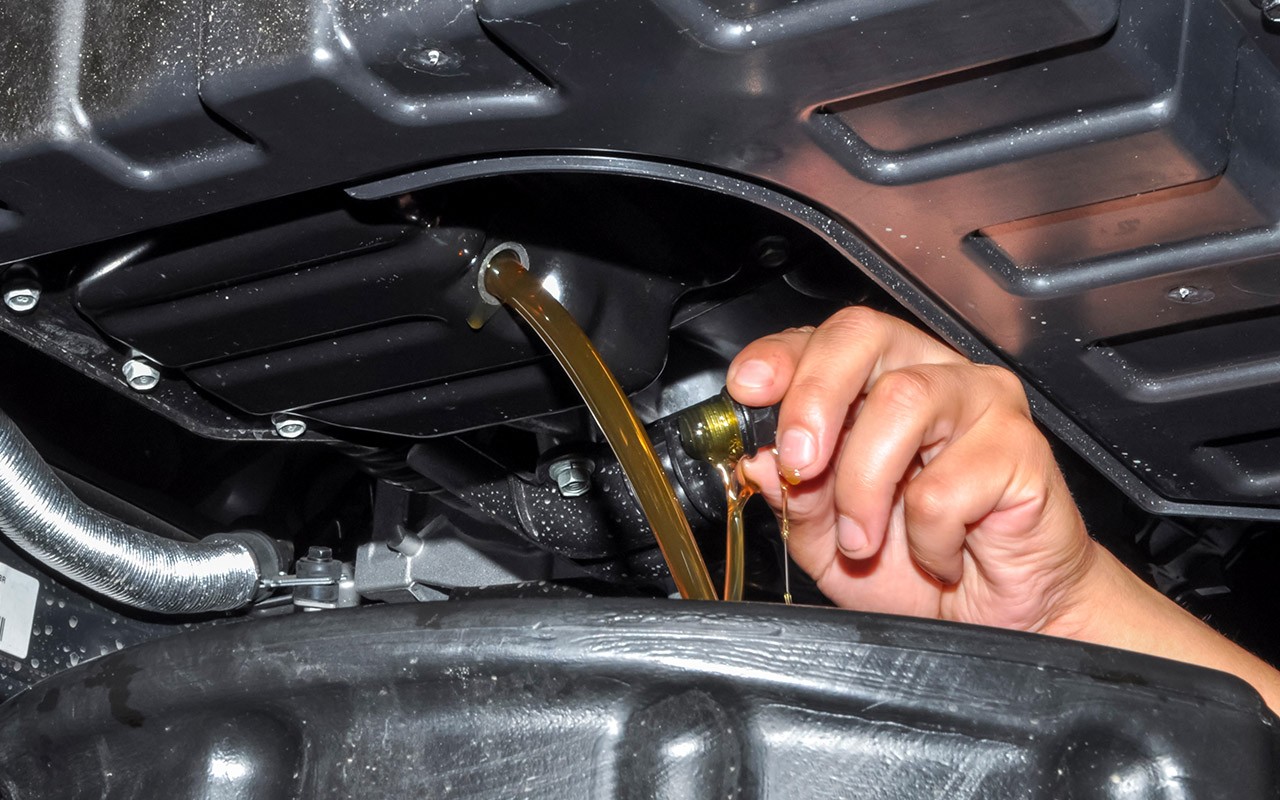
Step 15: add new oil. Slowly pour it into the funnel in the oil filler hole. For example, if your car has 5 liters of oil, stop at 4 1/2 liters.
Step 16: start the engine. Close the oil filler cap, start the engine, let it run for 10 seconds and shut it off. This is done to circulate the oil and apply a thin layer of oil to the engine.
Step 17. Check the oil level. Make sure the car is turned off during the test. Insert and remove the dipstick and add oil as needed to bring the level up to the "full" mark.
Step 18: Tidy up your territory. Be careful not to leave any tools in the engine compartment or driveway. You will need to have your old oil and filter recycled at your local repair shop or auto parts center as it is against the law to drain petroleum-based fluids.
Step 19: Check Your Work. Let the car run for about 10 minutes while you look under the car for the drain plug and oil filter area. Double check that the filler cap is closed, look for leaks and after 10 minutes turn off the engine and let it sit for 2 minutes. Then check the oil level again.
Step 20: Reset the service reminder light (if your car has one). Use a dry-erase marker to write the mileage and next oil change date on the upper left corner of the windshield on the driver's side. As a general rule, most vehicles recommend oil changes every 3,000-5,000 miles, but check your owner's manual.
Ready! An oil change consists of several steps, and it is important to follow each step carefully. If you have a newer, more complex vehicle or are unsure about any of the steps, one of our top rated mobile mechanics can perform an oil change for you using Castrol's high quality lubricants.