How to replace the AC fan control module
Content
The fan control module is part of the air conditioning control system. It is used to tell the AC condenser fan when to turn on, and in some cases the same block is used for the radiator fan as well. Although rare, the AC fan control module can fail over time.
This article will cover the most common fan control module replacements. The fan control module location and repair procedure varies by make and model. Refer to the owner's manual for information about your vehicle.
Part 1 of 2: Replacing the AC Fan Control Module
Necessary materials
- Basic set of tools
- New fan control module.
- User's Guide
- Socket set and ratchet
Step 1: Check the fan control module.. Before proceeding with the repair, it is important to make sure that the fan control module is at fault. It can have many different symptoms, such as fans not working at all or running for too long.
Before replacing the A/C control module, it must be diagnosed as a fan control relay or a faulty fan are more common causes of these symptoms.
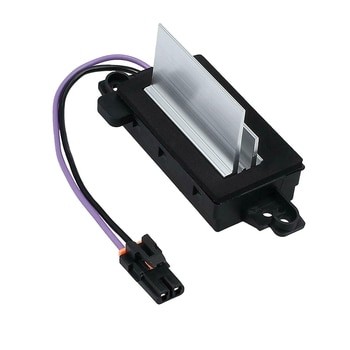
Step 2 Locate the fan control module.. The fan control module can be located in various locations on the vehicle. These are most commonly a radiator fan and a condenser fan, as shown above.
Other possible locations are along the car's firewall or even under the dashboard.
Consult your owner's manual if you're having trouble finding your vehicle's fan control module.
Step 3: Disconnect the fan control module connectors.. Disconnect the electrical connectors before removing the fan control module.
Depending on the number of fans the unit controls, there may be multiple slots.
Disconnect the connectors and install them close, but not in the way.
Step 4: Removing the fan control module. After the electrical connectors are disconnected, we can unscrew the block.
Usually only a few bolts hold the control module to the fan assembly.
Remove these bolts and place them in a safe place. They will be reused in a moment.
After removing the device, compare it with the new one and make sure they are identical and have some connections.
Step 5: Installing a New Fan Control Module. Install the new fan control module in place of the removed one.
Do not tighten all mounting bolts before tightening anything.
After all bolts are installed, tighten them to factory specifications.
After all the bolts are tightened, we will take up the electrical connectors, which have been set aside. Now connect the electrical connectors to the new fan control module.
Part 2 of 2: Checking work and finishing touches
Step 1: Check the installation. With any repair, we always check our work for errors before starting the car.
Make sure the fan control module is in the correct location and fully inserted.
Inspect the electrical connections and make sure they are all tight.
Step 2: Check fan operation. Now we can start the engine and inspect the fans. Turn on the air conditioner and set it to the coldest setting. The condenser fan should start immediately.
The radiator fan will take longer to turn on. This fan does not come on until the engine is warm.
Wait for the engine to warm up and make sure the radiator fan is also running.
Finally, make sure the air conditioner is blowing cold air and the car is not overheating.
When the fan control module fails, it can be uninteresting and result in the air conditioner not working and the car overheating. Replacing the fan control module can restore correct operation of both of these systems and repairs should be performed as soon as symptoms are detected. If any instructions are not clear or you do not fully understand, contact a professional such as AvtoTachki to schedule a service consultation.