How to replace tie rod ends
Tie rods are just one of many components in your steering system. Steering consists of a steering wheel, steering column, steering gear, tie rods and, of course, wheels. In short, tie rods are the parts that connect the steering gear to your car's front wheels. Thus, when you turn the steering wheel, the tie rods help the steering mechanism to point the front wheels in the direction you want.
Tie rods are subject to a lot of abuse as they are used all the time when the car is in motion. This wear can be accelerated if your vehicle is modified, such as with the truck raised or the vehicle lowered, due to a change in suspension geometry. Road conditions can also contribute to excessive wear, such as from unmaintained roads and potholes.
This repair can be done at home by the car owner; however, it is highly recommended to check and adjust the camber immediately after repair to ensure good and even tire wear.
- Functions: Tie rod ends come in different designs and vary by vehicle. Be sure to purchase tie rod ends that are suitable for your vehicle.
Part 1 of 1: Replacing Tie Rod Ends
Necessary materials
- ½" breaker
- ½" socket, 19 mm and 21 mm
- ratchet ⅜ inch
- Socket set ⅜, 10-19 mm
- Combination wrenches, 13mm-24mm
- Pins (2)
- Paul Jack
- Gloves
- liquid marker
- Safety jack stands (2)
- Safety glasses
- Screed(s)
- Tie Rod Removal Tool
Step 1: Park the vehicle on a level surface and loosen the mounting nuts.. Use a breaking bar and a suitable size socket to loosen the lug nuts on the two front wheels, but do not remove them yet.
Step 2: Raise the car. Use the jack to raise the front wheels off the ground and secure the vehicle in the air with the jack stands.
- Functions: When lifting a vehicle, you can always lift it by the frame on trucks and pinch welds on cars. Usually you see arrows, rubber pads, or a reinforced piece under the car that needs to be lifted. If you are in doubt where to lift, please refer to your owner's manual to find suitable lifting points for your specific vehicle.
Step 3: Remove the lug nuts and bar.. This will allow you to access the steering components.
Step 4: Turn the steering wheel in the right direction. The end of the tie rod must be extended outside the vehicle.
To push the right end of the tie rod out, the steering wheel must be turned to the left, and vice versa.
This gives us a little more room to make repairs.
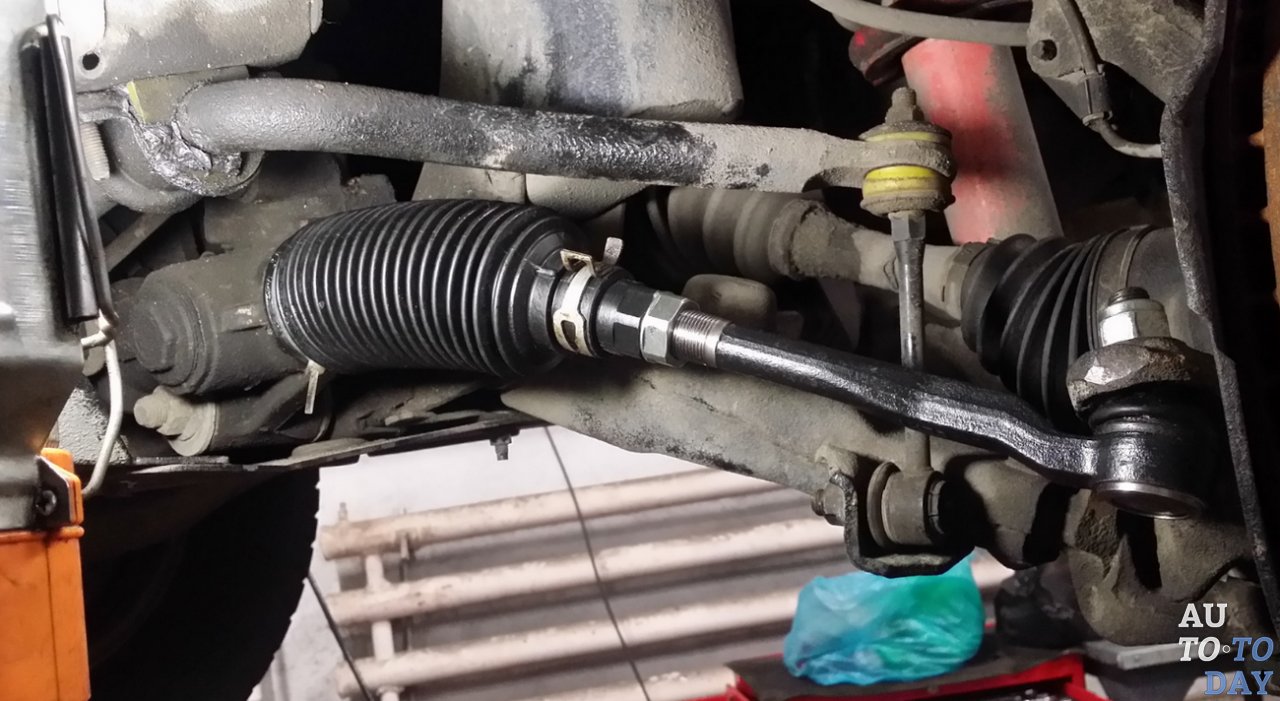
Step 5: Prepare to Remove the Tie Rod End. Use a combination wrench of the correct size to loosen the tie rod end lock nut.
Loosen the nut just enough to expose the threads on the end of the outer tie rod and mark the threads with a marker. This label will help us in the future when installing a new tie rod end.
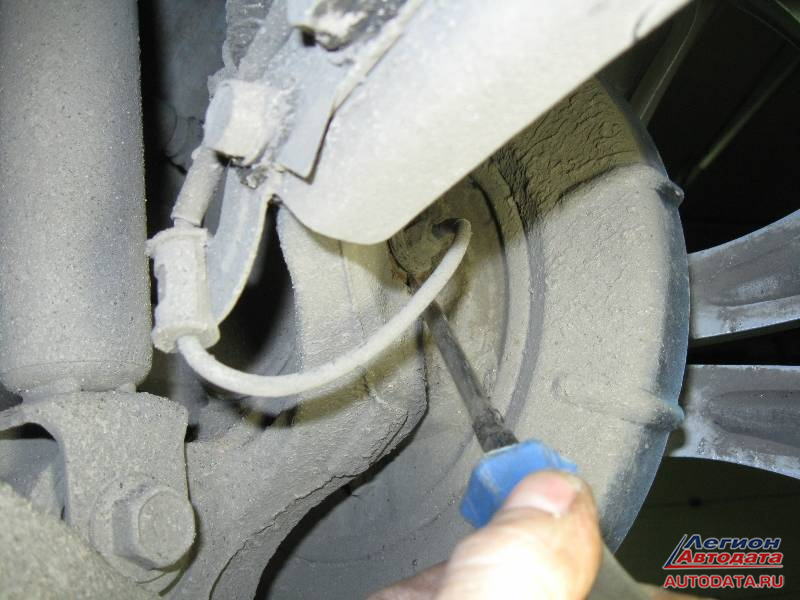
Step 6: Remove cotter pin from tie rod end.. Then find the appropriate size socket and ⅜ ratchet.
Loosen and remove the castle nut that secures the tie rod end to the steering knuckle.
Step 7: Remove the old tie rod end. Use a tie rod puller to pry the end of the tie rod out of its cavity in the steering knuckle.
Now turn the end of the tie rod counterclockwise to remove it from the inner tie rod. Count each full turn as you remove the tie rod - this, along with the markings previously, will be used to install a new tie rod end.
Step 8: Install the new tie rod end. Screw in the new tie rod end with the same number of turns it took to remove the old one. It should match up very close to the markings made earlier.
Insert the other end of the tie rod into the cavity of the steering knuckle. Install and tighten the nut that secures the tie rod end to the steering knuckle.
Insert a new cotter pin through the tie rod end and mounting nut.
Using a combination wrench, tighten the lock nut while attaching the outer tie rod to the inner tie rod.
Step 9: Repeat as needed. When replacing both outer tie rods, repeat steps 1-8 on the opposite side.
Step 10 Reinstall tires, tighten nuts securely, and lower vehicle.. Once the tire is back on and the nuts are tight, use the jack to remove the safety jack legs and lower the vehicle to the ground.
Tighten the clamp nuts ½ to ¾ turn until tight.
You can be proud to have successfully replaced your vehicle's tie rod ends. Because your tie rods control toe angle, it is highly recommended that you take your vehicle to the nearest auto or tire shop to have the front camber adjusted. This will ensure that your tires wear evenly while you are driving, as well as using torque to tighten the nuts to factory specifications. If you are not comfortable doing this repair yourself, you can invite a certified mechanic, for example, from AvtoTachki, who will come to your home or work to replace the tie rod ends.