How to replace a burned out headlight
Content
From time to time, some parts of your car may need to be replaced, including headlight bulbs.
While you may be doing regular checks and maintenance on your car's engine, brakes, and tires, you may not remember to check your headlights unless one or both bulbs stop working. This can result in reduced visibility when driving at night and may result in you being pulled over by the police.
Replacing a burned out or dim headlight on most vehicles is not particularly difficult, and new headlight bulbs are usually inexpensive.
You may need to replace lamps at regular intervals depending on the following factors:
No matter how often light bulbs need replacing, it's good to know how to do it yourself.
You can repair a blown headlight on your car by following these steps:
Part 1 of 5: Determine the type of light bulb you need
Required material
- User's Guide
Step 1: Know what size lamp you need. Check your vehicle owner's manual to find out what type of bulb you need for your headlights. If you do not have a manual, please contact your local parts store to select the correct light bulb.
There are several types of lamps on the market, which are indicated by a number. For example, your car may have an H1 or H7 bulb. You can also browse the list of common headlight bulbs to see what type you might need. Some lamps may look the same but are designed for different vehicles.
Functions: Some vehicles require different bulbs for low beam and high beam. Be sure to review these specifications in your manual.
FunctionsA: You can also call an auto parts store and let them know the make and model of your car and they can tell you what size bulb you need.
Step 2: Know Which Light Bulb You Need. In addition to choosing the right size bulb for your car, you also need to decide if you want to use a halogen, LED, or xenon bulb.
The table below shows the advantages and disadvantages of each type of lamp.
- A warning: Using the wrong type or size of bulb may cause overheating and damage to the headlight and melt the wire connection.
Part 2 of 5: Buy new light bulbs
You can order headlight bulbs online or buy them from most local auto parts stores.
- FunctionsA: If you can't determine which type of bulb you need, take the burnt out bulb with you to your local auto shop for a store employee to help you find the right bulb.
Part 3 of 5: Remove the headlight bulb
Removing a light bulb is a necessary step in repairing a burned-out headlight.
In older cars, the entire headlight bulb had to be removed and repaired. However, in most vehicles today, headlight bulbs are connected to a fixture behind the headlight, which is accessed through the engine bay.
Step 1: open the hood. You can open the hood by pulling the lever under the dashboard. Unlock the lever holding the car hood and open it.
Step 2: Locate the Headlight Bays. Locate the headlight compartments at the front of the engine bay. They should line up exactly where the headlights appear at the front of the car. The headlight bulb will be attached to a plastic connector with a few wires.
Step 3: Remove the bulb and connector. Slightly turn the lamp and connector counterclockwise and remove them from the housing. It should pop out easily once you turn it.
Step 4: Remove the bulb. Remove the bulb from the bulb socket socket. It should easily slide out of the lamp by lifting or pressing on the locking tab.
Part 4 of 5: Change the light bulb
After purchasing a new bulb, insert it into the headlight bulb holder in the engine compartment.
Necessary materials
- headlight lamp
- Rubber gloves (optional)
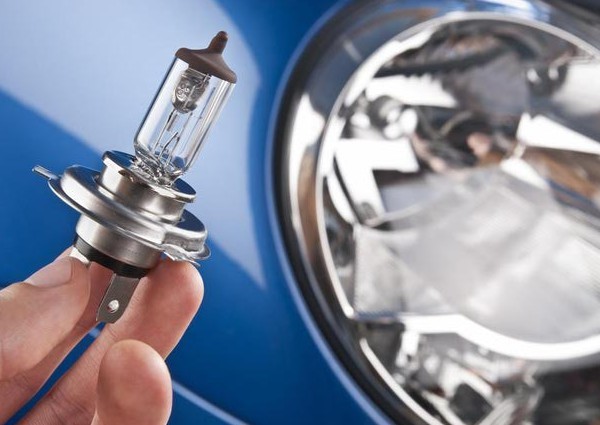
Step 1: Get a new light bulb. Take the new bulb out of the package and be very careful not to touch the glass of the bulb. Oil from your hands can get on the glass and cause the bulb to overheat or crack after a couple of uses.
Put on a pair of rubber gloves to keep oil and moisture out of the new bulb.
- FunctionsA: If you accidentally touch the lamp glass or headlight cover when installing the headlight, wipe it with alcohol before completing the installation.
Step 2: Insert the light bulb into the socket. Insert the lamp base into the lamp socket. Look for sensors or pins that should line up. Make sure the lamp is securely attached to the lamp connector. You should hear or feel a click as the bulb snaps into place.
Step 3: Move the Connector. Insert the connector, bulb first, into the housing.
Step 4: Tighten the connector. Rotate the connector approximately 30 degrees clockwise until it locks into place.
Part 5 of 5: Check the new light bulb
After replacing the bulb, turn on the headlights to check if the new replaced headlight works. Get to the front of the car and look at the headlights to make sure they are both working properly.
- Functions: Make sure both headlights have the same type of bulb so that one does not shine brighter than the other. Replacing both lamps at the same time is a good practice to have the same brightness on both sides.
If the new bulb doesn't work, there may be a problem with the headlight wiring. If you suspect that your headlights are not working, or if you want a professional to replace the headlights, contact a professional auto mechanic, such as an auto mechanic from AvtoTachki, who can come to you and restore the brightness of the headlights.