How to replace the cruise control switch
Content
The cruise control switch fails when the cruise control does not engage or accelerate. You may need a new switch if the vehicle does not coast.
When cruise control systems were first introduced, they were typically activated by a series of switches that ranged from dashboard controls to additional turn signal switches. As technology advances, one of the first systems to meet the growing needs of the automotive consumer group was cruise control. To improve safety and driving comfort, many car manufacturers have moved the cruise control activation switch to the outer edges of the steering wheel.
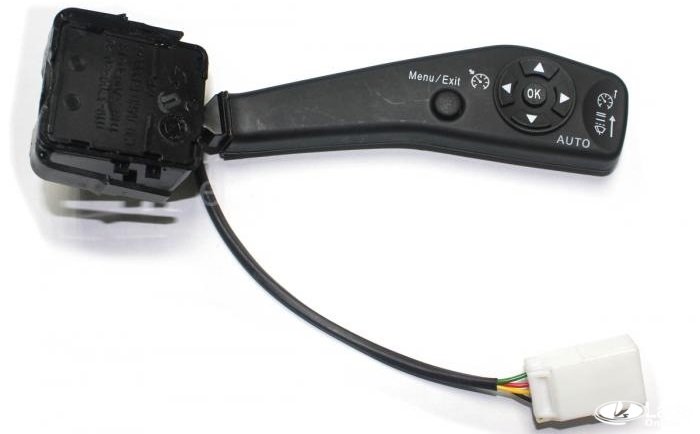
The cruise control switch typically consists of five separate functions that allow the driver to activate and control the cruise control setting with the thumb or any other finger on the steering wheel.
The five functions on all cruise control switches today typically include:
- On the button: This button will arm the cruise control system and arm it by pressing the set button.
- Off button: This button is for turning off the system so that it cannot be accidentally activated by mistake.
- Install/Speed Up Button: This button sets the cruise control speed after reaching the desired speed. Pressing this button again and holding it down will usually increase the speed of the vehicle.
- Resume button (RES): Resume button allows the driver to reactivate the cruise control setting to the previous speed if he had to temporarily disable the system due to traffic jams or slow down by depressing the brake pedal.
- Coast button: The coast function allows the rider to coast, which is typically used when driving downhill or in heavy traffic.
Along with manual control, many of today's cruise control systems have an optional shutdown system for safety. For automatic transmission drivers, the brake release switch is used as a secondary disengagement device, while manual transmission drivers who rely on the clutch pedal to change gear often have both a brake switch and a clutch pedal switch. Proper operation of all these systems is vital to vehicle safety and proper cruise control activation.
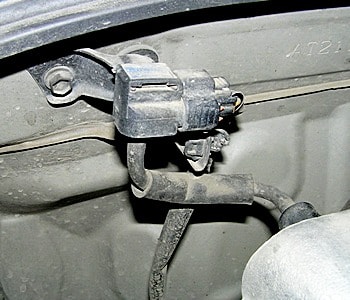
Sometimes the cruise control switch on the steering column breaks or fails due to prolonged use, water or condensation inside the steering wheel, or electrical problems with the switch. On some vehicles, the cruise control switch is still located on the turn signal. For the purposes of this tutorial, we will focus on the most common type of cruise control switch located on the steering wheel.
- Attention: In this article, we will focus on providing general instructions for removing the cruise control switch. In many cases, the exact location of the cruise control switch is different, as are the instructions for removing and replacing it.
Part 1 of 3: Identifying the Symptoms of a Faulty Cruise Control Switch
The main way most mechanics know that a certain component is damaged and needs to be replaced is based on the error code. On most OBD-II scanners, error code P-0568 indicates there is a problem with the cruise control switch, usually a power issue or a short circuit. However, if you don't get this error code, or if you don't have a scanner to download the error codes, completing the self-test gives the mechanic a better starting point for identifying the correct component that is broken.
Because there are multiple toggle switches on the control switch box, one or any of the following cruise control faults requires the mechanic to replace both cruise control switches, as the fault may exist in one or both of the toggle switches; but without replacing and testing them, you won't know for sure which one is faulty. It's always best to replace both of them at the same time.
Some of the other signs of a bad or faulty cruise control switch include:
Cruise control does not turn on: If you press the "on" button, the warning light on the instrument panel should light up. If this indicator does not come on, this indicates that the power button is damaged or that a short circuit has occurred in the cruise control button assembly. If the cause is a short circuit, the scanner will most likely show OBD-II code P-0568.
Cruise control does not accelerate when pressing the "accelerate" button: Another common cruise control switch failure is when you press the boost button and the cruise control does not increase the speed of the vehicle. This symptom may also be related to a faulty relay, cruise control servo, or control unit.
Cruise control does not return to original speed when the "res" button is pressed: The res button on the cruise control switch also often fails. This button is responsible for returning the cruise control to its original settings if you had to temporarily disable the cruise control by depressing the brake pedal or depressing the clutch. If you press this button and the cruise control light comes on on the dash and the cruise control doesn't reset, the switch is usually the culprit.
Cruise control does not work by inertiaA: A popular feature of cruise control is the "coast" feature, which allows drivers to temporarily disable throttle control when encountering traffic, when going downhill, or if necessary to slow down. If the driver presses the coast button and the cruise control continues to accelerate, the cruise control switch may be faulty.
Part 2 of 3: Replacing the Cruise Control Switch
In this tutorial, we will cover the tools, steps, and tips for replacing the cruise control switch system located on both sides of the steering wheel. This format is most commonly seen in vehicles made in the last decade. However, there are cruise control switches that are arranged as turn signals or separate levers attached to the steering column. If your vehicle has a cruise control switch located on the steering wheel, follow the instructions below. If it is located elsewhere, refer to your vehicle's service manual for exact instructions.
- A warning: Do not attempt this job if you do not have the right tools, as you will be removing the airbag from the steering wheel, which is a serious safety device that should not be handled carelessly.
Necessary materials
- Set of socket wrenches and ratchet with extension
- flashlight
- Flat blade screwdriver
- Philips screwdriver
- Cruise control switch replacement
- Safety glasses
The steps required to replace the switch on both sides of the steering wheel are the same if you have a cruise control switch group located on the same side of the steering wheel; the only difference is that instead of deleting two separate radio buttons, you will only delete one. The connections and the steps to remove them are almost identical.
- Attention: As always, refer to your vehicle service manual for exact instructions.
Step 1: Disconnect the battery. Locate the vehicle's battery and disconnect the positive and negative battery cables before continuing.
Step 2 Remove the steering column bolt covers.. There are two plastic plugs on both sides of the steering wheel that must be removed before the steering column cover can be removed. Using a flathead screwdriver, carefully pry the two covers off the side of the steering column. There will be a small tab where you can insert a screwdriver blade to remove them.
Step 3: Remove the steering column mounting bolts.. Using a ratchet with a long extension and an 8mm socket, unscrew the two bolts inside the holes in the steering column. Remove the driver side bolt first, then replace the passenger side bolt. Place the bolts and steering wheel covers in a cup or bowl so they don't get lost.
Step 4: Remove the airbag center group.. Grab the airbag unit with both hands and carefully remove it from the center of the steering wheel. This cluster is attached to the electrical connector and the cluster, so be careful not to pull too hard.
Step 5: Disconnect the electrical connector from the airbag unit.. Remove the electrical connector attached to the airbag unit so that you have a free space to work. Carefully disconnect the electrical connector by pressing on the side clips or tabs and pulling on the hard plastic side areas (not the wires themselves). After the electrical connector has been removed, place the airbag unit in a safe location.
Step 6: Remove the cruise control switch.. The switches are connected to a bracket which is now accessible from either side after you have removed the airbag. Use a Philips screwdriver to remove the bolts that secure the cruise control switch to the bracket. Usually the top one has a ground wire attached under the bolt. Once the bolts have been removed, the cruise control switch is loose and you can remove it.
Step 7: Disconnect the cruise control harness..
Step 8: Repeat the above steps for the other cruise control side switch..
Step 9: Replace the old cruise control switch with a new one.. After removing both switches, reinstall the new switches by following the instructions in reverse order as outlined below. Reinstall the wire harness and reattach the switch to the bracket, making sure you reinstall the ground wire under the top bolt. Complete this process on both sides.
Step 10. Connect the wiring harness to the airbag module..
Step 11: Reconnect the airbag module.. Place the airbag group right in the same place it was originally inside the steering wheel. Be sure to align the holes through which the bolts will enter the side of the steering column.
Step 12: Replace Steering Column Bolts. As noted above, make sure the bolts are aligned and inserted inside the bracket that holds the airbag unit to the steering wheel.
Step 13: Replace the two plastic covers.
Step 14: Connect the battery cables.
Part 3 of 3: Test drive the car
Before you start testing your new cruise control switch, it's a good idea to make sure the main switch (on button) is working. To test this, simply start the engine and press the "on" button on the cruise control switch. If the cruise control light comes on in the dash or instrument cluster, the switch should be working properly.
The next step would be to complete a road test to really check if the repairs were done correctly. If you have problems with cruise control turning off after a certain period of time, you should test the vehicle for at least that same period of time. Here are some tips on how to take a test drive.
Step 1: Start the car. Let it warm up to operating temperature.
Step 2: Check the codes. Connect a diagnostic scanner and download any existing error codes or erase the codes that originally appeared.
Step 3: Get your car on the highway. Find a place where you can safely drive for at least 10-15 minutes with cruise control on.
Step 4: Set cruise control to 55 or 65 mph.. Press the off button and if the cruise control light on the dash turns off and the system turns off, the button is working properly.
Step 5: Reset your cruise control. Once it is set, press the boost button to see if the cruise control increases the vehicle's speed. If so, then the switch is OK.
Step 6: Check the coast button. While driving at speed and with very little traffic on the road, press the coast button and make sure the throttle is disengaged. If so, release the coast button and check that the cruise control returns to its settings.
Step 7: Reset cruise control again and drive 10-15 miles.. Make sure cruise control does not automatically turn off.
Replacing the cruise control switch is a fairly simple repair. However, if you have read this manual and are still not 100% sure about following it, please contact one of your local AvtoTachki ASE certified mechanics to replace the cruise control switch for you.