How to replace the starter relay
Content
- Part 1 of 4: Checking the Status of the Starter Relay
- Part 2 of 4: Testing the Battery and Starter Relay Circuit
- Part 3 of 4: Replacing the Starter Relay
- On the external starter relay:
- On the internal starter relay:
- On the external starter relay:
- On the internal starter relay:
- Part 4 of 4: Test driving a car
The starter relays are faulty if there is a problem starting the engine, the starter remains engaged after starting, or a clicking sound comes from the starter.
The starter relay, commonly known as the starter solenoid, is the part of the vehicle that switches a large electrical current to the starter in light of a small control current and which in turn drives the engine. Its power is indistinguishable from that of a transistor, except that it uses an electromagnetic solenoid instead of a semiconductor to reproduce the exchange. In many vehicles, the solenoid is additionally connected to the starter gear with the engine ring gear.
All starting relays are simple electromagnets, consisting of a coil and a spring-loaded iron armature. When current passes through the relay coil, the armature moves, increasing the current. When the current is turned off, the armature contracts.
In the starter relay, when the key is turned in the car's ignition, armature movement closes a pair of heavy contacts that serve as a bridge between the battery and the starter. In order for the starter relay to function properly, it must receive sufficient power from the battery. Undercharged batteries, corroded connections, and damaged battery cables can prevent the starter relay from getting enough power to work properly.
When this happens, a click is usually heard when the ignition key is turned. Because it contains moving parts, the starter relay itself can also fail over time. If this fails, the ignition makes no sound when the ignition key is turned.
There are two types of starter relays: internal starter relays and external starter relays. The internal starter relays are built into the starter. The relay is a switch mounted outside the starter housing in its own housing. In most cases when the starter fails, it is usually the starter relay that fails, not the armature or gear.
The external starter relays are separate from the starter. They are usually mounted above the fender or on the firewall of the car. This type of starter relay is powered directly from the battery and operates with the key from the start position. The external starter relay works in the same way as the internal starter relay; however, more resistance is applied to the circuits. There are wires from the external starter relay to the starter that can generate extra heat if the wire is the wrong size.
Also, external starter relays are usually easy to access so that someone can connect a fuse link to a stereo amplifier. This is usually fine; however, when the booster is active and the starter motor becomes active, the relay can generate too much heat, destroying the contact points internally and rendering the starter relay ineffective.
Symptoms of a bad starter relay include trouble starting the car, the starter stays on after the engine starts, and a clicking sound coming from the starter. Sometimes the starter relay remains energized, causing the starter gear to remain engaged with the engine ring gear even when the engine is spinning on its own. In addition, corroded contacts can provide high resistance to the relay, preventing a good relay connection.
Engine light codes related to the starter relay on computer controlled vehicles:
P0615, P0616
Part 1 of 4: Checking the Status of the Starter Relay
Necessary materials
- Baking soda
- water
Step 1: Attempt to start the engine. To do this, insert the key into the ignition switch and turn it to the start position.
There are 3 different sounds that can be transmitted when the starter relay fails: the starter relay clicks rather than the starter engages, the loud grinding of the starter gear remains engaged, and the sound of the engine starting slowly.
You may have heard one of the sounds when the starter relay failed. All three sounds can be heard when the starter relay has melted the contacts inside.
If the contacts are melted inside the starter relay, a click may be heard when trying to start the engine. When you try to start the engine again, the engine may crank slowly at startup. The melted contacts can keep the starter gear in contact with the ring gear after starting.
Step 2: Remove the fuse panel cover, if present.. Locate the starter relay circuit fuse and make sure it is in good condition.
If the fuse is blown, replace it, but do not attempt to start the vehicle without checking the start circuits.
Step 3: Look at the battery and check the terminals. A bad battery connection causes symptoms of a bad starter relay.
- Attention: If the battery posts are corroded, clean them before continuing with testing. You can use baking soda and water mixed to clean the battery of corrosion. Also, you will need to use a terminal brush to scrub off hard corrosion. If you do, wear protective goggles.
Step 4: Check terminals and cable connections to starter relay and starter housing ground.. A loose end of the terminal indicates an open connection within the starter relay.
Loose cables cause problems with the starting circuit and create a situation where starting is not possible.
Step 5: Check the jumper on the internal starter relay.. Make sure it doesn't burn out and make sure the small wire from the ignition switch isn't loose.
Part 2 of 4: Testing the Battery and Starter Relay Circuit
Necessary materials
- Battery load tester
- DVOM (digital volt/ohmmeter)
- Safety glasses
- Sun Vat-40 / Ferret-40 (Optional)
- Jumper starter
Step 1: Put on your goggles. Do not work on or near the battery without eye protection.
Step 2 Connect the Sun Vat-40 or Ferret-40 to the battery.. Turn the knob and charge the battery to 12.6 volts.
The battery must hold a charge above 9.6 volts.
Step 3: Re-test the battery with Sun Vat-40 or Ferret-40.. Turn the knob and charge the battery to 12.6 volts.
The battery must hold a charge above 9.6 volts.
If the battery voltage is below 12.45 volts before you load it, you need to charge the battery until it is fully charged. A full charge is 12.65 volts, and a 75 percent charge is 12.45 volts.
A warning: Do not test the battery for more than 10 seconds, otherwise the battery may fail or leak acid. Wait 30 seconds between tests to allow the battery to cool down.
AttentionA: If you don't have Sun Vat-40 or Ferret-40, you can use any battery load tester.
Step 4: Connect the inductive sensor. Connect an inductive pickup (amp wire) from a Sun Vat-40 or Ferret-40 to the starter relay cable.
This is the wire from the battery to the starter relay.
Step 5: Trying to start the car. With the Sun Vat-40 or Ferret-40 facing you, turn the key to the start position and try to start the vehicle.
Keep track of how much the voltage drops and how much the current increases. Write down the readings to compare them with the factory settings. You can use the starter jumper to bypass the ignition switch to make sure the ignition switch is in good condition.
- AttentionA: If you don't have a Sun Vat-40 or Ferret-40, you can use the DVOM, a digital volt/ohmmeter, with an inductive pickup (amp output) to check the current on the cable from the battery to the starter relay only. . You will not be able to check the voltage drop during this test with the DVOM.
Part 3 of 4: Replacing the Starter Relay
Necessary materials
- socket wrenches
- reptile
- Disposable toothbrush
- DVOM (digital volt/ohmmeter)
- Jack
- Jack stands
- Saving a nine-volt battery
- Ratchet with metric and standard sockets
- Safety glasses
- Safety rope
- Jumper starter
- Terminal cleaning brush
- Wheel chocks
Step 1: Park your vehicle on a level, firm surface.. Make sure the transmission is in park (for automatic transmission) or 1st gear (for manual transmission).
Step 2: Place wheel chocks around the tires left on the ground.. In this case, the wheel chocks wrap around the front wheels because the rear of the car will be raised.
Apply the parking brake to block the rear wheels.
Step 3: Install a nine volt battery in the cigarette lighter.. This keeps your computer up to date and your settings up to date in the car.
If you don't have a nine-volt battery, no big deal.
Step 4: Disconnect the battery. Open the car's hood if it's not already open to disconnect the battery.
Remove the ground cable from the negative battery terminal by turning off power to the power window switches.
Step 5: Raise the car. Jack up the vehicle at the indicated points until the wheels are completely off the ground.
Step 6: Install Jacks. The jack stands should be located under the jacking points.
Lower the car on the jacks. In most modern cars, the jack stand attachment points are on a weld right under the doors along the bottom of the car.
On the external starter relay:
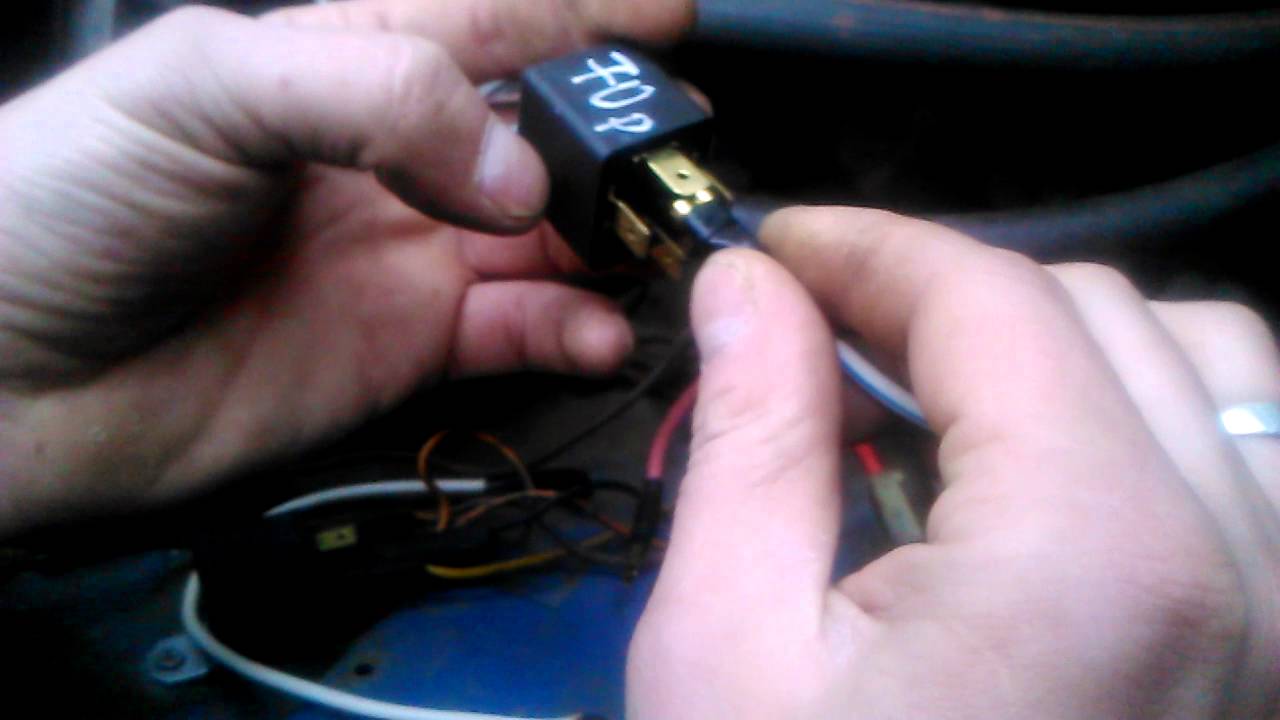
Step 7: Remove the mounting screw and cable from the relay to the starter.. Be sure to label the cable.
Step 8: Remove the mounting screw and cable from the relay to the battery.. Be sure to label the cable.
Step 9: Remove the mounting screw and wire from the relay to the ignition switch.. Don't forget to label the wire.
Step 10 Remove the mounting bolts that secure the relay to the fender or firewall.. Remove the relay from the bracket, if present.
On the internal starter relay:
Step 11: Grab the creeper and get under the car.. Find the starter for the engine.
Step 12: Disconnect the cable from the relay to the battery. Be sure to label the cable.
Step 13: Disconnect the cable from the starter housing to the cylinder block.. Be sure to label the cable.
- Attention: Don't go by color as most starter wires are black and can be the same length.
Step 14: Disconnect the small wire from the relay to the ignition switch.. Don't forget to label the wire.
Step 15: Remove the starter mounting bolts.. Some of the bolt heads are wrapped with safety wire.
You will need to cut the safety wire with side cutters before removing the bolts.
- Attention: When removing the starter, be prepared for the engine. Some starters can weigh up to 120 pounds depending on the type of vehicle you are working with.
Step 16: Remove the starter from the engine.. Take the starter and put it on the bench.
Step 17: Remove the mounting screws from the relay on the starter.. Drop the relay.
Check the condition of the contacts where the relay is connected. If the contacts are OK, you can clean them with a lint-free cloth. If the contacts are damaged, the starter assembly must be replaced.
On the external starter relay:
Step 18: Install the Relay in the Bracket. Install mounting bolts to secure relay to fender or firewall.
Step 19: Install the screw that secures the wire from the relay to the ignition switch..
Step 20: Install the cable and mounting screw from the relay to the battery..
Step 21: Install cable and mounting screw from relay to starter..
On the internal starter relay:
Step 22: Install the new relay to the starter housing.. Install the mounting screws and attach the new starter relay to the starter.
Step 23: Wipe off the starter and go under the car with it.. Install the starter on the cylinder block.
Step 24: Install the mounting bolt to secure the starter.. While holding the starter, install the mounting bolt with your other hand to secure the starter to the engine.
Once the mounting bolt is in, you can release the starter and it should stay in place.
Step 25: Install the remaining set of mounting bolts. Thus, the starter is fully attached to the cylinder block.
- Attention: If any gaskets fall out after removing the starter, put them back in. Don't leave them in place. Also, if you had to remove the safety wire from the bolt heads, be sure to install a new safety wire. Do not leave the safety wire as the starter bolts may loosen and fall out.
Step 26: Install cable from engine block to starter housing..
Step 27: Install the cable from the battery to the relay post..
Step 28: Install a small wire from the ignition switch to the relay..
Step 29 Reconnect the ground cable to the negative battery post.. Remove the nine volt fuse from the cigarette lighter.
Step 30: Tighten the battery clamp. Make sure the connection is good.
If you didn't have a nine-volt power saver, you'll have to reset all settings in your car, such as the radio, power seats, and power mirrors.
Step 31: Raise the car. Jack up the vehicle at the indicated points until the wheels are completely off the ground.
Step 32: Remove Jack Stands.
Step 33: Lower the car so that all four wheels are on the ground.. Pull out the jack and set it aside.
Step 34: Remove the wheel chocks.
Part 4 of 4: Test driving a car
Step 1: Insert the key into the ignition switch and turn it to the start position.. The engine should start normally.
Step 2: Drive the car around the block. During a test drive, be sure to check the gauges for battery or engine lights.
If the engine light comes on after replacing the starter relay, the starting system may need further diagnostics or there may be an electrical problem in the ignition switch circuit. If the problem persists, contact one of the certified AvtoTachki specialists for a replacement.